PinIt!

Showing posts with label Cream. Show all posts

Friday, February 3, 2017

Strawberry Swiss Cake Roll

Let me preface this post by saying I'm not really a fancy kinda girl. (And now I have "Fancy" by Reba going in my head!) I'm a hillbilly, and quite happy about it. Once in a while though, I have the desire to try something that's fairly fancy. 

I've never made any "roll" before. No pumpkin roll, etc. However, I got silicon mats recently (some just before Christmas, and more for Christmas) and I thought that would make it easier, so.... I jumped out of my box. 

And whoa, was it worth it. This swiss cake roll is heavenly. You can use any freeze-dried berries or fruit, so you can change the flavor as desired. (I found strawberries at Aldi's, so that's what I went with.) Personally, I think that it could use more strawberry flavor, but that's a preference thing. 

I do think the use of silicon mats made this process much easier than without. If you don't have any, sub parchment paper in the pan and a clean towel for after the cake is done. 

Comments are loved! What's your favorite "fancy" dessert?

Printable Recipe
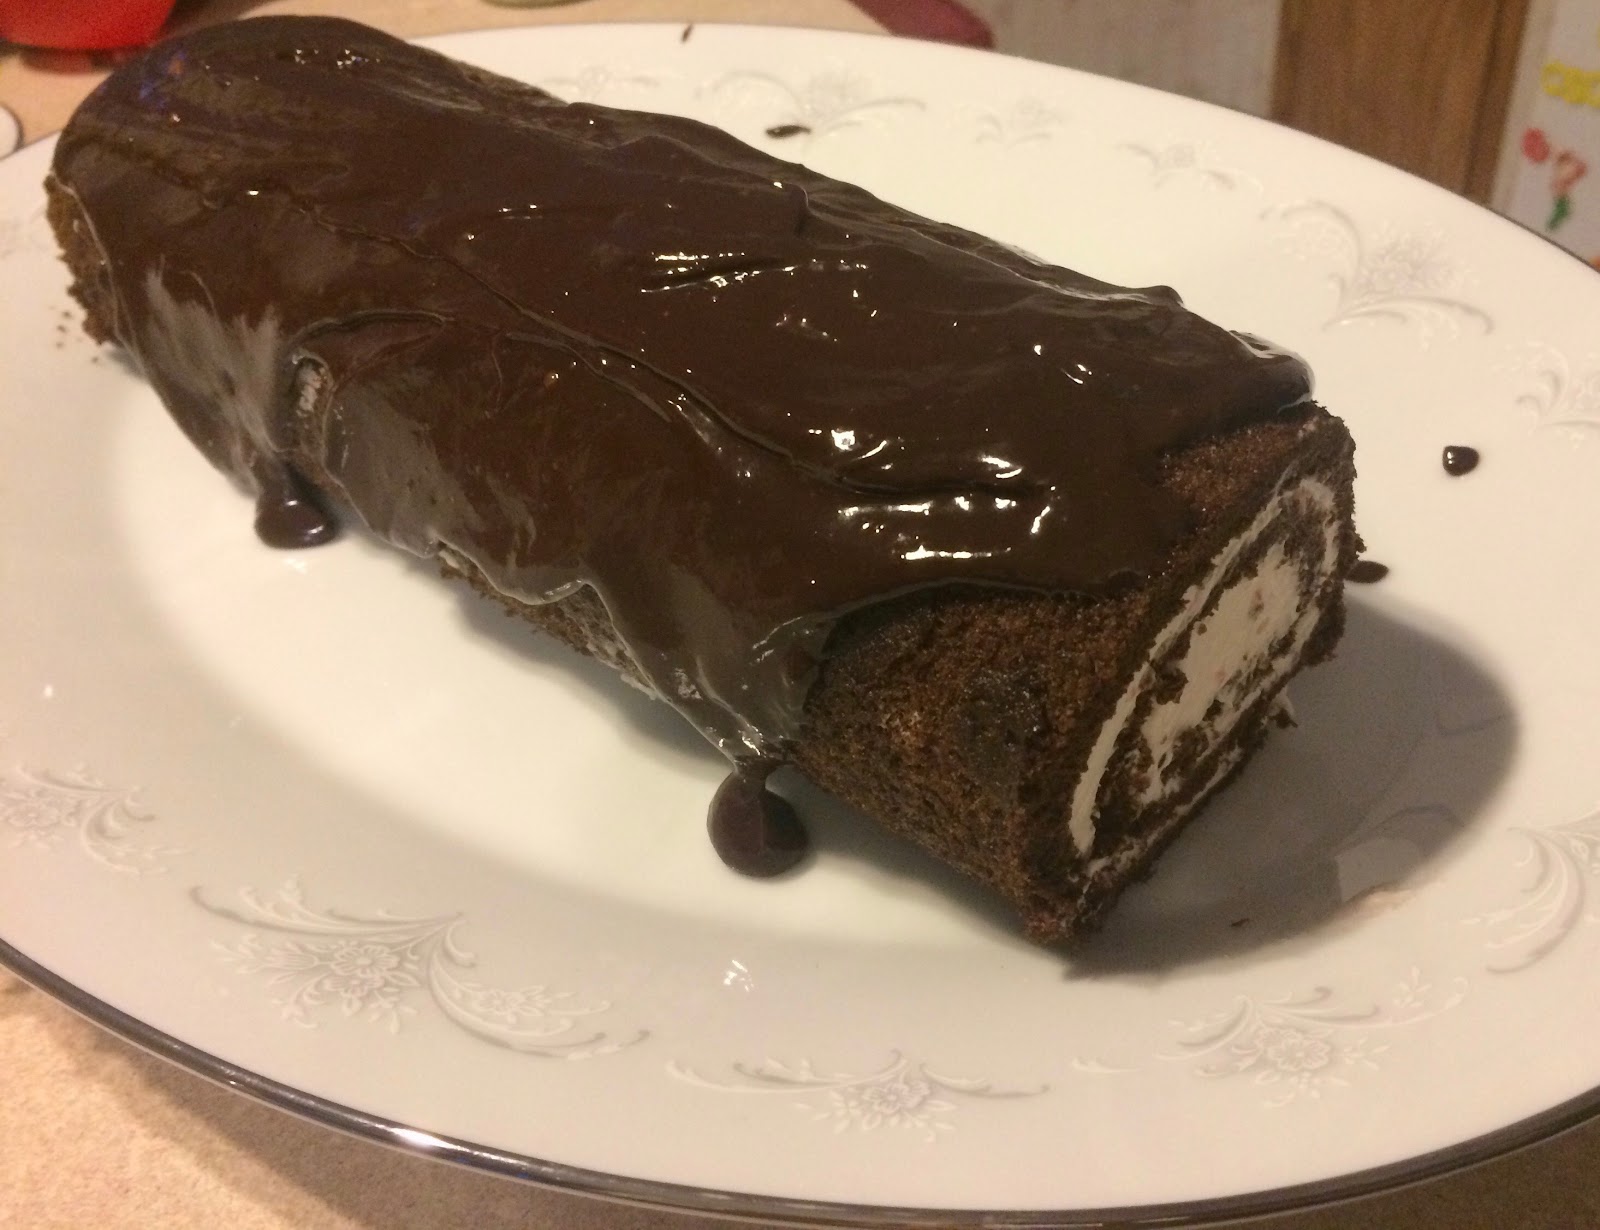
Strawberry Swiss Cake Roll


Ingredients
For the batter:
  • 4 eggs, separated
  • ½ cup + ⅓ cup sugar, divided
  • 1 teaspoon vanilla
  • ½ cup flour
  • ⅓ cup cocoa powder
  • ½ teaspoon baking powder
  • ¼ teaspoon baking soda
  • ⅛ teaspoon salt
  • ⅓ cup water
For the Filling:
  • ½ cup freeze dried strawberries, crushed finely
  • 8 ounces cream cheese, room temperature
  • ½ teaspoon vanilla
  • pinch of salt
  • 1 cup powdered sugar, divided
  • 1 cup heavy whipping cream
For the Ganache:
  • 3 ounces semi-sweet chocolate chips
  • 6 tablespoons heavy whipping cream
For the Topping, optional:
  • Redi-whip or cool whip
  • fresh strawberries, chopped

Directions
For the cake:
  1. Preheat oven to 350°. Line a 10”x15” jelly roll pan with a silicon baking mat and grease heavily.
  2. In a mixing bowl, beat egg whites until soft peaks form. Slowly add in ½ cup sugar and beat until stiff peaks. Beat for 3 minutes, then add remaining ⅓ cup sugar and vanilla. Beat for 2 more minutes.
  3. In a separate bowl, mix flour, cocoa powder, baking powder, baking soda, and salt together. Alternately add flour mix and the ⅓ cup water to a large bowl with the egg yolks. When thoroughly mixed, fold the batter into the egg whites a little at a time.
  4. Spread batter into the prepared pan and bake for 12-15 minutes until toothpick come back clean and cake springs back when lightly touched.
  5. Meanwhile, coat a silicone baking mat with powdered sugar.
  6. When the cake is done, immediately invert it onto the mat. Remove the first silicone mat, and then roll up the cake starting at the narrow end. Let it cool completely.
For the Filling:

  1. In a large mixing bowl using a whisk, beat heavy whipping cream and ¼ cup powdered sugar until stiff peaks form. Remove to a separate bowl.
  2. In a large mixing bowl, beat the cream cheese until smooth. Add in ¾ cup powdered sugar, strawberry powder, vanilla, and salt.
  3. Fold in whipped cream until combined.
  4. Carefully unroll the cake. Spread the filling evenly over the entire surface and then roll the cake back up.
  5. Place cake roll on a plate, cover with plastic wrap, and place in the fridge for at least 3 hours.
For the Ganache/Finishing:
  1. Heat the whipping cream in microwave for 45 seconds or until hot, then add the chocolate chips. Cover and let it sit for two minutes; stir until smooth. Let the ganache cool slightly before pouring and spreading over the cake.
  2. If desired, top with more redi-whip or cool whip and strawberries.
  3. Slice and serve. Store leftover cake in the fridge.

Yield/Time
12 servings
5 ½ hours (start to finish)
Nutrition Facts
324


Source (for original): Spend With Pennies

Wednesday, January 18, 2017

Crock Pot Zuppa Toscana Soup

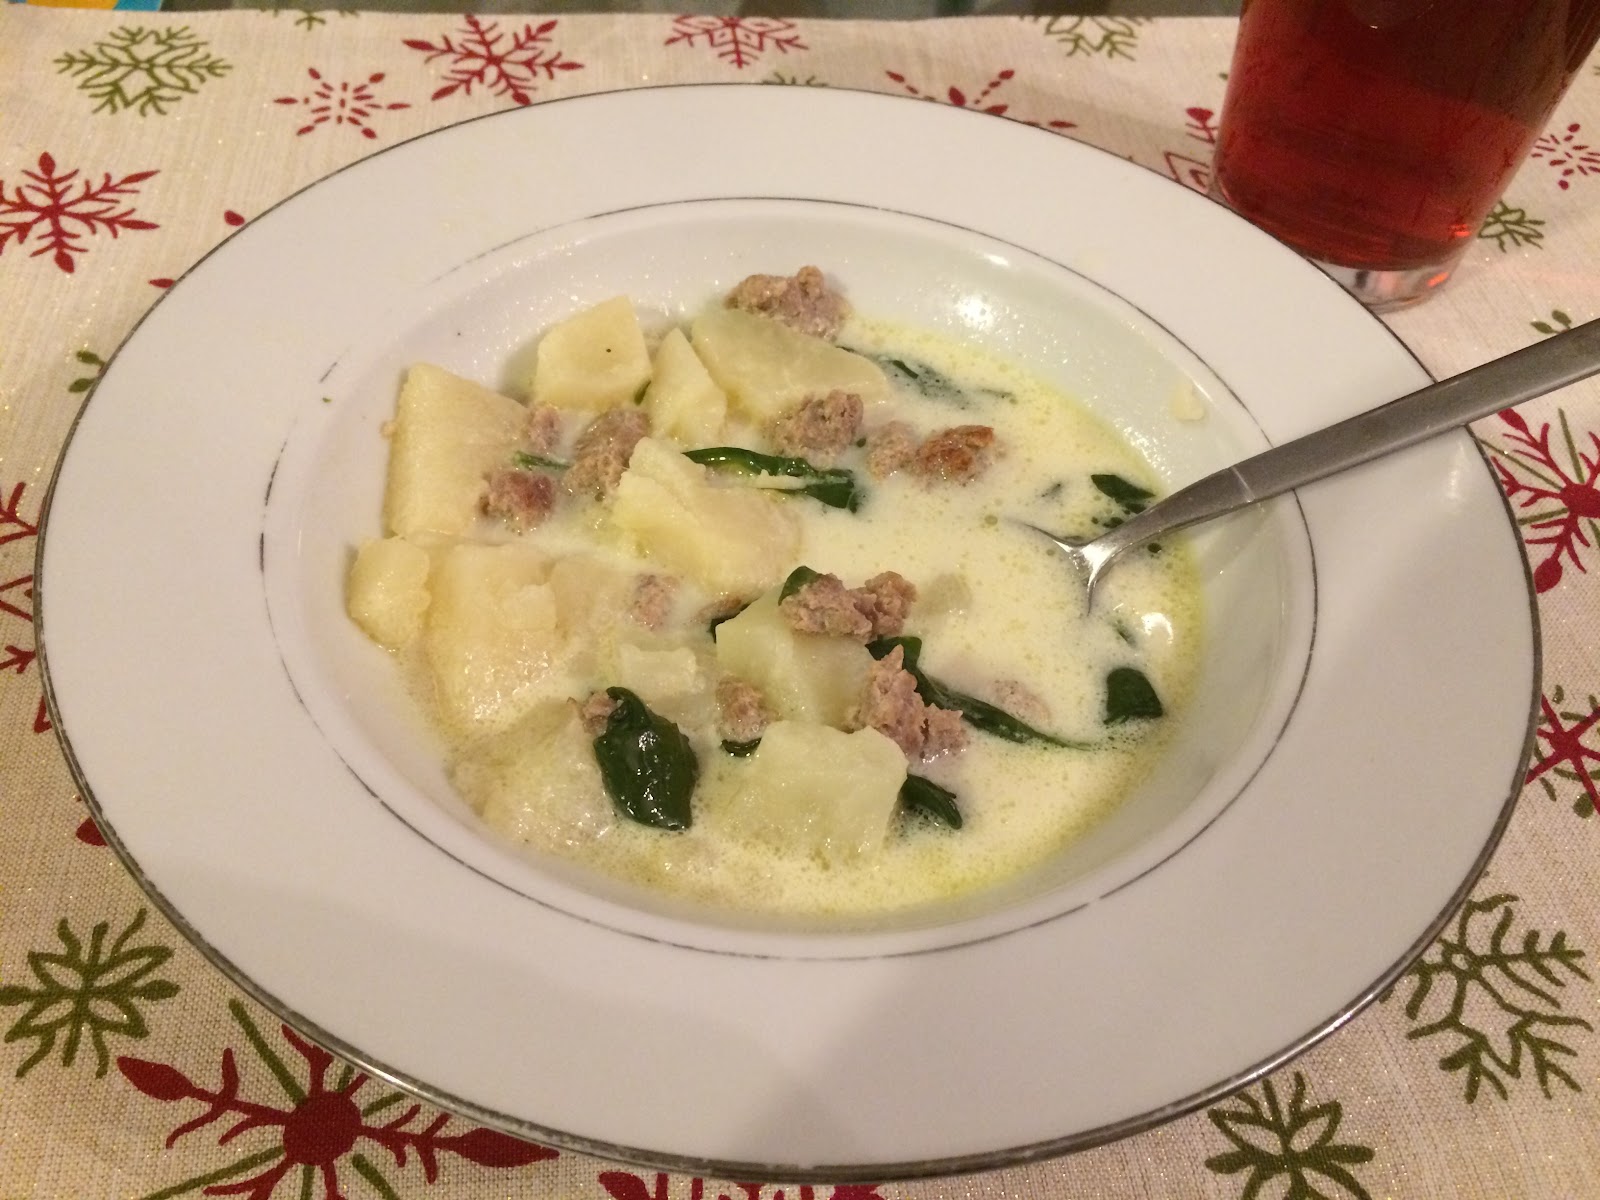
I am, truthfully, not a big soup fan. I'll eat it, occasionally; but not a fan. For some reason, this one got my attention, so I thought it was worth a shot.

It is, most definitely, worth making! Nate was at work when I made it, so he hasn't had it yet, but it was a huge hit with the boys and I! I was lazy/in a hurry when I was putting it together, so I did not dice the potatoes very fine, but I just mashed them a bit in my bowl. The boys didn't seem to have a preference--they were eating the pieces until they saw me mashing it with my spoon, then they mashed theirs too. ;) I would recommend cutting the pieces smaller, but it did work this way if you don't have much time to prep.

Adrian absolutely loved it, and Gabriel announced that the spinach was the best part ever. ;) (We may not be perfect parents, but so far we are at least raising them to be less fussy than their mama was/is!!)

One tip/suggestion/comment-- this does not need to be a crock pot recipe! Next time, I am just going to try stove top, and see how that works! I would recommend simmering all ingredients but the spinach & whipping cream for maybe 20-30 minutes, then adding them for another 15-20. However, since I haven't done that yet, you should definitely watch your times!

Remember, comments are loved! What's your go-to soup recipe?

Crock Pot Zuppa Toscana Soup


Ingredients
  • 1 pound ground sausage
  • ½ tablespoon Garlic Garlic, or 1 clove fresh, diced
  • ½ tablespoon Onion Onion, or 1/2 small onion, diced
  • 4 potatoes, diced
  • Dash salt
  • Dash pepper
  • 4 cup chicken broth
  • 2 cups spinach/kale (Original called for kale, but I usually have spinach on hand)
  • ¾ cup heavy whipping cream
  • Parmesan

Directions
  1. In a large skillet over medium-high heat, brown the sausage. (If using fresh onion/garlic, add here and saute for a few additional minutes.)  Drain grease from skillet.
  2. In a large crockpot, place sausage, Garlic Garlic, Onion Onion, potatoes, salt, pepper, and chicken broth. Add additional water to cover potatoes as needed. 
  3. Gently stir, then cook on low for 5-6 hours or high for 2-4 hours. 
  4. Add spinach/kale and whipping cream, stir, then continue to cook for 30 minutes.
  5. Serve hot, with parmesan. 

Yield/Time
8 servings
3-7 hours
Nutrition Facts *I calculate nutrition facts for reference only, this is not done scientifically

278/serving

Source (for original): Homemade Hooplah


Tastefully Simple info: If you are interested in making a purchase, you can purchase through my page, or just search and select "Serena Lee" as your consultant. Obviously, if you are not local and already have a consultant.... purchase through them online, or contact them! Shop local, as always! Disclaimer: I am paid a small amount with each purchase, based on sales, made through myself as a consultant. You are helping to support my baking addiction, thank you! ;)

Monday, January 9, 2017

Smothered Chicken Queso Casserole

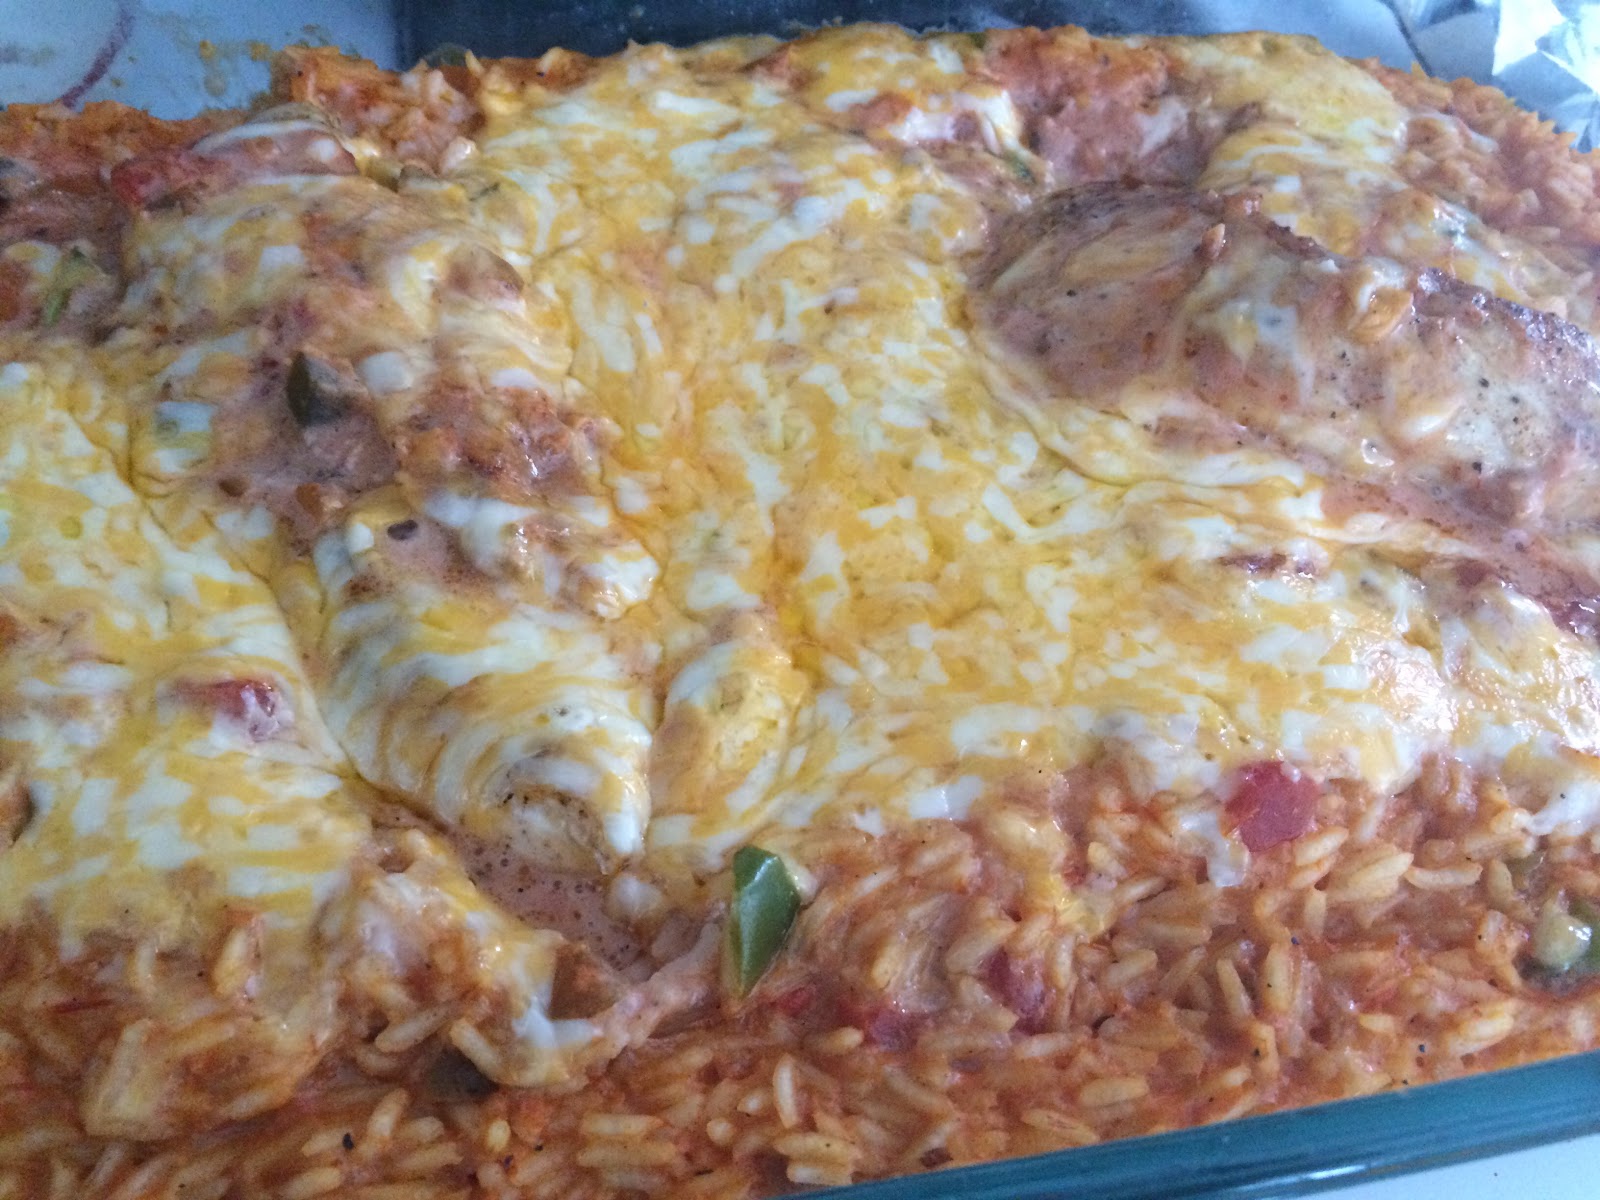
I'm always looking for something different to make for my boys. We have a lot of recipes that are similar, and I tend to be afraid to jump out of my box (very far, at least) for dinner. However, this combines things that Nate & the boys all like-- chicken, taco seasoning, salsa, rice... Salsa in a main dish, however, is why this is out of my box. I am not a big salsa fan, but the boys loved this!

(However, this does make a lot-- too much for my boys, they tired of it quickly. I will definitely only make a 1/2 batch next time!)

The picture is questionable, but it is much tastier than it looks! I'm just not much of a photographer. ;)

Remember, comments are loved! What's your favorite out-of-the-box dish?

Smothered Chicken Queso Casserole


Ingredients

  • 1 tablespoon oil 
  • 1-2 large boneless skinless chicken breasts, cut in half lengthwise 
  • 1 tablespoon taco seasoning, divided
  • 15 ounces salsa 
  • ½ cup heavy whipping cream
  • ¼ cup milk
  • 1 medium red/orange/green bell pepper, seeded, chopped 
  • 2 ½ cups cooked white rice
  • 1 cup shredded Mexican cheese blend 
  • Chopped tomatoes and chopped fresh cilantro, if desired
Directions

  1. Preheat oven to 350°. Spray 13”x9” baking dish with cooking spray.
  2. Heat oil over medium-high heat in a large skillet. Sprinkle ½ tablespoon taco seasoning over chicken, then cook for 6-8 minutes. Turn once, cooking til golden brown on both sides.
  3. In large bowl, stir together salsa, whipping cream, milk, and pepper. Reserve approximately ¾ cup of the sauce mixture; set aside. Stir rice into remaining sauce mixture.
  4. Place rice mixture in casserole; top with chicken. Top with reserved sauce mixture, then shredded cheese. 
  5. Cover with foil and bake 20 minutes; uncover and bake 10 to 15 minutes longer or until sauce bubbles and juice of chicken is clear when cut.
  6. Cool for 10 minutes, then garnish as desired.
Yield/Time
6 servings
1 hour
Nutrition Facts *I calculate nutrition facts for reference only, this is not done scientifically
323-371, depending on amount of chicken


Source (for original): Betty Crocker

Monday, September 19, 2016

Oreo Cream Pie-- Celebrating 30 years on this earth!

Friday I celebrated my 30th birthday! Following tradition, I decided what I wanted for my 'cake' and made it myself. ;)

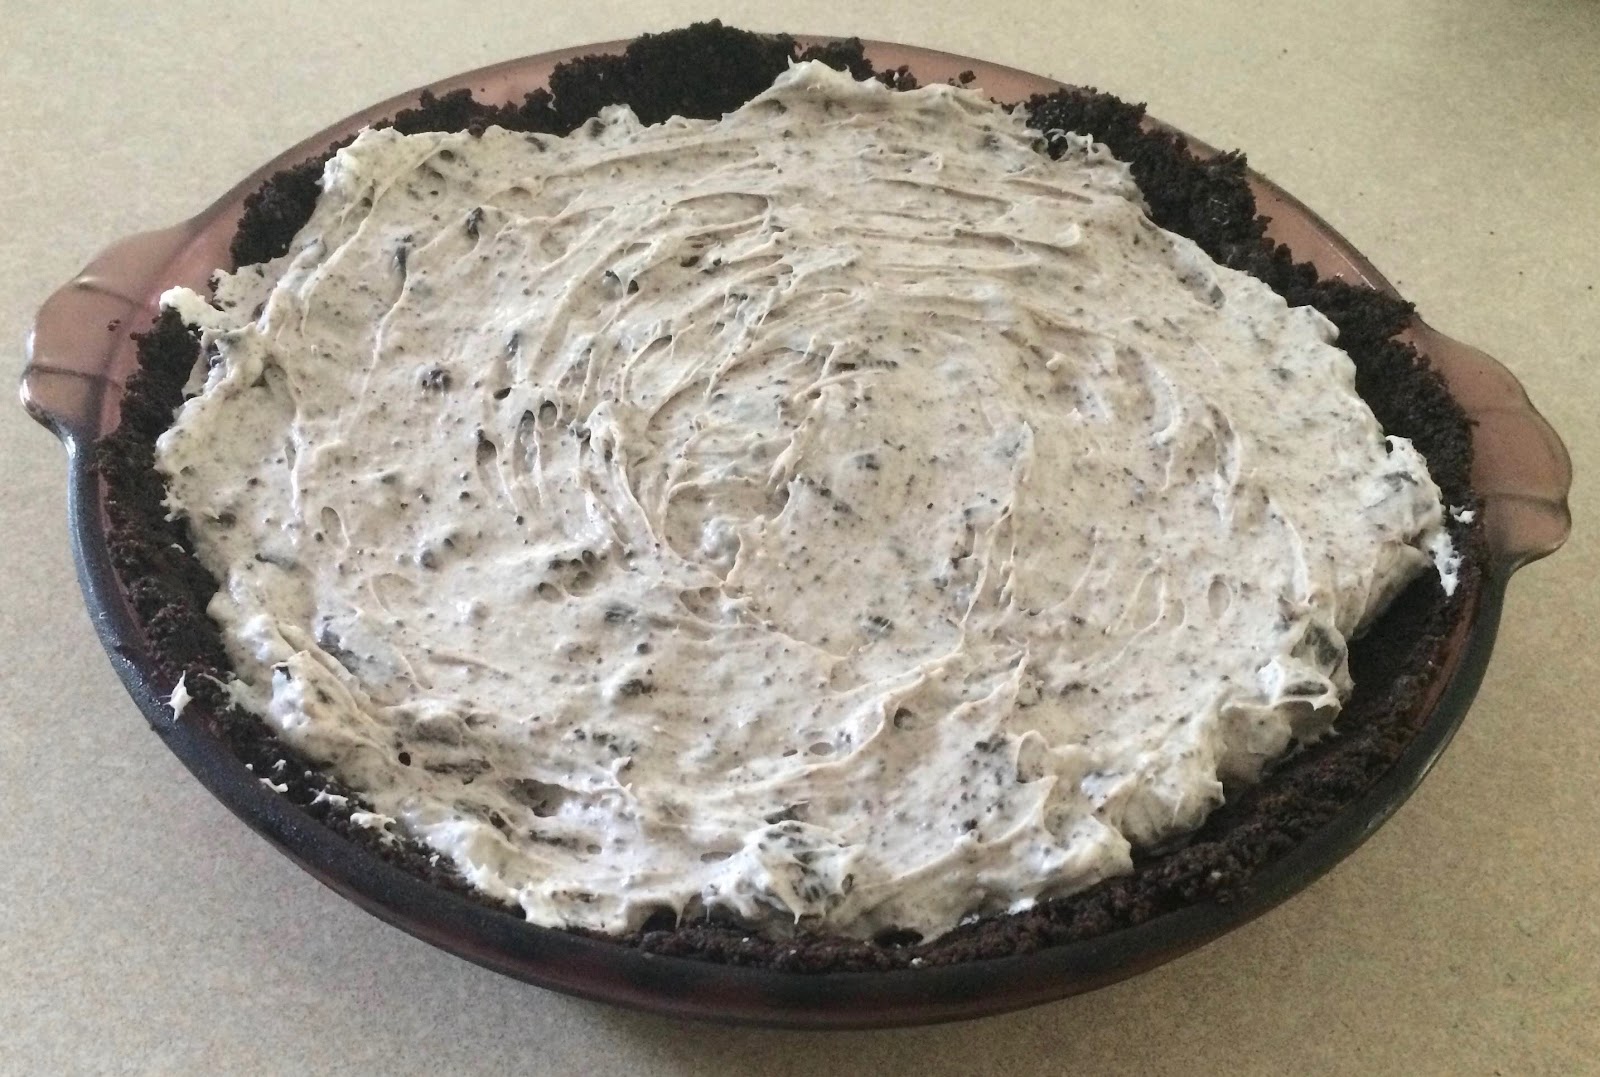
And I must say, I outdid myself this year. In the past, when I was too intimidated to make it for myself, I bought a frozen Cookies & Creme Pie. Silly me. Homemade is always better, and this was no exception. (Well, except for the calories. For heaven's sake, don't look at the nutritional facts. I honestly thought about skipping that, but some people want to know... Just make it for your birthday, calories don't count on your birthday. Right? At least if you don't do the math until after you've eaten it...)

This is one of the best desserts I've ever made. And, modestly aside, that's saying something. You guys know me and my desserts. This is perfectly rich, a small slice is just enough, it has just enough sweet, and the perfect amount of Oreo in each bite.

Now, there are two separate recipes here--the pie crust, and the pie. I've included 3 printables--the crust, the pie, and both.

(I did not take a picture of the crust before I filled it, sorry!)
Oreo Pie Crust

Ingredients
  • 24 Oreos, crushed
  • ¼ cup melted butter

Directions
  1. Lightly grease a 9” pie pan; set aside.
  2. Combine Oreo crumbs and butter in a medium bowl, mix well. Press mixture evenly in pan; covering the bottom and up the sides. (Careful to spread it evenly!)
  3. Freeze for one hour before filling.

Yield/Time
1 pie crust, 6-8 servings
15 minutes + freezing
Nutrition Facts *I calculate nutrition facts for reference only, this is not done scientifically
1680 total
280 (6 slices), 210 (8 slices)

Source (for original): Chef In Training


Oreo Cream Pie

Ingredients
  • 1 cup whipping cream
  • 8 ounces cream cheese, softened
  • ¾ cup sugar
  • 26 Oreos, crushed
  • 1 prepared 9-inch Oreo Crust

Directions
  1. In a mixing bowl using the whisk attachment, beat the whipping cream until stiff peaks form. (Approximately 1 to 2 minutes,)
  2. In a separate bowl, beat cream cheese and sugar until well blended. Fold in whipping cream until smooth. Add Oreos; stir until well combined.
  3. Carefully spread into pie crust.
  4. Refrigerate for 1 hour, then enjoy!

Yield/Time
6-8 servings
15 minutes + cooling
Nutrition Facts *I calculate nutrition facts for reference only, this is not done scientifically
853 (6 slices), 640 (8 slices)

Source (for original): Chef in Training

Remember, comments are loved! What's your favorite food to celebrate your birthday with?

Monday, August 29, 2016

Cinnamon Rolls & Icing

Now, I know we've had lots of conversations about homemade vs. storebought items. (Well, they've been mainly one-sided, but that's OK.) Homemade cinnamon rolls are another one of those things that are about 1000x better when homemade. I've been known to buy my share of canned cinnamon rolls, but they seriously cannot compare to homemade. 

And I know, I know--who has the time to make cinnamon rolls from scratch, every time they want cinnamon rolls? Not this mama. That's what's great about these-- make 1 batch, eat a pan, and have 2 more in the freezer for another day. (Or give them away, that works too.) 
Note: you can freeze the rolls at any point. Unrisen in the pan: cover tightly with plastic wrap & aluminum foil. Remove them, allow them to thaw and rise, and continue the baking and icing process. Baked but unfrosted: thaw, warm for a few minutes in the oven, and ice while warm.

Don't be deterred by the number of steps! These do take some time to make, but I promise you--they are worth it! You'll know it when you bite into the cinnamon, creamy-covered goodness. 

Speaking of creamy-covered goodness... Originally, I made this with a heavy cream based icing. (And that's the only one I've ever remembered to take a picture with.) Not really my thing, to be honest. I get rave reviews when I share it, but Nate and I both prefer cream cheese bases for an icing like this. Not just the consistency; you can make either to whatever consistency you prefer. The cream cheese taste really hits the spot with cinnamon rolls. However, I wanted to include both--take your pick, or use whatever icing recipe you prefer! 

Printable Recipe (all)

Printable Recipe (cinnamon rolls)
Cinnamon Rolls
Ingredients
  • 1 1/3 cups Milk
  • 1/3 cup Vegetable Oil
  • 1/3 cup Sugar
  • 1 1/2 teaspoons Active Dry Yeast
  • 3 cups All-purpose Flour, separated
  • 1/3 heaping teaspoon Baking Powder
  • 1/3 teaspoon Baking Soda
  • 1/3 heaping tablespoon Salt
  • 8 - 10 2/3 tablespoons Melted Butter
  • 2/3 cup cinnamon/sugar mix
  • Desired icing recipe

Directions
  1. Heat the milk, oil, and sugar in a saucepan over medium heat to just below a boil. Set aside and cool to warm. Sprinkle the yeast on top and let it sit on the milk for 1 minute.
  2. Add 2 2/3 cups flour. Stir until combined, then cover and set in a warm place for 1 hour. In the meantime, coat 3 cake pans (disposable or regular) with cooking spray.
  3. Remove the cover and add the baking powder, soda, salt, and remaining flour. Stir thoroughly to combine. (At this stage, may refrigerate for up to 3 days, punching down the dough if it rises to the top of the bowl.)
  4. On a floured surface, roll the dough into a large rectangle, about 30”x10”. The dough should be thin.
  5. To make the filling, pour melted butter over the surface of the dough, then spread evenly. Generously sprinkle cinnamon/sugar mix over the butter.
  6. Roll the rectangle tightly. Work slowly, being careful to keep the roll tight. (The filling will ooze.) Pinch the seam together and flip the roll so that the seam is face down.
  7. Slip a cutting board underneath the roll and cut into 1/2” slices. Place the sliced rolls in the pans, being careful not to overcrowd. (Each pan will hold 7-9; 3rd pan is for end pieces.)
  8. Cover all the pans and let rise for at least 20 minutes before baking.
  9. Preheat the oven to 375°F.
  10. Remove the cover and bake for 15 to 18 minutes, until golden brown.
  11. While the rolls are baking, prepare desired recipe for icing.
  12. Remove pans from the oven. Immediately drizzle icing over the top.

Yield/Time
Servings: 11 (2 rolls each)
Prep Time: 2 Hours Cook Time: 30 Minutes
Nutrition Facts *I calculate nutrition facts for reference only, this is not done scientifically
173/roll without icing
213/roll with heavy cream icing
241/roll with cream cheese icing

Cream Cheese Icing for Cinnamon Rolls
Note: this makes icing for just over 1 pan! Multiply by 2 if doing all pans at once.

Ingredients (per pan of rolls)
  • 4 ounces cream cheese, softened
  • 3/4 cup powdered sugar
  • 2-3 tablespoons milk

Directions
  1. In a large mixing bowl, mix together the cream cheese, powdered sugar, and milk to desired consistency.
  2. Drizzle over prepared cinnamon rolls.
Yield/Time
5 minutes

Nutrition Facts *I calculate nutrition facts for reference only, this is not done scientifically
68 per roll

Vanilla Cream Glaze for Cinnamon Rolls
Note: this makes icing for just over 1 pan! Multiply by 2 if doing all pans at once.

Ingredients (per pan of rolls)
  • 1/2 heaping cup of powdered sugar
  • 1/4 teaspoons vanilla extract
  • 1/4 cup heavy cream
  • milk

Directions

  1. In a large mixing bowl, combine sugar, heavy cream, and vanilla until mixture resembles a thick batter.
  2. If needed, add milk one tablespoon at a time, stirring until smooth – about 3-5 minutes.
Yield/Time
5 minutes
Nutrition Facts *I calculate nutrition facts for reference only, this is not done scientifically
40 per roll

Source (for original): Cinnamon Rolls: The Pioneer Woman; Heavy cream frosting: How Sweet It Is; Cream Cheese Icing: Love Grows Wild

Remember, comments are loved!
What is your favorite way to have cinnamon rolls?

Wednesday, April 30, 2014

Reese's Peanut Butter Cup Cheesecake

With my family, it's kinda assumed that I will be bringing dessert to the family gatherings. So, when we had Easter at Mama's house (with my brother & grandparents too), it was time again for me to find something yummy to make!

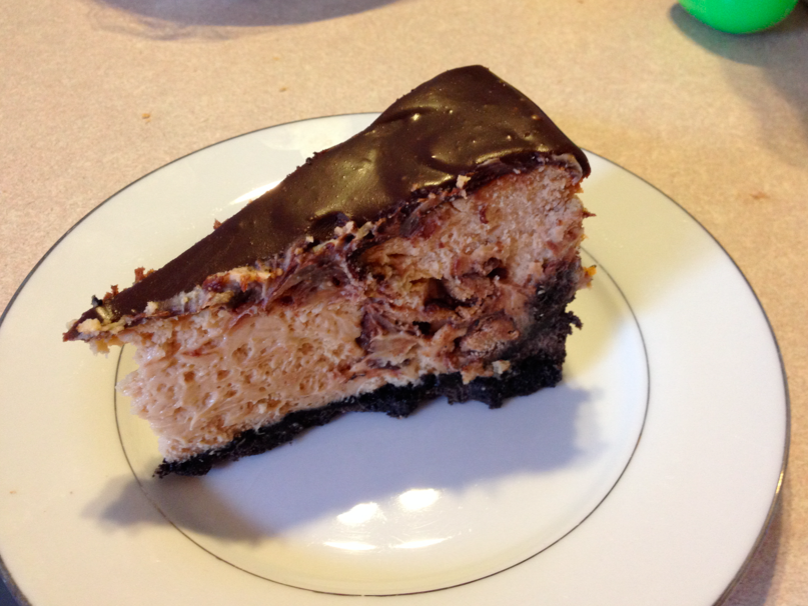
This recipe is one I found on Pinterest ages ago (really, Pinterest is quite addicting.... there are sooo many recipes to try on there!). It's definitely something to make when you are feeding multiple people.... this is RICH! Even I couldn't finish a small slice. (And I have quite the sweet tooth, clearly.) We had 6 adults and Gabriel there, and I don't think we even had 1/2 the cheesecake that day. 

It was definitely a hit, though! Everyone loved it, even if you can't eat much! I will most certainly make this again, for another gathering some time! (Next time, I might even leave out the Reese's, though. I don't really think they added much.) 

Gabriel had fun helping me make this! I think his favorite part about helping Mama in the kitchen is licking the beaters when we are done with the mixer, but he is getting to be a pretty good helper! (We are working on stirring things without spilling them out of the bowl, but that's ok. He just turned 2; we have plenty of time to practice!) 

As always, comments are love! 


Reese’s Peanut Butter Cup Cheesecake


Ingredients
  • 15.35 ounce package Oreo cookies
  • 6 tablespoons butter, melted
  • 32 ounces cream cheese, at room temperature
  • 5 large eggs
  • 1 1/2 cups lightly packed light brown sugar
  • 1 cup creamy peanut butter
  • 1 cup heavy cream, divided
  • 1 teaspoon vanilla
  • 8 ounces Reese’s minis (Original called for 16 ounces: 8 to go in, and 8 to go on top after the topping. That seemed like way to much for me; I didn't add any on top.)
  • 1 cup semisweet chocolate chips
Directions
  1. Preheat oven to 325°. In the bowl of a food processor, process the cookies until they are finely ground crumbs. Add the butter and pulse until moistened. (May have to do in 2 batches.) Press into the bottom and halfway up the sides of a 9” springform pan. Bake for 10 minutes. Place on a wire rack to cool.
  2. In the bowl of an electric mixer, beat the cream cheese until smooth. Add the eggs, one at a time; beating until smooth. Add in the sugar, peanut butter, 1/2 cup cream, and vanilla; beat until combined. Be careful not to overbeat. Stir in the Reese’s.
  3. Pour the batter into the cooled crust. Bake for about 1 hour, or until set and the top looks slightly dry. Cool the cheesecake completely on a wire rack. Refrigerate until completely chilled, at least 4 hours. Release the cheesecake from the pan onto a cake stand or serving plate.
  4. Place the chocolate chips in a medium heatproof bowl. In a small saucepan, heat 1/2 cup cream just until simmering. Pour over the chocolate chips. Let sit for 3 minutes, then stir until the mixture is melted and smooth. Pour over the cheesecake, allowing to drip down the sides. Serve or cover and store in the fridge for up to 2 days.
Yield/Time
16 to 20 servings
Prep Time: 25 minutes Cook Time: 1 hour 10 minutes
Total Time: 5 hours 35 minutes

Nutrition Facts
Very, very bad for you.