PinIt!

Showing posts with label Cheese. Show all posts

Friday, March 17, 2017

Sausage Wontons

This recipe is amazing! It's great as a party appetizer, or to make a small batch as a snack/addition to dinner. Nate & I love these! While pregnant, I could probably eat the whole plate... ;) 

These are definitely a only-once-in-awhile thing, though... the calories may not be that high, but between the cheese, sausage, and ranch: these little wontons are NOT good for you! Delicious, but a little less than healthy!

Also, note: they do not reheat well, so try not to make more than you think you'll need! This recipe is easy to cut in half or quarters. 

Remember, comments are loved! What's your favorite appetizer recipe?

Printable Recipe
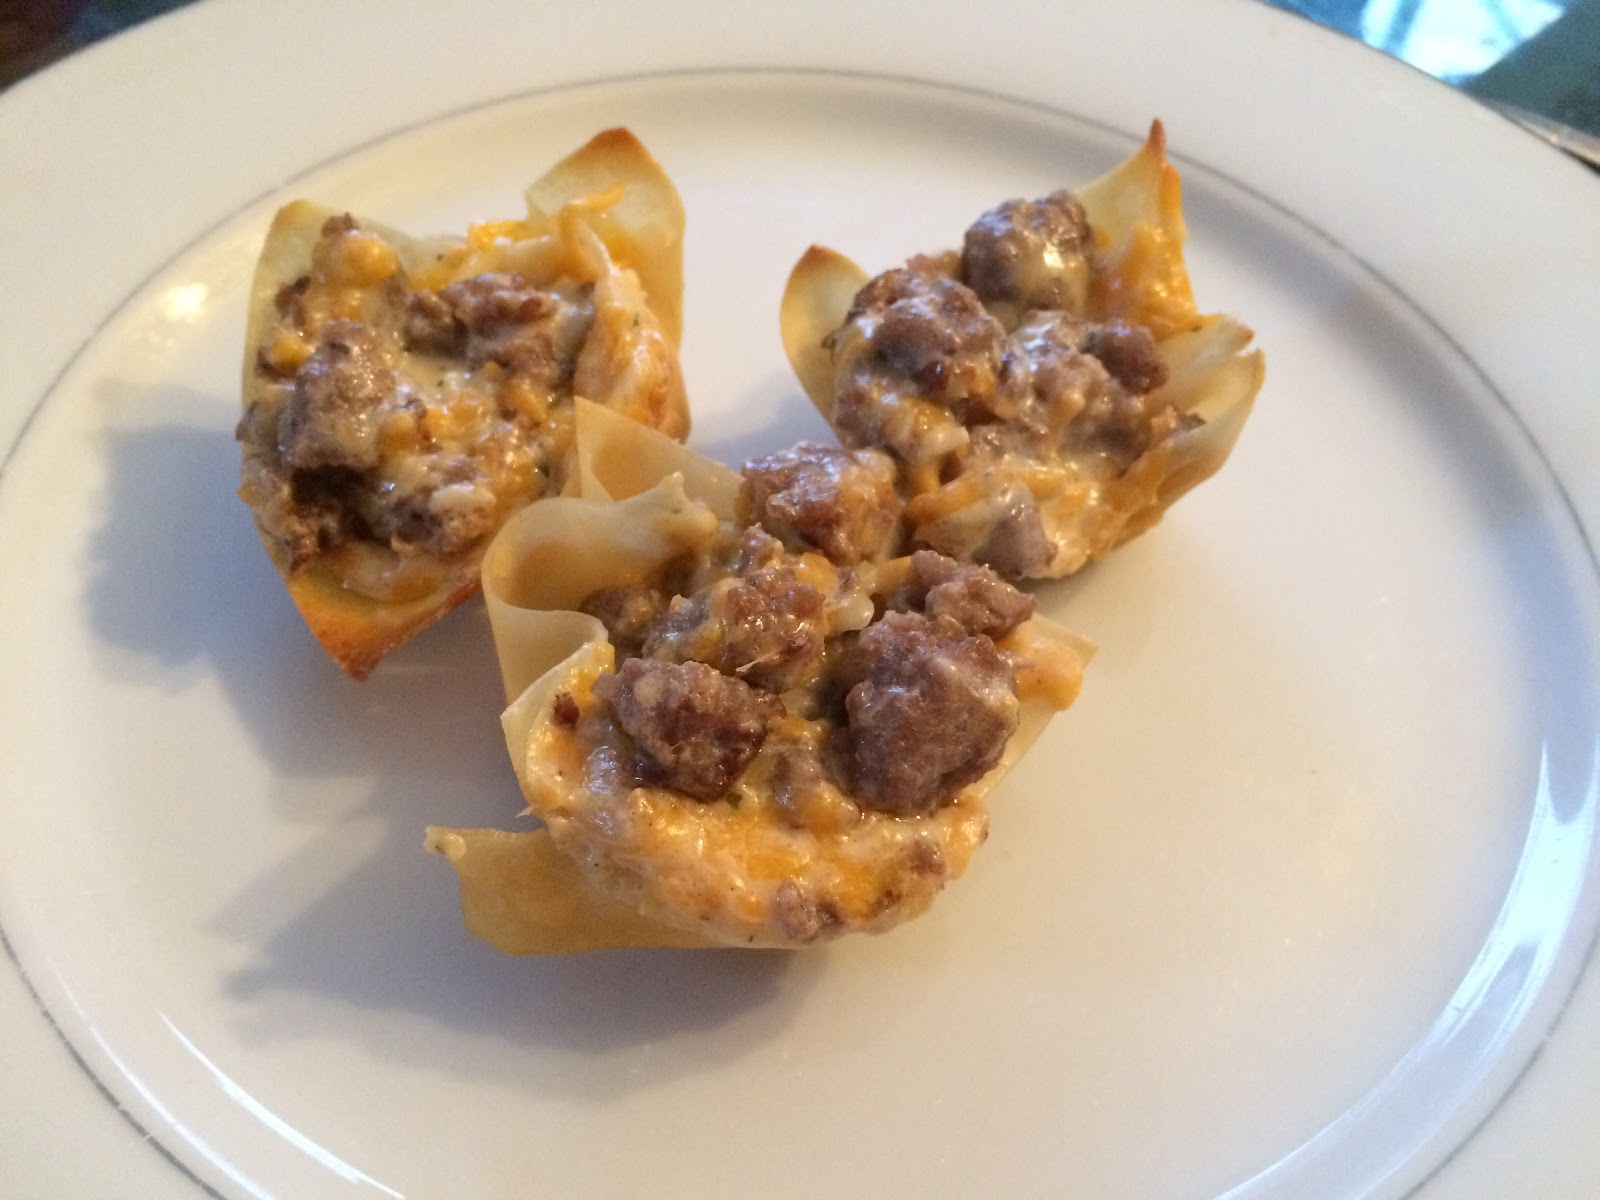
Sausage Wontons


Ingredients
  • 16 ounces wonton wrappers
  • 1 pound sausage
  • 1 cup shredded Monterey Jack cheese
  • 1 cup shredded Cheddar cheese
  • 1 cup Ranch dressing

Directions
  1. Preheat oven to 350°. 
  2. Spray a miniature muffin pan with cooking spray. Insert wonton wrappers into the muffin pan so as to form small cups. Bake 5 minutes in the preheated oven. Allow the baked wrappers to cool. Remove from the pan.
  3. In a medium bowl, mix the sausage, Monterey Jack, Cheddar, and Ranch dressing. Fill the baked wonton wrapper cups with the mixture. 
  4. Bake the filled wonton wrappers 7 to 12 minutes, until the sausage mixture is bubbly and slightly brown. Watch closely so the wonton wrappers do not burn.

Yield/Time
Servings: 48
Prep Time: 15 Minutes Cook Time: 20 Minutes
Nutrition Facts *I calculate nutrition facts for reference only, this is not done scientifically

73/wrap


Source (for original): All Recipes

Monday, January 9, 2017

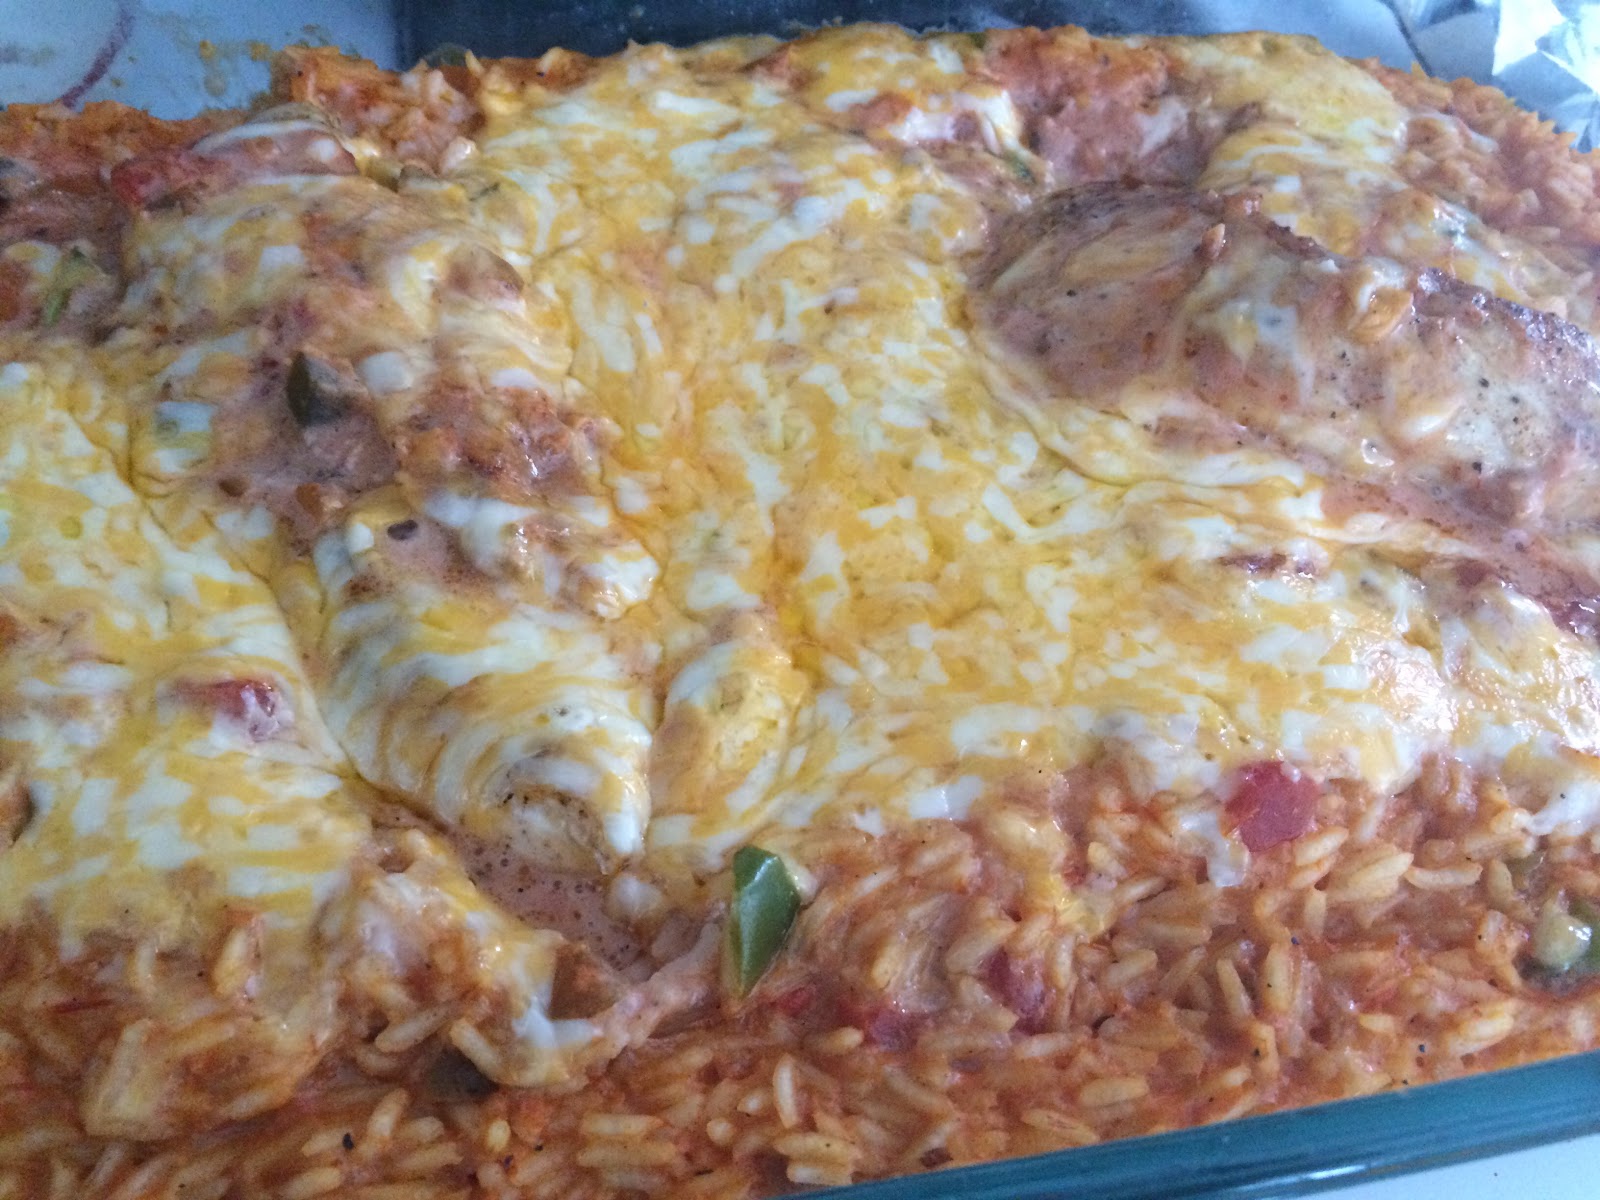
Smothered Chicken Queso Casserole

I'm always looking for something different to make for my boys. We have a lot of recipes that are similar, and I tend to be afraid to jump out of my box (very far, at least) for dinner. However, this combines things that Nate & the boys all like-- chicken, taco seasoning, salsa, rice... Salsa in a main dish, however, is why this is out of my box. I am not a big salsa fan, but the boys loved this!

(However, this does make a lot-- too much for my boys, they tired of it quickly. I will definitely only make a 1/2 batch next time!)

The picture is questionable, but it is much tastier than it looks! I'm just not much of a photographer. ;)

Remember, comments are loved! What's your favorite out-of-the-box dish?

Smothered Chicken Queso Casserole


Ingredients

  • 1 tablespoon oil 
  • 1-2 large boneless skinless chicken breasts, cut in half lengthwise 
  • 1 tablespoon taco seasoning, divided
  • 15 ounces salsa 
  • ½ cup heavy whipping cream
  • ¼ cup milk
  • 1 medium red/orange/green bell pepper, seeded, chopped 
  • 2 ½ cups cooked white rice
  • 1 cup shredded Mexican cheese blend 
  • Chopped tomatoes and chopped fresh cilantro, if desired
Directions

  1. Preheat oven to 350°. Spray 13”x9” baking dish with cooking spray.
  2. Heat oil over medium-high heat in a large skillet. Sprinkle ½ tablespoon taco seasoning over chicken, then cook for 6-8 minutes. Turn once, cooking til golden brown on both sides.
  3. In large bowl, stir together salsa, whipping cream, milk, and pepper. Reserve approximately ¾ cup of the sauce mixture; set aside. Stir rice into remaining sauce mixture.
  4. Place rice mixture in casserole; top with chicken. Top with reserved sauce mixture, then shredded cheese. 
  5. Cover with foil and bake 20 minutes; uncover and bake 10 to 15 minutes longer or until sauce bubbles and juice of chicken is clear when cut.
  6. Cool for 10 minutes, then garnish as desired.
Yield/Time
6 servings
1 hour
Nutrition Facts *I calculate nutrition facts for reference only, this is not done scientifically
323-371, depending on amount of chicken


Source (for original): Betty Crocker

Wednesday, October 5, 2016

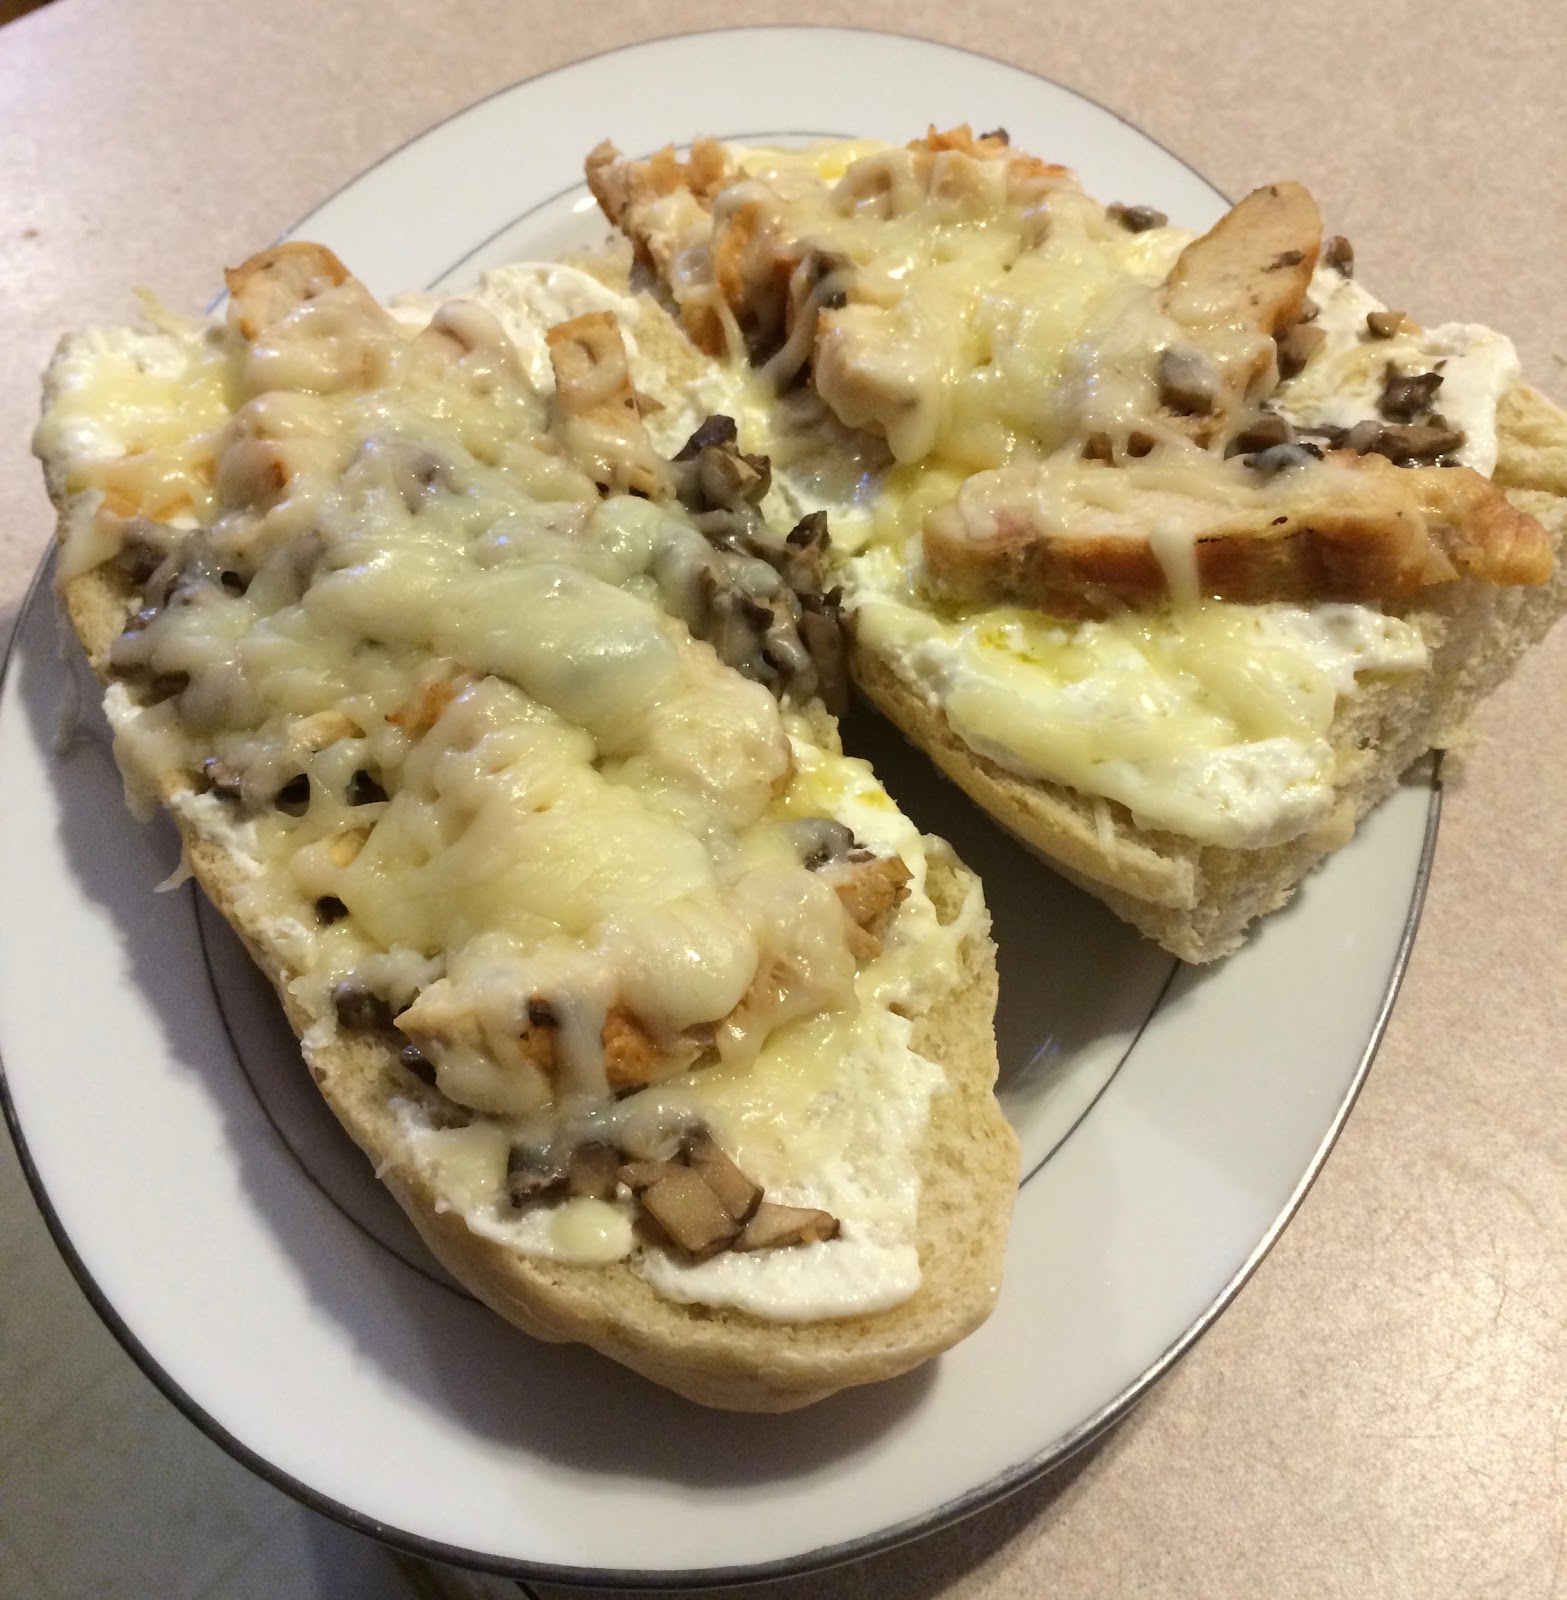
Chicken Alfredo Stromboli

I love pretty much anything to do with alfredo. It seems like half of the new entrees I want to try from Pinterest are variations of alfredo pasta! I already have recipes I love, so I try to not do it too often, but it's definitely one of my favorite meal ideas.

This is a recipe I found years ago, I think when Nate & I were first married. We both LOVE it, and it's always a hit with the boys too. It's pretty easy to do, especially if you use shortcuts. I almost always have shredded or grilled chicken in the freezer, so I use that instead of cooking the chicken as part of the recipe. You can use your own Italian/French bread, or you can pick some up in the deli section of your local grocery store. Whatever works for you!

Printable Recipe
Chicken Alfredo Stromboli

Ingredients
  • ½ loaf italian or french bread
  • 6 ounces boneless skinless chicken breasts, cubed
  • 1 teaspoon olive oil
  • ½ cups mushroom stems and pieces, chopped finely
  • 1 clove Garlic, minced (or one teaspoon Garlic Garlic)
  • dash Salt
  • ¼ teaspoon Pepper
  • ¼ cup sour cream
  • ¼ cup Parmesan
  • 3 teaspoons butter, softened
  • 1 cup shredded mozzarella cheese

Directions
  1. Preheat oven to 350°.
  2. Place bread, cut side up, on an ungreased baking sheet. Bake for 2-3 minutes or until lightly toasted; set aside.
  3. In a small skillet, saute chicken in oil until juices run clear; drain. Add the mushrooms, salt, garlic, and pepper; cook for 1-2 minutes or until heated through.
  4. In a small bowl, combine the sour cream, Parmesan, and butter; spread over bread halves. Top each with ½ of the of the chicken mixture. Sprinkle with mozzarella. 
  5. Broil for 1-2 minutes or bake for 10-15 minutes (or until cheese is melted).

Yield/Time
Serves: 4
Prep/Total time: 30 minutes
Nutrition Facts *I calculate nutrition facts for reference only, this is not done scientifically
381/serving (using homemade french bread)

Source (for original): Cooking for Two
Comments are loved! What's your favorite alfredo-style dish?

Tastefully Simple info: If you are interested in making a purchase, you can purchase through my page, or just search and select "Serena Lee" as your consultant. Obviously, if you are not local and already have a consultant.... purchase through them online, or contact them! Shop local, as always! Disclaimer: I am paid a small amount with each purchase, based on sales, made through myself as a consultant. You are helping to support my baking addiction, thank you! ;)

Monday, September 5, 2016

Cheesy Garlic Zucchini Bread

It's Monday morning, of a holiday weekend, and I'm sharing something fairly healthy. I know, I know. Don't get mad yet though, just trust me.

Imagine a cheddar bay biscuit.... in bread form. With barely noticeable shredded zucchini in it. That's what I am sharing with you today. I know, everyone is probably getting tired of the zucchini recipes. I know we're nearing the end of the season, but I wanted to share one more! (No promises that it's the last one, though.) I am a firm believer that you can't have too many zucchini recipes. Especially this time of year-- we've had it all summer, now some people are getting sick of it and need something different to do with it. Well, this is perfect! 

Because, really, who doesn't love cheddar bay biscuits?? I know we do. From Red Lobster or homemade, doesn't matter, I could eat them all day long. Same thing with this bread! (And I think Adrian could too; he devours every piece I give him!) Since it's made in bread form vs. biscuit form, it's slightly easier to make, too. The applesauce & zucchini in it make it slightly healthier, too. It's not GREAT for you, but you can eat least feel good about eating it.
Cheesy Garlic Zucchini Bread

Ingredients
  • 3 cups all purpose flour
  • 1 tablespoon baking powder
  • 1 teaspoon salt
  • ½ teaspoon baking soda
  • 1 teaspoon Garlic Garlic (or garlic powder)
  • 3 cups shredded zucchini, drained
  • 1 cup shredded cheddar cheese
  • 2 large eggs
  • 1 cup milk
  • ¼ cup applesauce
  • 1 ½ tablespoons vegetable oil *if you don't want to use applesauce, just use 1/4 cup oil. However, I have not tried it this way.
Directions
  1. Preheat oven to 350°. Grease a 9”x5” loaf pan.
  2. In a large bowl combine the flour, baking powder, salt, baking soda, and Garlic Garlic. Add the zucchini, and cheddar; stir to combine.
  3. In separate small bowl, combine the eggs, milk, applesauce, and oil. Pour the wet ingredients into the dry ingredients. Gently stir together just until moistened.
  4. Pour into loaf pan and bake for 40-50 minutes, or until a toothpick inserted comes out clean. Let cool for 10 minutes. Remove from pan to cool. Serve warm.
Yield/Time
10 slices
1 hour 15 minutes
Nutrition Facts *I calculate nutrition facts for reference only, this is not done scientifically
182/slice


Source (for original): Gather for Bread
Remember, comments are loved! Share your zucchini recipes!
Tastefully Simple info: If you are interested in making a purchase, you can purchase through my page, or just search and select "Serena Lee" as your consultant. Obviously, if you are not local and already have a consultant.... purchase through them online, or contact them! Shop local, as always! Disclaimer: I am paid a small amount with each purchase, based on sales, made through myself as a consultant. You are helping to support my baking addiction, thank you! ;)

Wednesday, August 31, 2016

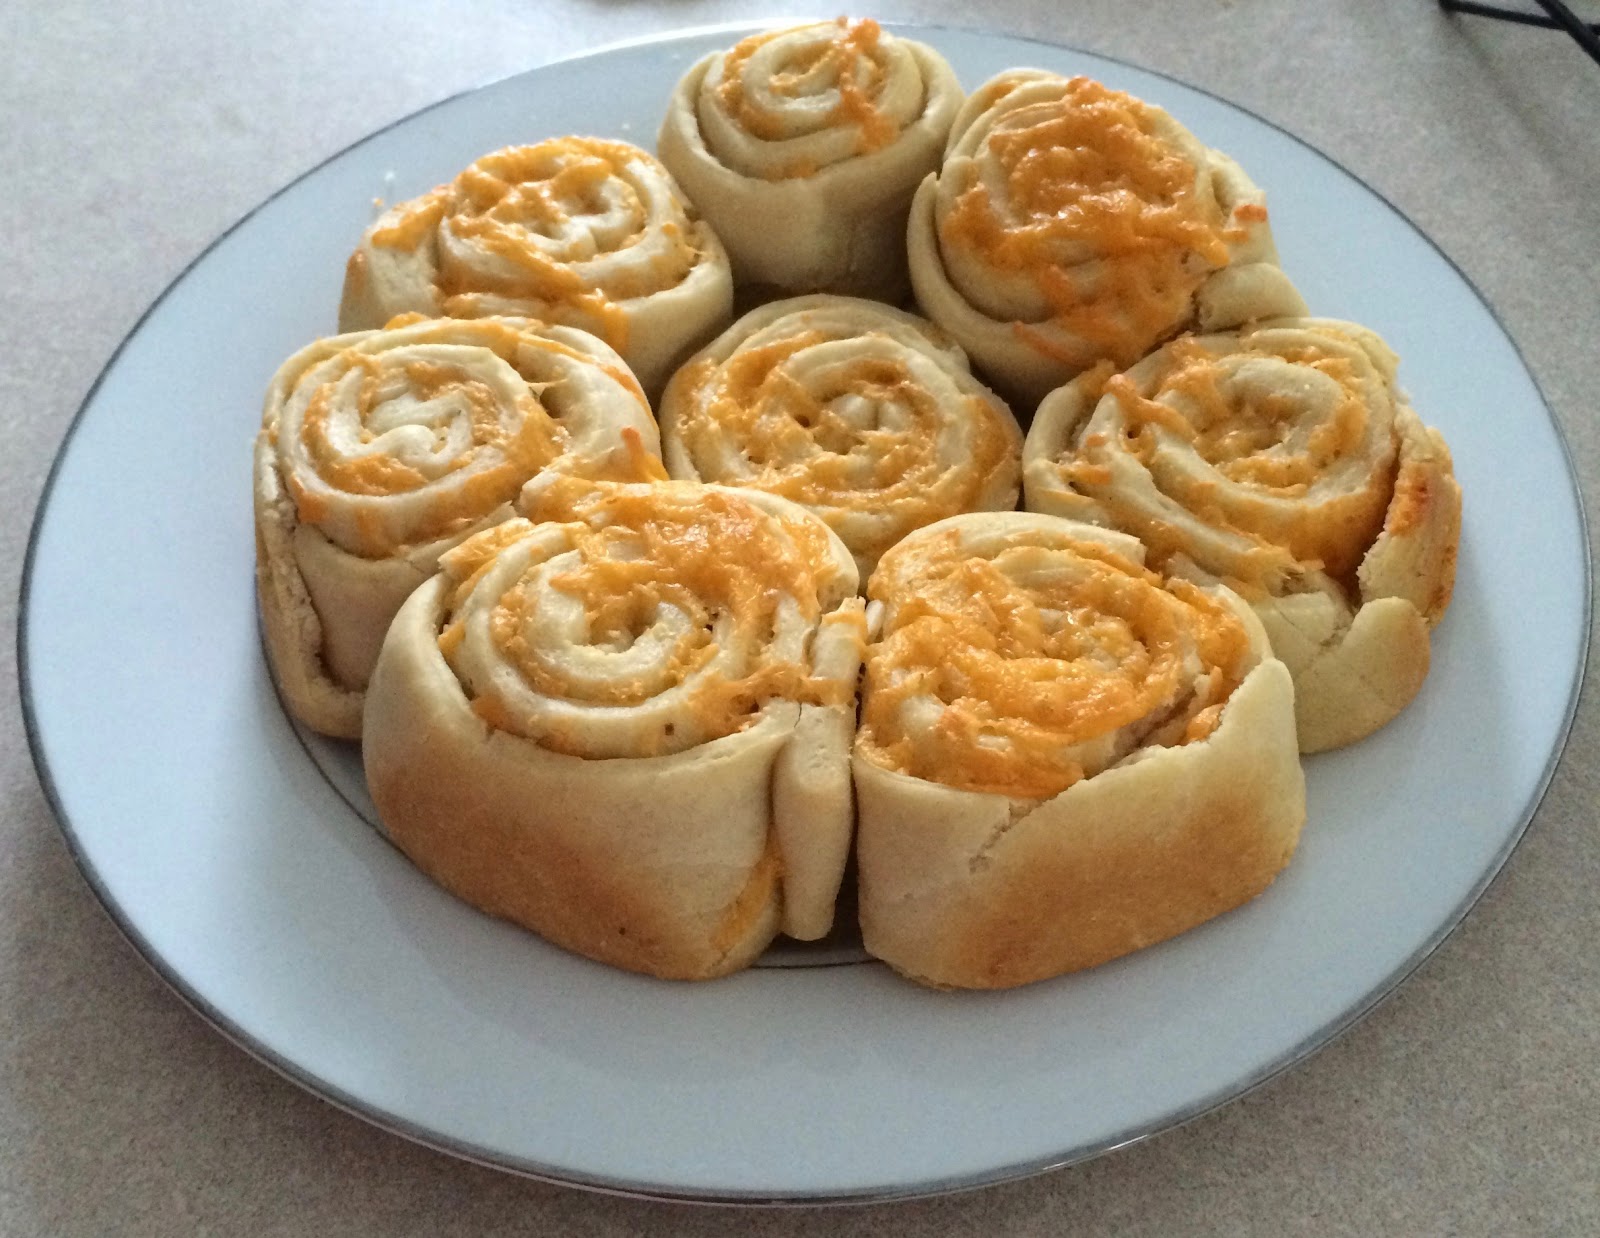
Garlic Cheese Rolls (updated)

Confession time: I am one of those people who cannot leave a recipe alone. If you know me in person, and I've ever made something for you, you probably know that about me. "Let me know what you think I should do differently!" is one of the first things I say when I give food to people. I love to tweak things until I decide they are absolutely, truly perfect.

It's not my fault though, my husband encourages me.

This is one of those recipes. I originally posted this awhile ago, when I first made it. I was so excited that it turned out so well, I had to share right away! Now it's been a couple years, and I think at this point I actually have it to my level of perfect. With minimal changes, too. We'll see though. You know me. ;)

These rolls are a perfect addition to a dinner, or great to just snack on. (Warning: they are addicting.) They are wonderfully cheesy, with just the right amount of garlic and butter. (Another warning: I really like garlic. Really, really like garlic. You may want to cut down if you are not a huge fan. Or just throw caution to the wind and try it anyways, because these rolls are amazing.) I think my favorite part is that they are actually rolls vs. a biscuit-- they are great to peel apart and eat. That just might be me though...

Garlic Cheese Rolls


Ingredients
  • 2 3/4 - 3 1/4 cups all-purpose flour
  • 2 1/4 teaspoon active dry yeast
  • 1/4 teaspoon salt
  • 1 cup warm water (120°-130°)
  • 2 tablespoons vegetable oil
  • 1/2 cup butter, softened
  • 2 teaspoons Garlic Garlic (or garlic powder)
  • Additional herbs/seasonings, optional
  • 2 1/2 cups cheese (mozzarella, cheddar, or colby jack)
Directions
  1. In a large mixing bowl, combine 1 1/4 cups flour, yeast, and salt; add water and oil. Beat on low speed for 30 seconds; then scrape bowl. Beat on high speed for 3 minutes. Knead in another 1 1/2 cups flour; adding up to 2 cups if needed. Knead for 6-8 minutes, to make a moderately stiff dough that is smooth and elastic.
  2. Cover, let rest for 10 minutes. Grease 3 8" cake pans, or 1 9"x13" pan; set aside. Note: DO NOT use metal cake pans. I've tried it multiple times, and it may just be my pans, but they stuck very badly.
  3. Meanwhile, beat together butter and garlic, adding additional seasonings as desired.
  4. Roll dough out into large rectangle (approximately 24”x12”). Spread garlic butter to within 1” of edge. Sprinkle with 2 cups desired cheese. Roll up jelly-roll style.
  5. Slice into 18-20 rolls, then place prepared pans. Sprinkle with remaining cheese. Let rise in a warm place for 30 minutes.
  6. Preheat oven to 350°.
  7. Place pan(s) on center rack, bake for 20-25 minutes or until golden brown. Remove to wire rack to cool.

Yield/Time
18-20 rolls
1 1/2 hours
Nutrition Facts *I calculate nutrition facts for reference only, this is not done scientifically
173 each/20 rolls


Source (for original): Better Homes & Gardens (dough), and the loose idea for the rolls came from a blog that no longer exists.
Remember, comments are loved! What's your favorite go-to roll?

Tastefully Simple info: If you are interested in making a purchase, you can purchase through my page, or just search and select "Serena Lee" as your consultant. Obviously, if you are not local and already have a consultant.... purchase through them online, or contact them! Shop local, as always! Disclaimer: I am paid a small amount with each purchase, based on sales, made through myself as a consultant. You are helping to support my baking addiction, thank you! ;)

Friday, August 12, 2016

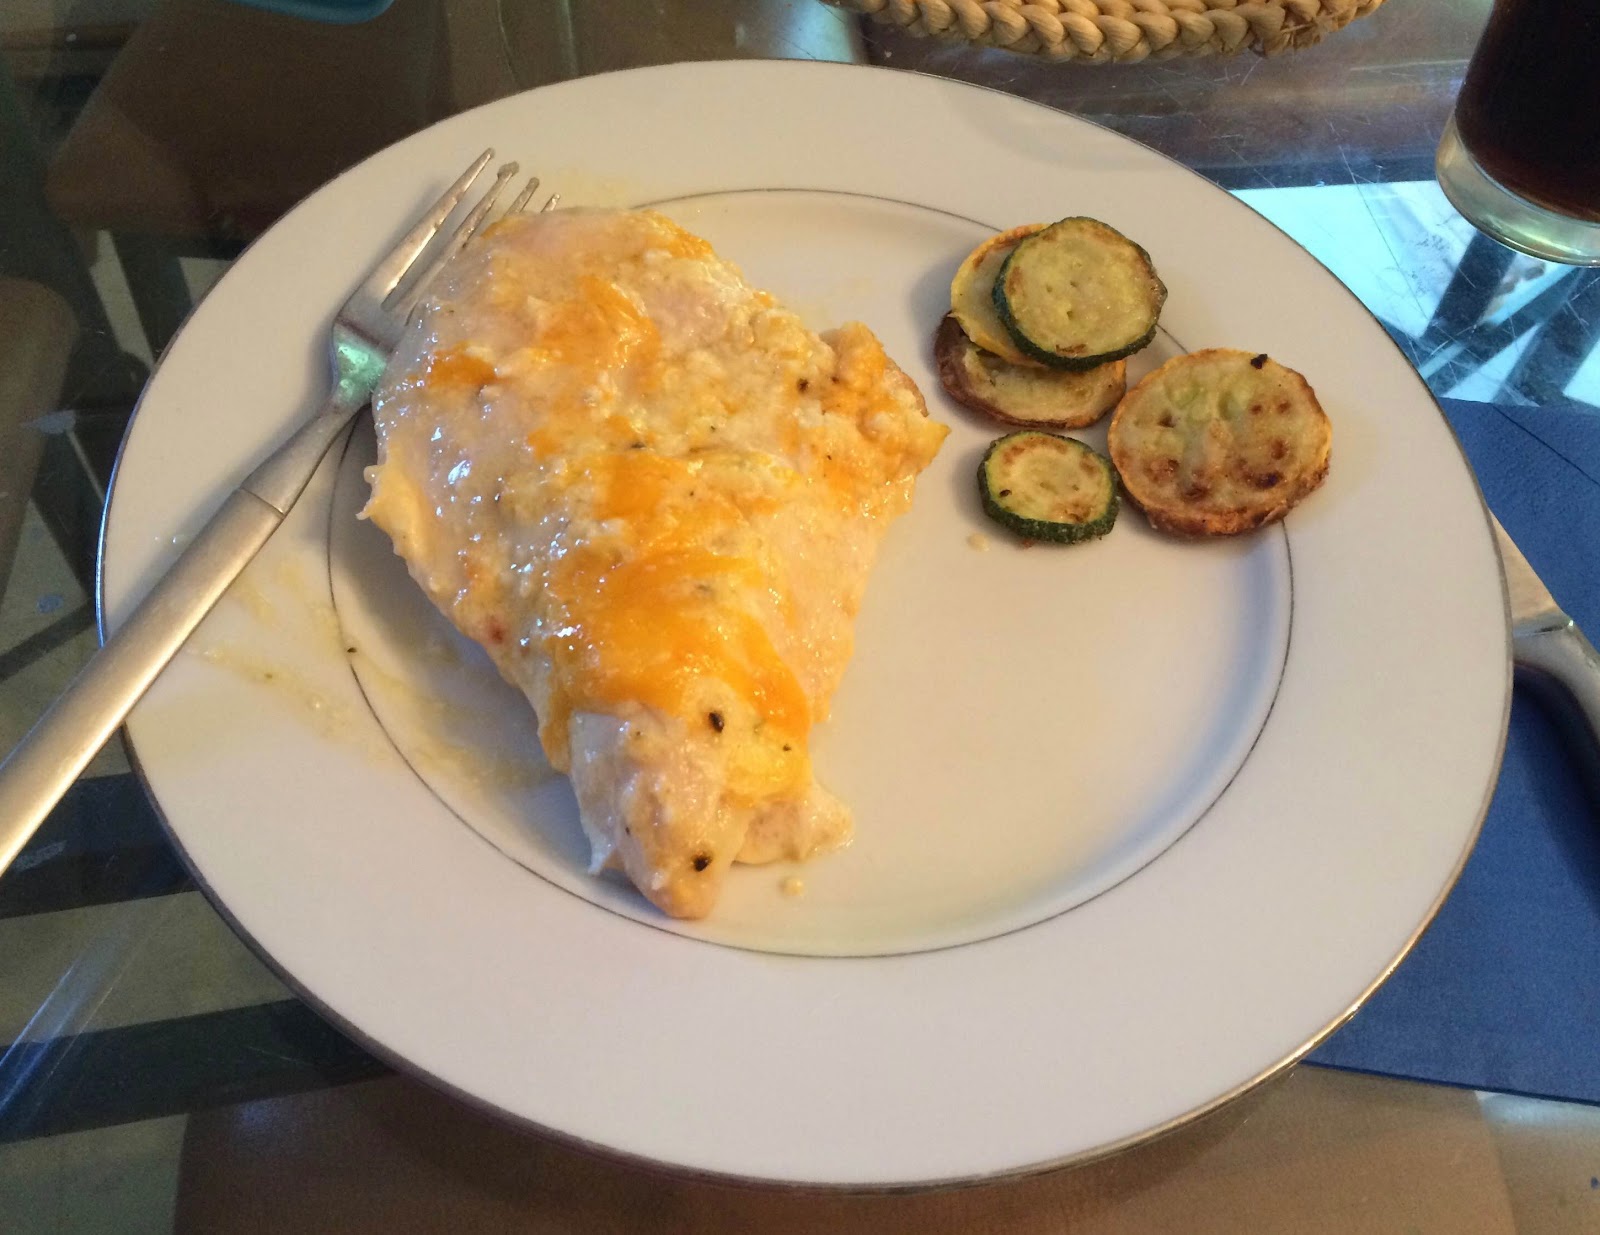
Creamy Baked Cheesy Chicken

I'm going to preface this post by saying that I am working on taking better food photos. But, sometimes good food just isn't pretty. Especially when you've had to move things around to get a good temp with the meat thermometer. (And yes, I regularly use a meat thermometer; I only risk food poisoning when raw cookie dough is involved.)

Anyways, there is no raw cookie dough here (today). Or raw meat, thankfully. Just really, really good chicken. I've made this multiple times, with good results each time. Different cheeses, too. The picture is taken with cheddar, but it's just as great with mozzarella. Asiago is what the original called for, but whatever. I go with whatever is already shredded in my fridge. ;) I love the combination of seasonings, cheese, and mayonnaise. The mayo makes this sooo creamy. The chicken is PERFECT. So tender, so juicy. I could eat this weekly. It's always a hit with my boys, too!

Creamy Baked Cheesy Chicken


Ingredients
4 chicken breasts, cut in half
1 cup light mayonnaise or greek yogurt
3/4 cup shredded cheese, divided
1 1/2 teaspoon seasoning salt (I use Seasoned Salt)
1/2 teaspoon pepper
1 1/2 teaspoon garlic powder (I use Garlic Garlic)
Parmesan

Directions
Preheat the oven to 375° and spray a 9”x13” pan with cooking spray. Lay the chicken inside the pan.
Mix together mayonnaise, 1/2 cup cheese, and seasonings. Spread the mixture evenly over each piece so that the chicken won't dry out while baking.
Sprinkle the top with remaining cheese and fresh parmesan.
Bake uncovered for 45-60 minutes, or until chicken is cooked through. (I always use really thick chicken breasts, but start checking at 20-25 minutes. If the breasts are thinner, they will be done much sooner.) Enjoy!
Yield/Time
4-8 servings
50 minutes
Nutrition Facts
267 per 1/2 breast *I calculate nutrition facts for my use only, this is not done scientifically

Source (for original): Recipe Critic

Remember, comments are love! What's your favorite way to make chicken?
Tastefully Simple info: If you are interested in making a purchase, you can purchase through my page, or just search and select "Serena Lee" as your consultant. Obviously, if you are not local and already have a consultant.... purchase through them online, or contact them! Shop local, as always! Disclaimer: I am paid a small amount with each purchase, based on sales, made through myself as a consultant. You are helping to support my baking addiction, thank you! ;)

Monday, March 17, 2014

Chicken & Spinach Pasta

Our oven died a couple weeks ago, when our menu plan was filled with things that needed to be baked. Thankfully, we've gotten it fixed since, but of the handful of things left on my plan, not ONE of them was crock pot or stove top only. We had pizza the first night I realized it was completely dead (that's also the day I dropped a wooden shelf on my head.... so we probably would've had pizza anyways), and I came up with some alternate meals. 

This Chicken & Spinach Pasta is actually something that was on the original menu, but originally required baking. With some slight adaptation to make it stove top (and a decent amount of adaptation simply because I wanted to), it worked. 

It's actually a pretty basic dish, but I really like adding the cream cheese/sour cream for some extra creaminess. 

The cutest thing about this was Gabriel's reaction to the spinach/tomato in it. It isn't unusual for me to put (small) pieces of tomato in things, but for some reason he said "icky" when he found a piece at the edge of his plate. I explained that it was tomato & it was yummy, then showed him the spinach & said that was yummy too. So he picked up a piece of spinach, told me "spinach yummy!" then promptly ate it. When we had leftovers the next day, he ate all of the spinach before even touching the pasta. :)


Chicken & Spinach Pasta


Ingredients
  • 16 ounces dry small pasta
  • 2 tablespoons butter
  • 1/2 onion, chopped
  • 2 cloves garlic, minced
  • 8 ounces cream cheese
  • 1/2 cup sour cream
  • 1-2 cups milk
  • 1/2 cup grated Parmesan cheese
  • 1 1/2 cups shredded mozzarella cheese
  • 1/2 teaspoon salt
  • 1/2 teaspoon black pepper
  • 1/4 teaspoon crushed red pepper flakes
  • 2 cups chopped fresh spinach
  • 2 cups cooked chicken, diced
  • 1 cup diced tomatoes
  • Fresh basil or parsley, for garnish
Directions
  1. Preheat oven to 400°, if desired. (Baking is not necessary.) Spray a 9”x13” baking pan with non-stick spray.
  2. Cook pasta; drain and set aside.
  3. While pasta is cooking, heat butter in a large saute pan set to medium heat. Add in the onion and garlic. Saute for 3 - 4 minutes to slightly soften; do not brown.
  4. Add in cream cheese; stir to melt. Reduce heat to low. Stir in sour cream, milk, Parmesan cheese, 1 cup of mozzarella cheese, salt, pepper and red pepper flakes. Stir until everything is well combined and bubbling. Add pasta, chicken, spinach and tomatoes. Add more milk as needed to obtain desired consistency.
  5. If baking, stir to coat and immediately transfer to baking dish. Add remaining cheese and bake, uncovered, for 20-25 minutes.  
  6. If not baking, add remaining cheese and heat thoroughly.
  7. Top with basil or parsley for garnish.
Yield/Time
8 servings
20-45 minutes

Source (for original): Inspired Dreamer

Tuesday, January 7, 2014

Cheddar Bay Biscuits!

So, as promised, here is the recipe for my Cheddar Bay Biscuits! We also took these to the New Year's Eve party... these are my go-to recipe when we are going somewhere & need to take something snacky. They are easy to make, delicious, and aren't temp sensitive so I can make them ahead!


I found this recipe ages ago, when I wanted Red Lobster but couldn't go. (Which is just depressing, really.) These are a lot less salty then their version, which is nice. Nate insists that mine are better than theirs in general. :)


Printable Recipe
Cheddar Bay Biscuits


Ingredients
  • 2 cups all-Purpose flour
  • 3 teaspoons baking powder
  • 1 teaspoon Salt
  • ¼ teaspoon garlic powder
  • ⅓ cup butter, cold, cut into chunks
  • 2 tablespoons canola/vegetable oil
  • 1 heaping cup grated cheddar cheese
  • ½- ⅔ cup Milk
Garlic Butter Topping:
  • 2 ½ tablespoons butter
  • ½ teaspoon garlic powder
  • ½ teaspoon dried parsley flakes
Directions

  1. Preheat oven to 400° F. Lightly grease a cookie sheet.
  2. In a large bowl, combine flour, baking powder, salt and garlic powder. Whisk together to combine thoroughly. Add chunks of butter. Using a pastry cutter, cut butter into flour until it is coarse, pea-sized. Add oil, cheddar cheese and ½ cup milk. Stir together. Keep adding milk a bit at a time, just until the dough is moistened and no longer dry and powdery.  (For dough sticky enough to form into balls, ⅔ cup is usually required.)
  3. Form dough into small balls & place on prepared cookie sheet. (Or, drop approximately ¼ cup portions of the dough onto the cookie sheet.)
  4. Bake for 14-17 minutes. While biscuits are baking, melt butter for topping in a small bowl. Stir in garlic powder and parsley.
  5. When biscuits come out of the oven, use a brush to spread garlic butter over the tops of all the biscuits. Use up all of the butter. Serve warm.
Yield/Time
Yields: 12-16
Prep: 20 minutes Bake: 17 minutes

Nutrition Facts *I calculate nutrition facts for reference only, this is not done scientifically
Calories: 147 (16 ct) or 196 (12 ct)

Source (for original): Food & Whine