PinIt!

Showing posts with label Tortillas. Show all posts

Wednesday, November 2, 2016

Spinach Wraps

I know, I know. You're thinking, "It's getting close to the holidays, and Serena's posting about SPINACH WRAPS? What's wrong with her?"

Well, nothing really. I was just glancing through recipes I haven't posted and stumbled across this.

I used to love getting panini's from a place on campus with spinach wraps, but I'm too cheap to buy the wraps themselves in stores. I'd change up the things I put in them, but I always got the spinach wraps. Then, when I found this recipe, I decided it was worth a shot to do it myself.

Yeah, this is easy. Really guys. This is awesome. I had never made tortillas before this, so I was a bit intimidated the first time, but it's SO easy. Fairly time-consuming, to roll out all the tortillas, but definitely doable. We could just munch on them by themselves; forget making them into panini's or anything else. They don't have a strong spinach taste, so even if you aren't a big fan of spinach, it's worth trying.

Oh, and side note? These freeze fairly well. Slightly more brittle, and I haven't tried more than short-term freezing (a few weeks), but works out great still.
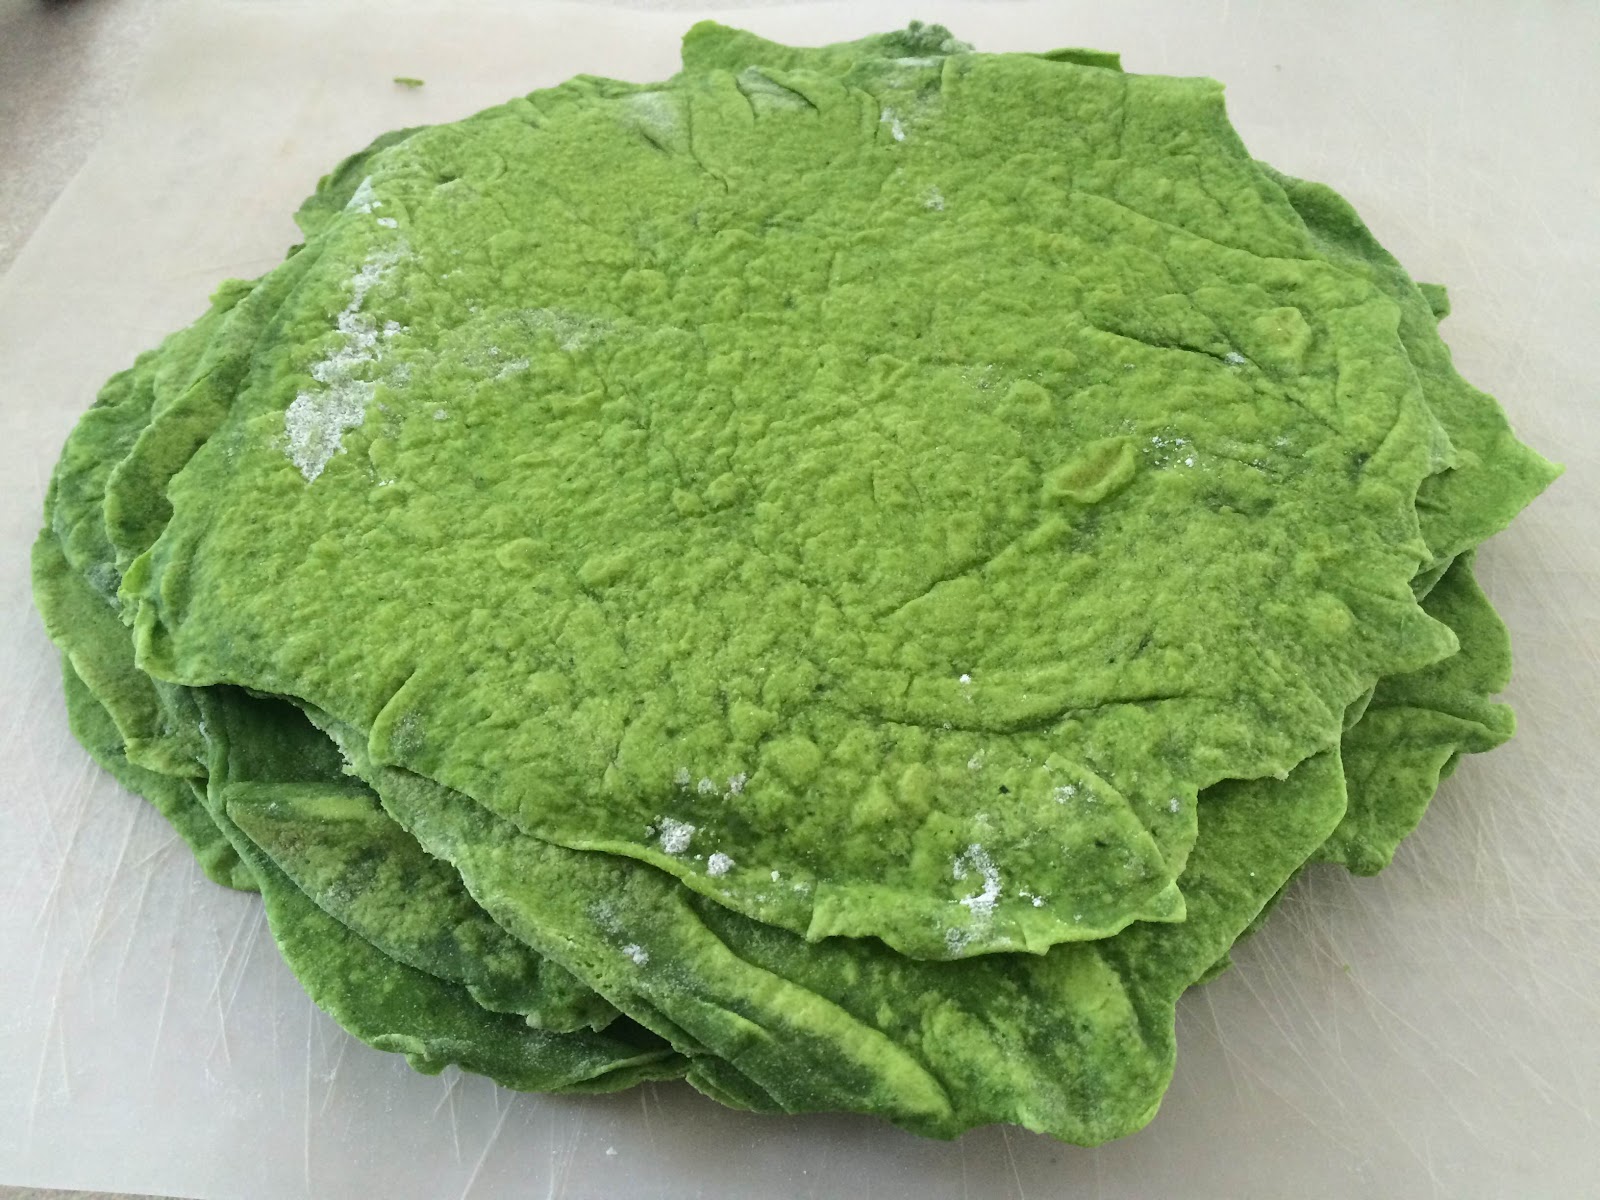
Spinach Wraps

Ingredients
  • 3 cups flour
  • 1 ½ teaspoons baking powder
  • 1 teaspoons salt
  • 4 tablespoons vegetable or avocado oil
  • 4 ounces spinach (approximate 4 cups)
  • ¾ cups milk, warmed 

Directions
  1. In a large bowl, stir together the flour, baking powder, and salt until evenly mixed. Add the oil; stir until dough is crumbly. Set aside.
  2. Place the spinach and warm milk in a blender or food processor, and mix on high until smooth. Pour the spinach mixture into the flour and stir to combine. Knead the dough for about 5 minutes, until smooth. Add more flour as needed. 
  3. Form the dough into a ball, wrap in plastic wrap, and refrigerate for 30 minutes.
  4. Lightly flour a counter and a rolling pin. Break the chilled dough into 10 - 14 medium sized balls. Roll out each ball into a very thin circle, about 8”-10” in diameter. 
  5. Heat a large frying pan or griddle over medium heat. Cook the wraps one at a time for about 30 seconds -1 minute on each side or until wrap has stiffened slightly and is golden brown in spots. 
  6. Let cool, then place in gallon bags and store in the fridge until ready to use. *may also freeze until needed.

Yield/Time
12 wraps
1 hour
Nutrition Facts *I calculate nutrition facts for reference only, this is not done scientifically

148 calories per wrap (12 ct)

Source (for original): Katie at the Kitchen Door
Remember, comments are loved! What are your favorite wrap ingredients?

Wednesday, October 30, 2013

A Favorite Entree: Cheesy Chicken & Tortillas!


I am one of those people who finds a recipe they really like, then makes it over & over in a short period of time. Much to the annoyance of my husband, who wants things changed up regularly. To compromise, when I have a current favorite dinner, I only put it on the menu about once a month. That's enough that I feel like I am not going through withdrawal, and Nathan will tolerate eating it.

This is one of those recipes! When I first found this, I made it every week or so. Nathan was so incredibly sick of it after a few weeks that he would eat every other leftover in the fridge before he would finish this off. (And by then, I had usually finished it!) Since then, it's been relegated to every month or so. I always get excited when I realize it's been awhile since I made it, as that means I can make it again!

 I love the combination of flavors in taco seasoning, so I get excited when I see a recipe calling for it that's completely different from others I've tried. With this recipe, you can really vary the amount of seasoning to make it as spicy as you want. (Another benefit of making homemade taco seasoning-easy to vary the seasoning without wasting part of a packet of the store-bought stuff.) With Gabriel, I cut down on the spiciness, but it's all personal preference. 

I think that my favorite thing about this recipe is the tortillas being mixed in with everything-- it adds a fun texture/flavor!


Cheesy Chicken & Tortillas
Ingredients
  • ½ pound cooked chicken, shredded
  • 1-2 tablespoons taco seasoning
  • 1 ¼ cups chicken broth
  • 26 ounces Condensed Cream of Chicken Soup (1 large can-if you want to sub with 2 small cans, increase the chicken broth to 1 3/4 cup)
  • 20 taco-size flour tortillas, torn or cut into 1” pieces
  • 4 cups shredded Mexican cheese blend
  • Hot cooked regular long-grain white rice (I usually cook 3 cups raw)
Instructions
  1. Heat the oven to 350°.
  2. Mix ½ of taco seasoning with chicken. Add remaining taco seasoning, broth, and soup.
  3. Layer half of the chicken mixture, tortillas, and cheese in a 3-quart shallow baking dish. Repeat the layer. (When layering tortillas, be careful not to layer them too thick.)
  4. Bake for 30 minutes or until the mixture is hot and bubbling. Serve over rice.
Yield/Time
Approx 10 servings
Prep: 15 minutes Bake: 30 minutes

Nutrition Facts
½ cup + ¼ cup rice = 379 cals


Source (for original): Recipe.com

Monday, October 21, 2013

Chimi Changas

Since I have been absolutely atrocious about taking pictures of my recipes recently, I decided to just post a recipe from last month's menu plan. I have made a ton of yummy things recently, and haven't even managed to take a picture of one, which annoys me immensely.  

That sounds like I'm teasing you, doesn't it? Sorry! Don't worry, most of the things that I have made recently are things I will be making again in the near future -as in, before the holidays I hope- so they will be posted soon enough.

To make up for the teasing, and because I want to ensure that my coworkers continue to love me and think I'm amazing, I will be posting a FANTASTIC brownie recipe tomorrow morning. Assuming it turns out tonight, of course, but I have no reason to think that it won't. (Knock on wood!)

So, without further ado, here's a wonderful idea for dinner!


When I am hunting around for things to add to my menu plan, I like to try things that are a new variation on an old favorite. I had thought about doing a variation of tacos in the oven before, but never got around to it. When I saw this recipes for chimi changas, I decided it was past time to try it!

We all loved these! A fun, different way to eat tacos, the tortillas were warm & crispy, and it was incredibly easy.  

My only complaint is how long it takes to bake. I'm used to having tacos on the table FAST. This? Not-so-fast. 30 minutes in the oven is 30 minutes that my stomach is saying "Wait, I thought we were having tacos? Do they normally take this long?" Even condsidering that, these are definitely something I will be making again! 

(See below the recipe for more comments.) 

Edited 8/16: these freeze great! The edges of the tortilla are a bit stiff, but I love to freeze a few and then have an easy lunch to take to work.

Chimi Changas

Ingredients
  • 8 ounces cream cheese    
  • 8 ounces colby jack or Mexican blend cheese, shredded
  • 1 pound ground beef    
  • 1 ½ tablespoons taco seasoning
  • ¾ cup water    
  • 12 flour tortillas (6”)
  • Shredded cheddar cheese (optional)    
  • sour cream (optional)
  • lettuce (optional)    
  • salsa (optional)

Directions
  1. Preheat oven to 350°.
  2. In a large pan over medium heat, brown beef. Add taco seasoning and water, cook until most of the water is gone.
  3. Meanwhile, in a large bowl, stir together cream cheese and colby jack. Once meat is cooked, add to cheese mixture; stir to combine. 
  4. Divide among tortillas. Tuck in sides (to make a square) and place seam-side down on a greased baking sheet. Spray tops of tortillas with cooking spray. 
  5. Bake for 15 minutes. Flip, then bake an additional 15 minutes.
  6. Serve with cheddar cheese, sour cream, salsa, or lettuce, as desired.
Yield/Time
12 servings
45 minutes

Nutrition Facts
273/tortilla (without additional toppings)

Source (for original): My Fridge Food

I cut the recipe in half for our family of 3, and we still had leftovers. 

The only thing I will do differently for next time is the number of tortillas: these things were stuffed. I would cut the recipe in half or thirds, and use a couple more tortillas than it calls for to make them slightly smaller. That's just personal preference, though.

Remember, comments are love! 

Thursday, September 19, 2013

Green Chili Enchilada Bake... and my secret confession

I have a confession.

I am afraid of enchilada sauce.

There, I said it. Go ahead, laugh. Get it out of your system.

....

Done? Good.

Now, to explain: I was always a picky eater growing up. If you've met my parents/grandparents, you'll realize that it's almost impressive that I managed to stay a picky eater. I have been working to rectify that & broaden my horizons, but some things I just can't get over.

Like enchilada sauce, beans, & salsa. All three of which are in this recipe.

(It's not like I don't like enchiladas. I love enchiladas. It just happens that my recipe for enchiladas does not require enchilada sauce....which is pure coincidence.)

Salsa I can explain: I don't like to just eat tomatoes.  Have them in something? Sure, as long as it's not the dominant flavor. Just have salsa & chips? Blech. I don't even like to watch Nate eat it. (But being the good wife I am, I still buy salsa & chips for him. See? Don't I get good wife points? ) 

Beans actually make sense. I have yet to find a type of beans that I like the texture of. (I am, of course, not referring to green/yellow beans. Those things are delicious, especially fresh and raw.)

Enchilada sauce isn't so easily explainable. Before I bought it for this, I couldn't even tell you what's in the stuff; I just knew that it's not something I would like. (Then I read the side of the can today, and decided maybe I was better off NOT eating the stuff...) However, if I am going to broaden my horizons, expand my cooking skills, blah blah blah, I need to try it.

Once. 

So, I made this recipe.... cut in half. (Which is actually a very good tip: if you have serious doubts about liking the dish, cut the recipe down the first time you make it. That way, if you have to pitch most of the pan, it's not a large pan.)


Green Chili Enchilada Bake


Ingredients
  • 1 cup mild green enchilada sauce
  • 1 cup reduced fat sour cream
  • ¾ cup salsa verde, mild
  • 12 white corn tortillas broken into 1” pieces
  • 2 cups cooked chicken or turkey breast
  • 15 ounces black beans, drained
  • 1 cup shredded cheddar cheese
  • Tortilla chips (optional)
  • Extra salsa (optional)

Instructions
  1. Preheat oven to 350° and spray a 9”x13” baking dish with cooking spray.
  2. Place enchilada sauce, sour cream and salsa into prepared baking sheet. Stir until well combined.
  3. Stir in broken tortillas, chicken or turkey and black beans. Stir to combine and top evenly with cheese.
  4. Bake for 22-25 minutes, until cheese is hot and melted. Serve with chips and salsa if desired.

Yield/Time
12 servings
30 minutes

Nutrition Facts
194 per serving


Source (for original): Picky Palate


 I, of course, did not add the beans. Maybe I will be more adventurous next time.

 Hahahahahaha......

No, seriously. Beans are gross. Maybe if I know I am not going to have to eat the dish, I will add some for Nate.

Aside from cutting it in half (and baking in an 8"x8" pan), that was the only change I made. We all liked this well enough, and I will probably make it again. It does have a strong enchilada sauce/salsa flavor, but I think I can get over that. I surprisingly liked it better reheated. (Odd.)

I am going to try making my own enchilada sauce--really, have you read the ingredient list on the cans of that stuff?? I found a recipe on one of the blogs that I follow, but anyone else have recommendations?

As always, comment & let me know if you try this! (Or even if you just feel like commenting!)