PinIt!

Showing posts with label Cream Cheese. Show all posts

Monday, May 8, 2017

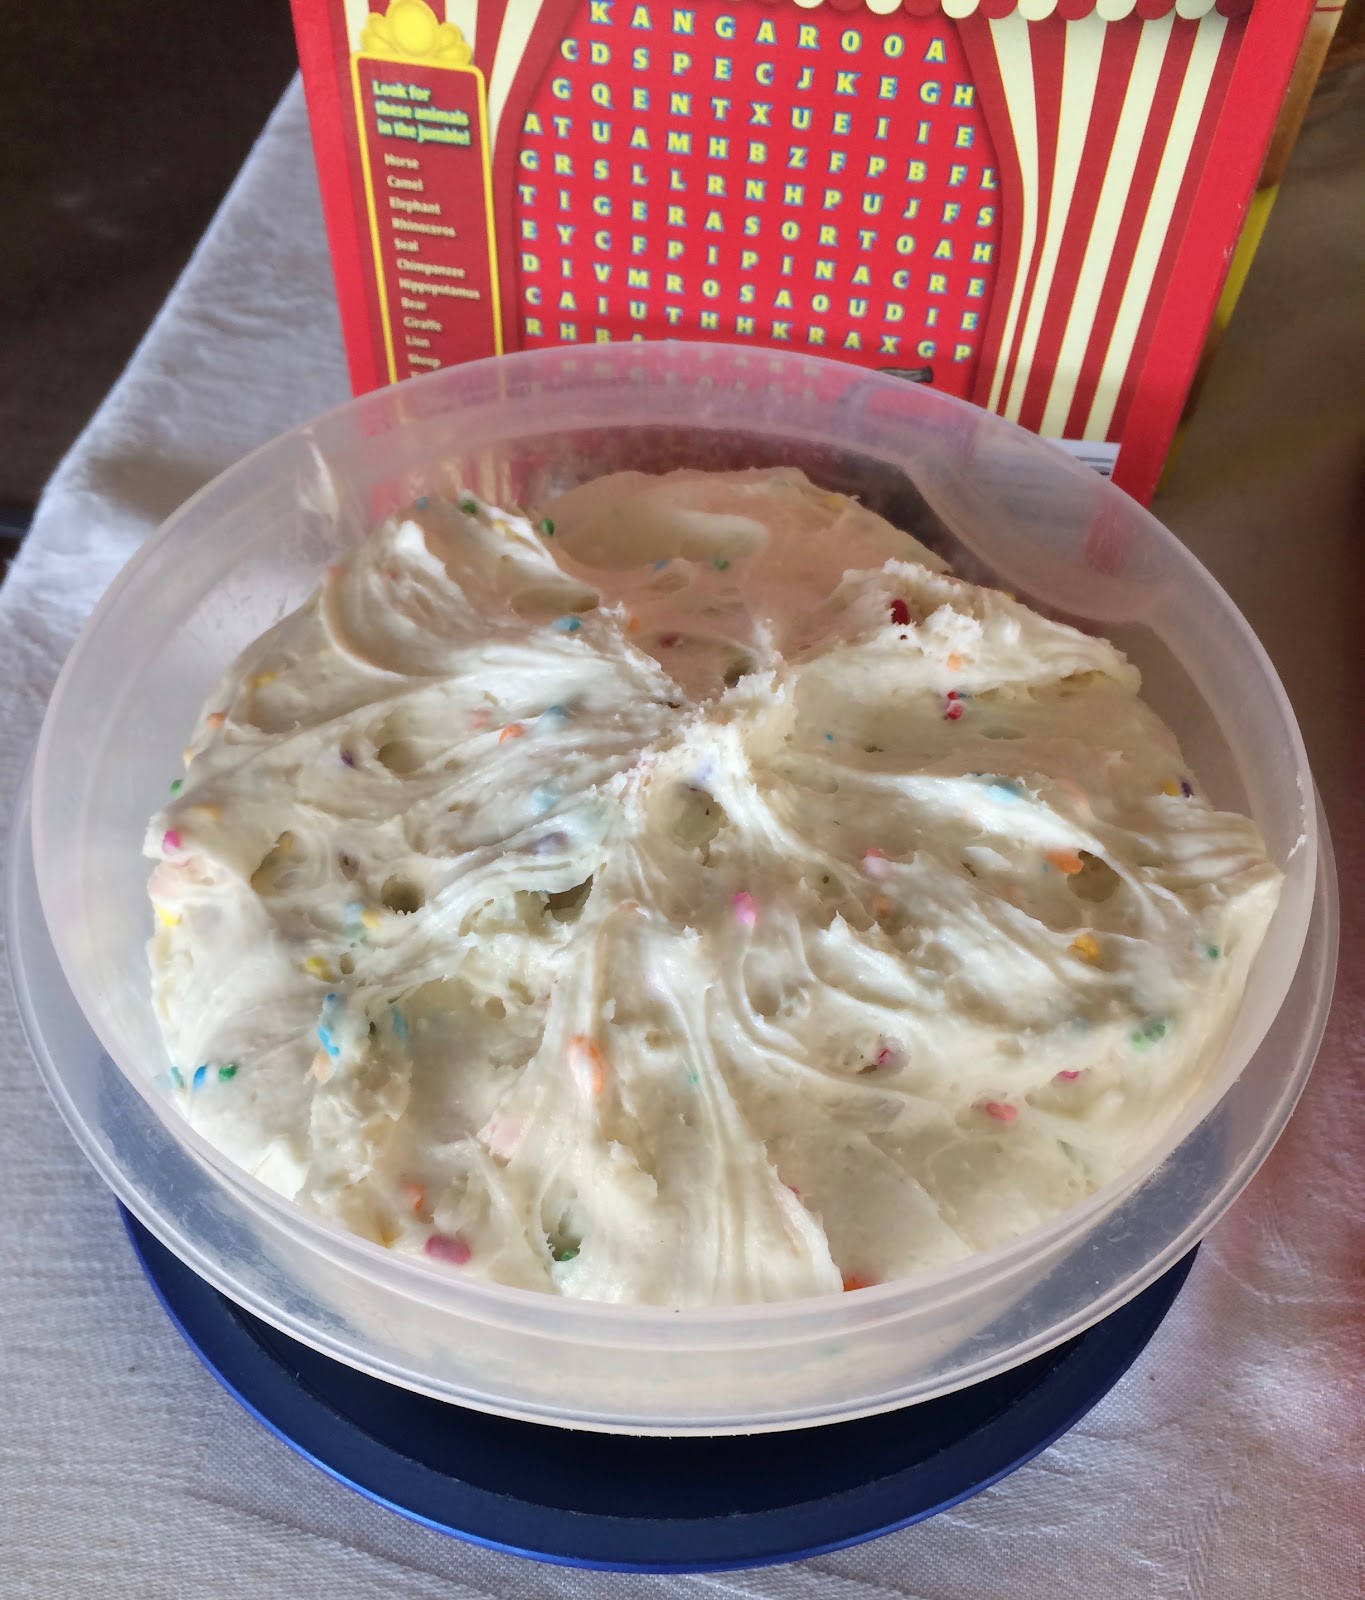
Funfetti Dip

Do you remember the old Dunkaroo dips? They had little graham crackers, and vanilla frosting with sprinkles. I couldn't get my mom to buy them very often, but I loved those things. So, when I stumbled across something that claimed to taste like it... I jumped on that. 

I will say that this funfetti cake mix dip isn't QUITE how I remember the Dunkaroo dips tasting, but it's pretty close. Close as I'm going to get, at least.

Unless someone happens to be going to Canada and wants to bring me back some... because apparently those things are still available in Canada. It might be the pregnancy hormones talking, but I am seriously tempted to order some. (But, the least expensive is $8 for a 5 pack... I think I'll have to refrain. I don't think Nate would be understanding of that...)

Anyways, back to the dip: this stuff is GOOD. It does make a ton though, so unless you are feeding a crowd and can pawn the leftovers off on someone, I really recommend cutting the recipe in half.

Remember, comments are loved! What's your favorite childhood treat that you like to remake?

Printable Recipe
Funfetti Dip

Ingredients
  • 1 box Funfetti Cake Mix
  • 16 ounces cream cheese
  • 8 ounces cool whip
  • Extra sprinkles, if desired

Directions
  1. Mix all ingredients together. Add more cool whip until desired consistency is reached. 
  2. Add extra (seasonal) sprinkles, if desired.

Yield/Time
Approx 50 servings
5 minutes
Nutrition Facts
75/servings

Source (for original): Finding Our Way

Monday, May 1, 2017

Dirt Cake

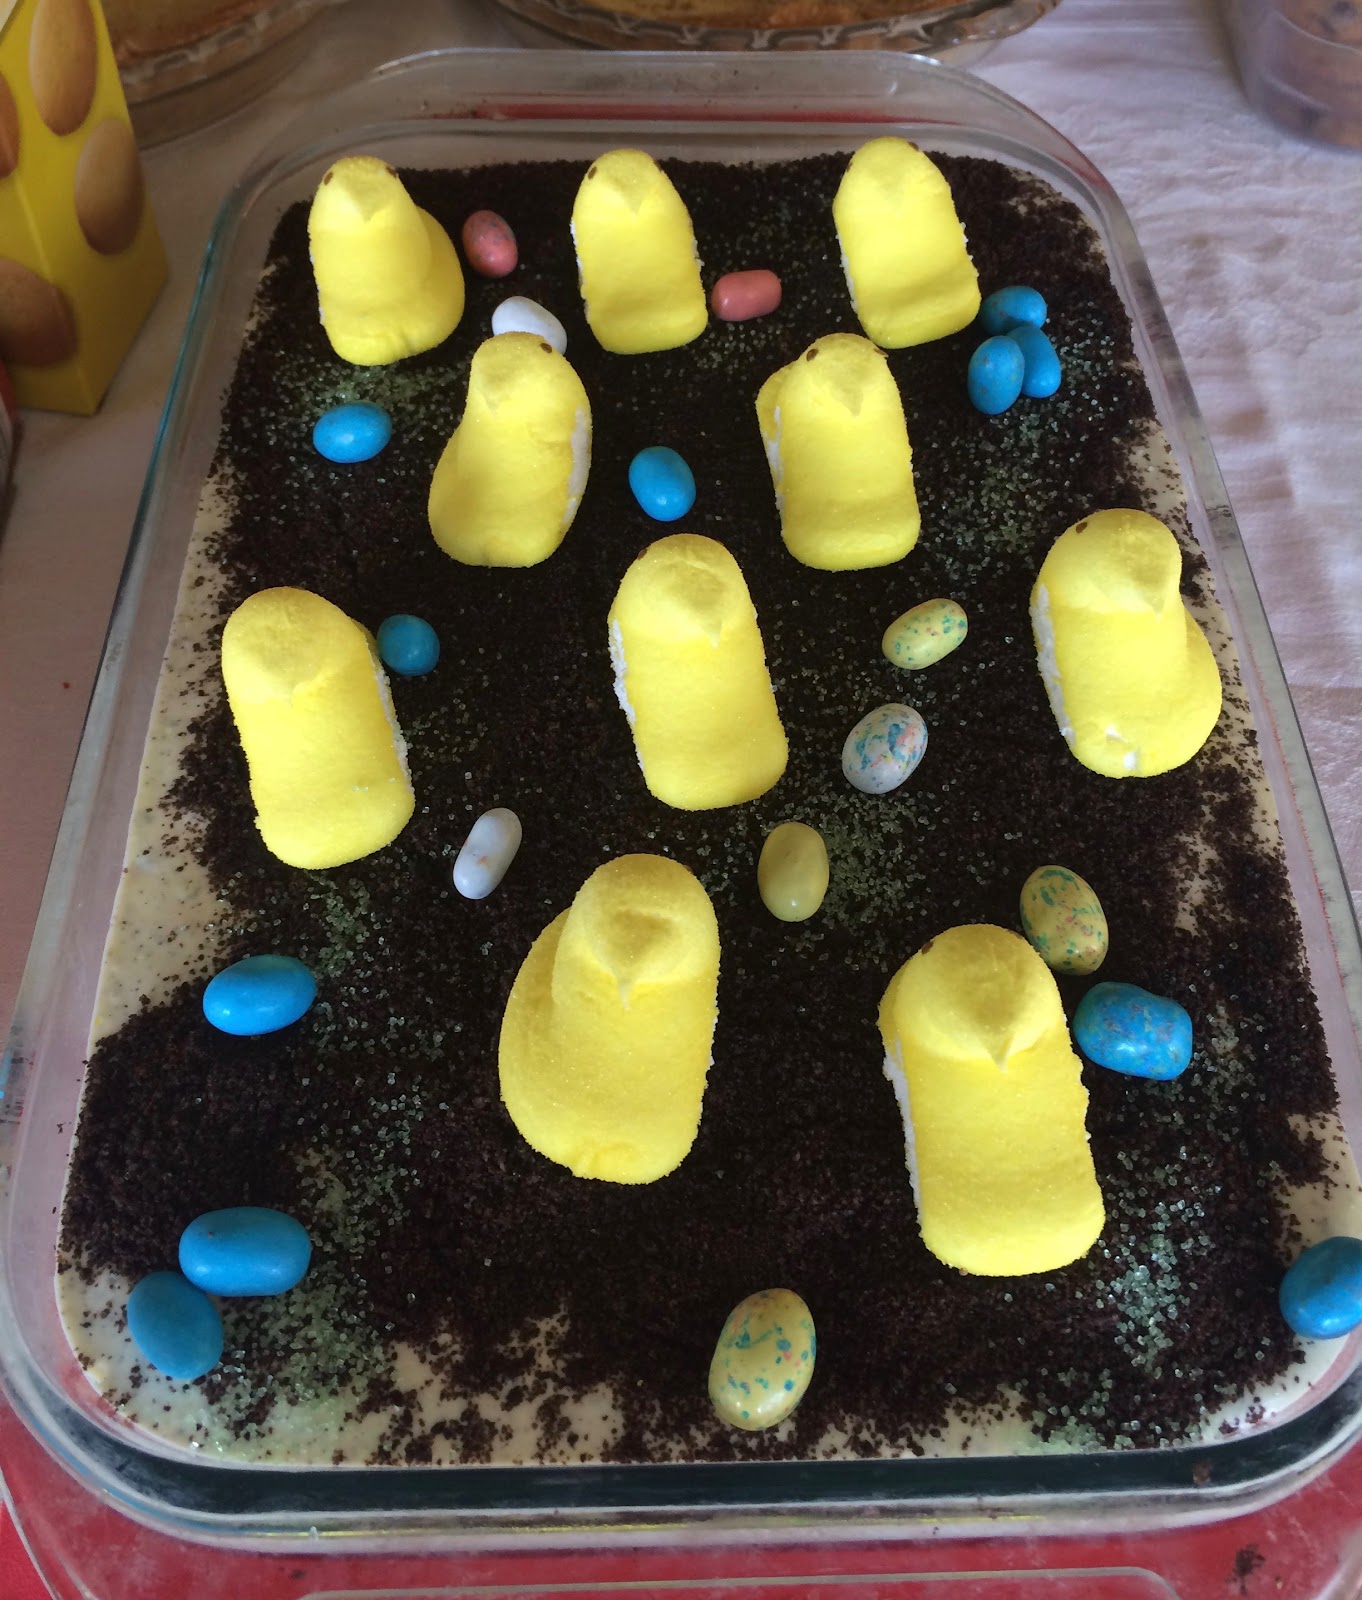
I've tried different type of dirt dessert recipes over the years, but I've never been fully satisfied with one I've found... til now.

This is perfect. I seriously wouldn't change anything about this recipe! (Well, except for the calorie content...) If you really wanted to cut down on the calories, you could try cutting out some of the Oreos, using light cream cheese, skim milk, etc. However... this is worth the calories. 

I made this for Easter with my extended family (thus the Peeps, eggs, and green sprinkles), but you really don't need to decorate it unless it's for a holiday. I'm considering making this again soon just for a random Wednesday or something. Or possibly just because baby says it sounds good. ;) 

Remember, comments are loved! Do you have a favorite dirt dessert recipe?

Printable Recipe

Dirt Cake

Ingredients
  • 1 & ⅓ package Oreos, separated
  • 8 ounces cream cheese, softened
  • ½ cup butter, softened
  • 1 cup powdered sugar
  • 16 ounces cool whip
  • 2 small boxes instant vanilla pudding
  • 3 cups milk
  • 1 teaspoon vanilla
  • Decorations (ex: including bunnies and edible grass for Easter)

Directions
  1. Finely crush 1 package Oreos, place ⅔ in the bottom of a 9” x 13” pan. Set aside.
  2. Separately, crush ⅓ package Oreos into small chunks and set aside.
  3. Mix cream cheese and butter until smooth. Mix in powdered sugar, and fold in whipped topping and small chunks of Oreos. Set aside.
  4. In a separate bowl mix pudding, milk and vanilla. Fold this mixture in with the cream cheese mixture.
  5. Pour over crumb mixture in pan, then sprinkle with the reserve finely crushed Oreos. Let set for a few hours and keep refrigerated until ready to serve.

Yield/Time
16 servings
20 minutes + cooling time
Nutrition Facts
431/serving

Source (for original): Lil Luna

Monday, April 17, 2017

Nutella Bundt Cake

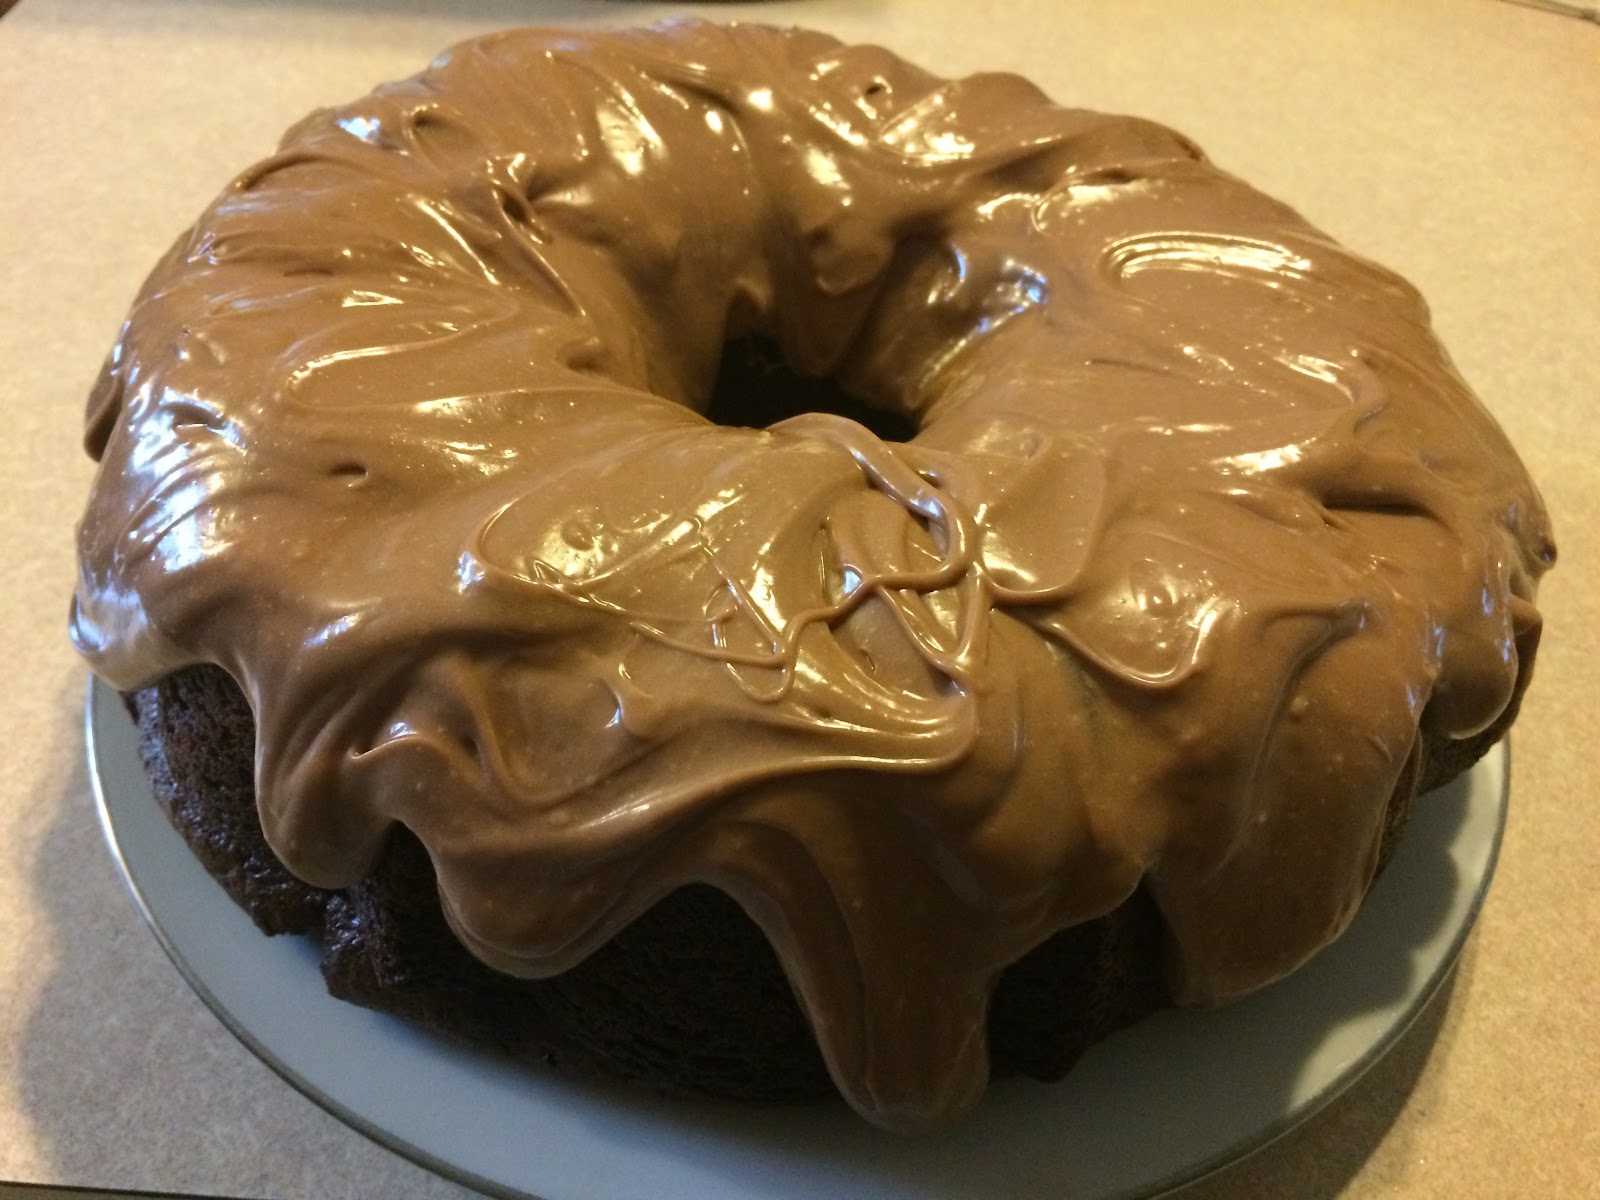
You all should know of my love for Nutella; I've spoken about it a lot. It might even be considered an addiction, at times. I have no regrets, though. (Ok, well, this is pregnant me talking, not trying-to-lose-the-baby-weight me.) I even got my grandma going on it, although I still think that's her own fault. (Really! We went down to Florida to visit them, and she bought TWO jars for the week we were there. Her reasoning is that they were buy one get one free. So, this pregnant lady ate a lot of Nutella that week, and of course Grandma had some too!) 

I've made this Nutella Bundt Cake a couple times, and it is always a HUGE HIT. Even before it gets into the oven, because I practically lick out the bowl for both the cake and the frosting. ;) It's very rich, but not so rich you can't eat a really big piece. Or two.  OK, maybe I'm the only one who could eat two, but baby LOVES Nutella. It makes her happy.

Anyways, back to the cake... this was my contribution to Easter dinner yesterday, and the reason Mama always lets me make desserts for everything. It was, of course, a huge hit. I recommend making it for any and all upcoming occasions, because everyone loves it. And that's without even getting into JUST how easy this is. You literally just mix all the cake ingredients together for a few minutes, then pour into a well-greased bundt pan and bake it. The frosting is just as easy-- mix the 3 frosting ingredients together for a few minutes, then spread over the cake. Delicious, easy, and a crowd pleaser!

Remember, comments are loved! What's your favorite Nutella dessert?

Printable Recipe

Nutella Bundt Cake

Ingredients
Cake:
  • 1 box chocolate cake mix (Devils food)
  • 1 small box chocolate pudding mix (3.9 ounces)
  • ½ cup Sour Cream
  • ½ cup Nutella
  • ¾ cup Oil
  • ¾ cup Water
  • ½ cup Sugar
  • 4 Eggs
  • 1 teaspoon Vanilla

Frosting:
  • 8 ounces cream cheese, softened
  • 2 cups powdered sugar
  • ¼ cup Nutella
  • chopped hazelnuts for garnish, optional

Directions
  1. Preheat oven to 350°, heavily grease a large bundt pan.
  2. In a large bowl, mix all cake ingredients together for 3 minutes on high. Pour into pan.
  3. Bake for 45-50 minutes or until a toothpick comes out clean. Let sit in pan for 5 minutes, then invert onto a cooling rack.
  4. While cake is cooling make frosting: In a medium bowl combine cream cheese, powdered sugar, and Nutella; beat on high until creamy.
  5. Scoop frosting into a large ziplock bag and cut a hole in the corner of the bag, or use a piping bag with a large round tip. (Or, do what I do, and just spread it over til it looks kinda pretty.)
  6. When cake is completely cooled, pipe the frosting over the cake in a back and forth method. Sprinkle chopped hazelnuts over the top if desired.

Yield/Time
1 hour 15 minutes
Approximately 20 servings

Nutrition Facts
372

Note:
You can make double layer (for a VERY LARGE GROUP): make 2 cakes, then when both are cooled place one cake upside down on serving tray. Spread layer of frosting over the top, then place second cake on top. (Makes a sphere-like cake.) Drizzle frosting over top as directed.


Source (for original): Chef in Training

Monday, March 20, 2017

Cranberry Cream Cheese Muffins/Bread

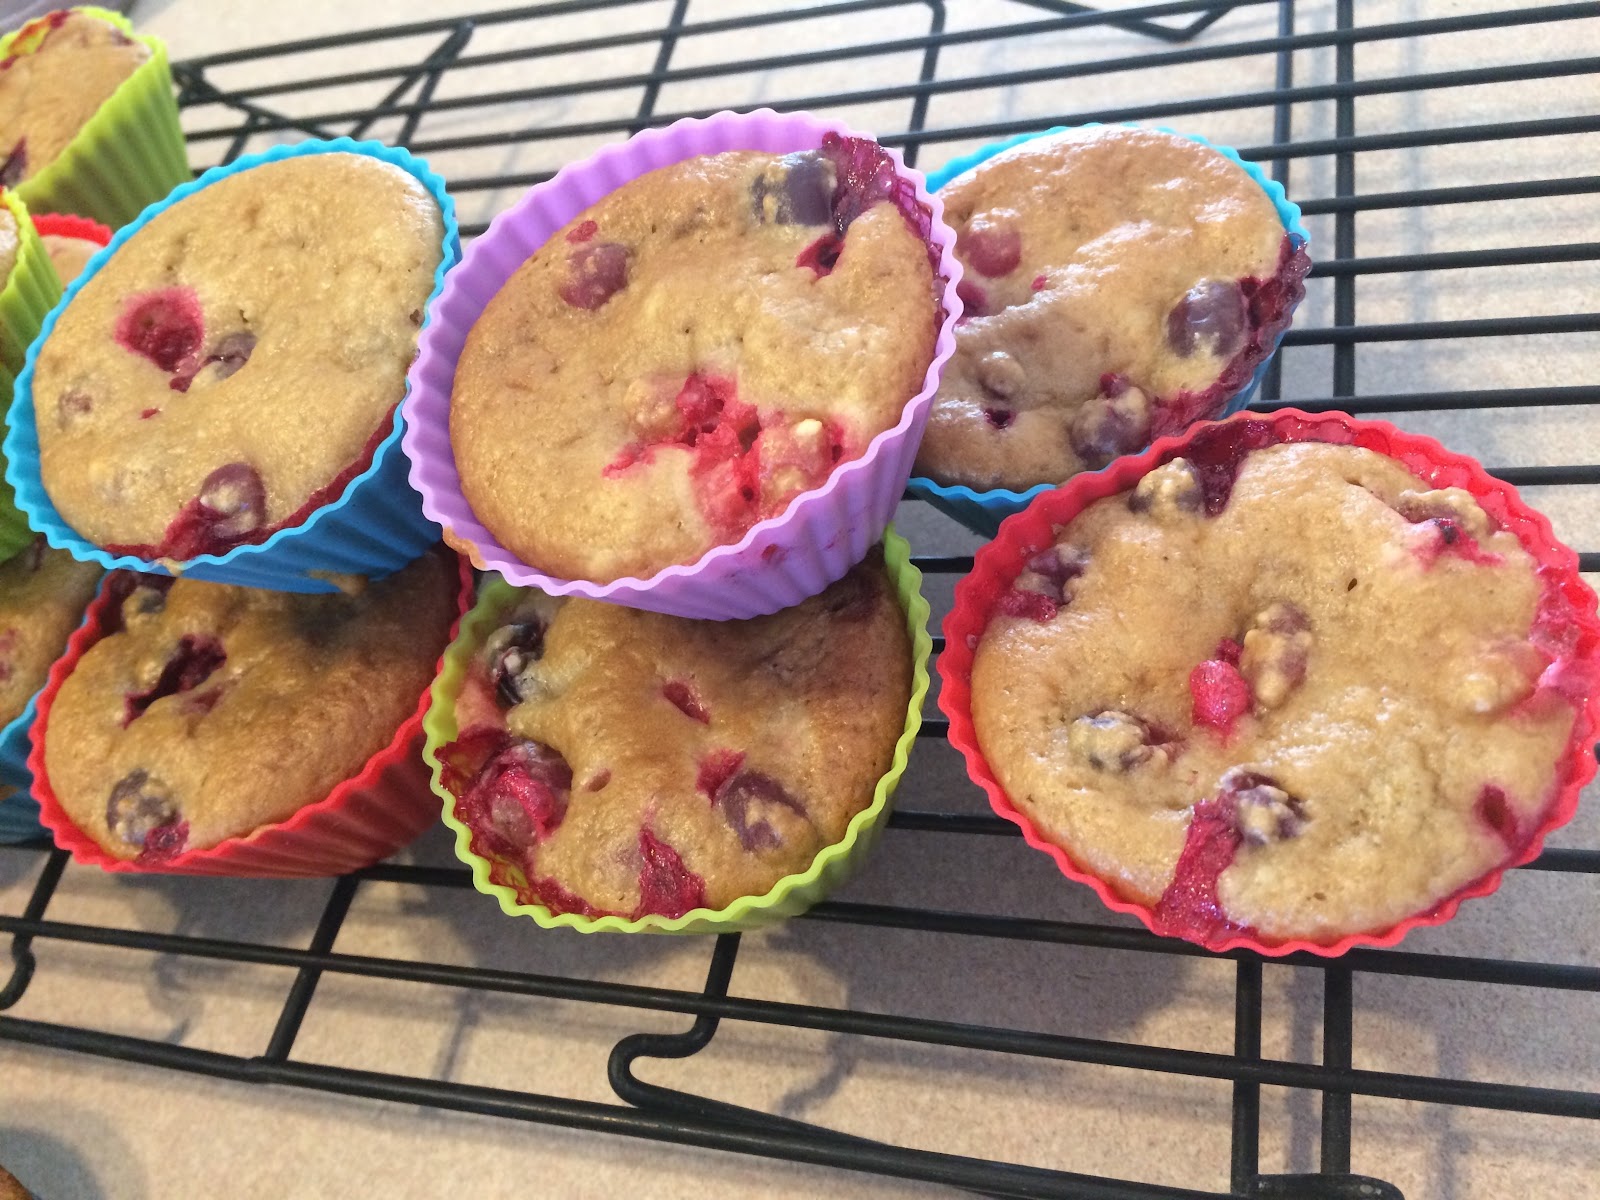
I've had a lot of cranberries in my freezer for awhile, just waiting to be made into something yummy. Problem is, I couldn't decide what. So, I was searching Pinterest yesterday, and I found a recipe I'd pinned but hadn't made yet. (Shocker.) I decided that these needed to be made into muffins!

And wow, was this a hit. They are not overly sweet, I did try to make them slightly healthier (thus the applesauce vs using butter), but the boys devoured them. Gabriel ate 3 or 4... after eating 2-3 servings of dinner. Adrian only ate 1, but again, that was right after dinner!

If you are looking for a fairly healthy snack/breakfast, this is it! 

Remember, comments are loved! What's your favorite use of cranberries?

Cranberry Cream Cheese Muffins/Bread

Ingredients
  • 8 ounces cream cheese, softened
  • ⅔ cup brown sugar
  • ¼ cup sugar
  • 1 cup unsweetened applesauce
  • 4 eggs
  • 1 ½ teaspoons vanilla
  • 2 cups flour
  • 1 ½ teaspoons baking soda
  • ½ teaspoon salt
  • 2 cups cranberries

Directions
  1. Preheat oven to 350° (for bread) or 375° (for muffins). Lightly grease 2 loaf pans or lightly grease/line with muffin liners 24 muffin tins. 
  2. Cream together cream cheese, sugars, and applesauce. Slowly add in eggs and vanilla; mix until combined.
  3. In a separate bowl, mix together flour, baking soda, and salt. Slowly add to cream cheese mixture just until combined. Stir in cranberries.
  4. Spoon into prepared muffin liners or loaf pans. For muffins, bake for 18-25 minutes or until toothpick inserted in center comes out clean. For bread, bake for 60-70 minutes, or until toothpick inserted in center comes out clean. 

Yield/Time
24 muffins, 2 loaves of bread (12 slices each)
*Note: bread has not been tested, I've only made muffins!
45 minutes (muffins), 1 ½ hours (bread)
Nutrition Facts *I calculate nutrition facts for reference only, this is not done scientifically
114

Source (for original): 12 Tomatoes

Friday, February 3, 2017

Strawberry Swiss Cake Roll

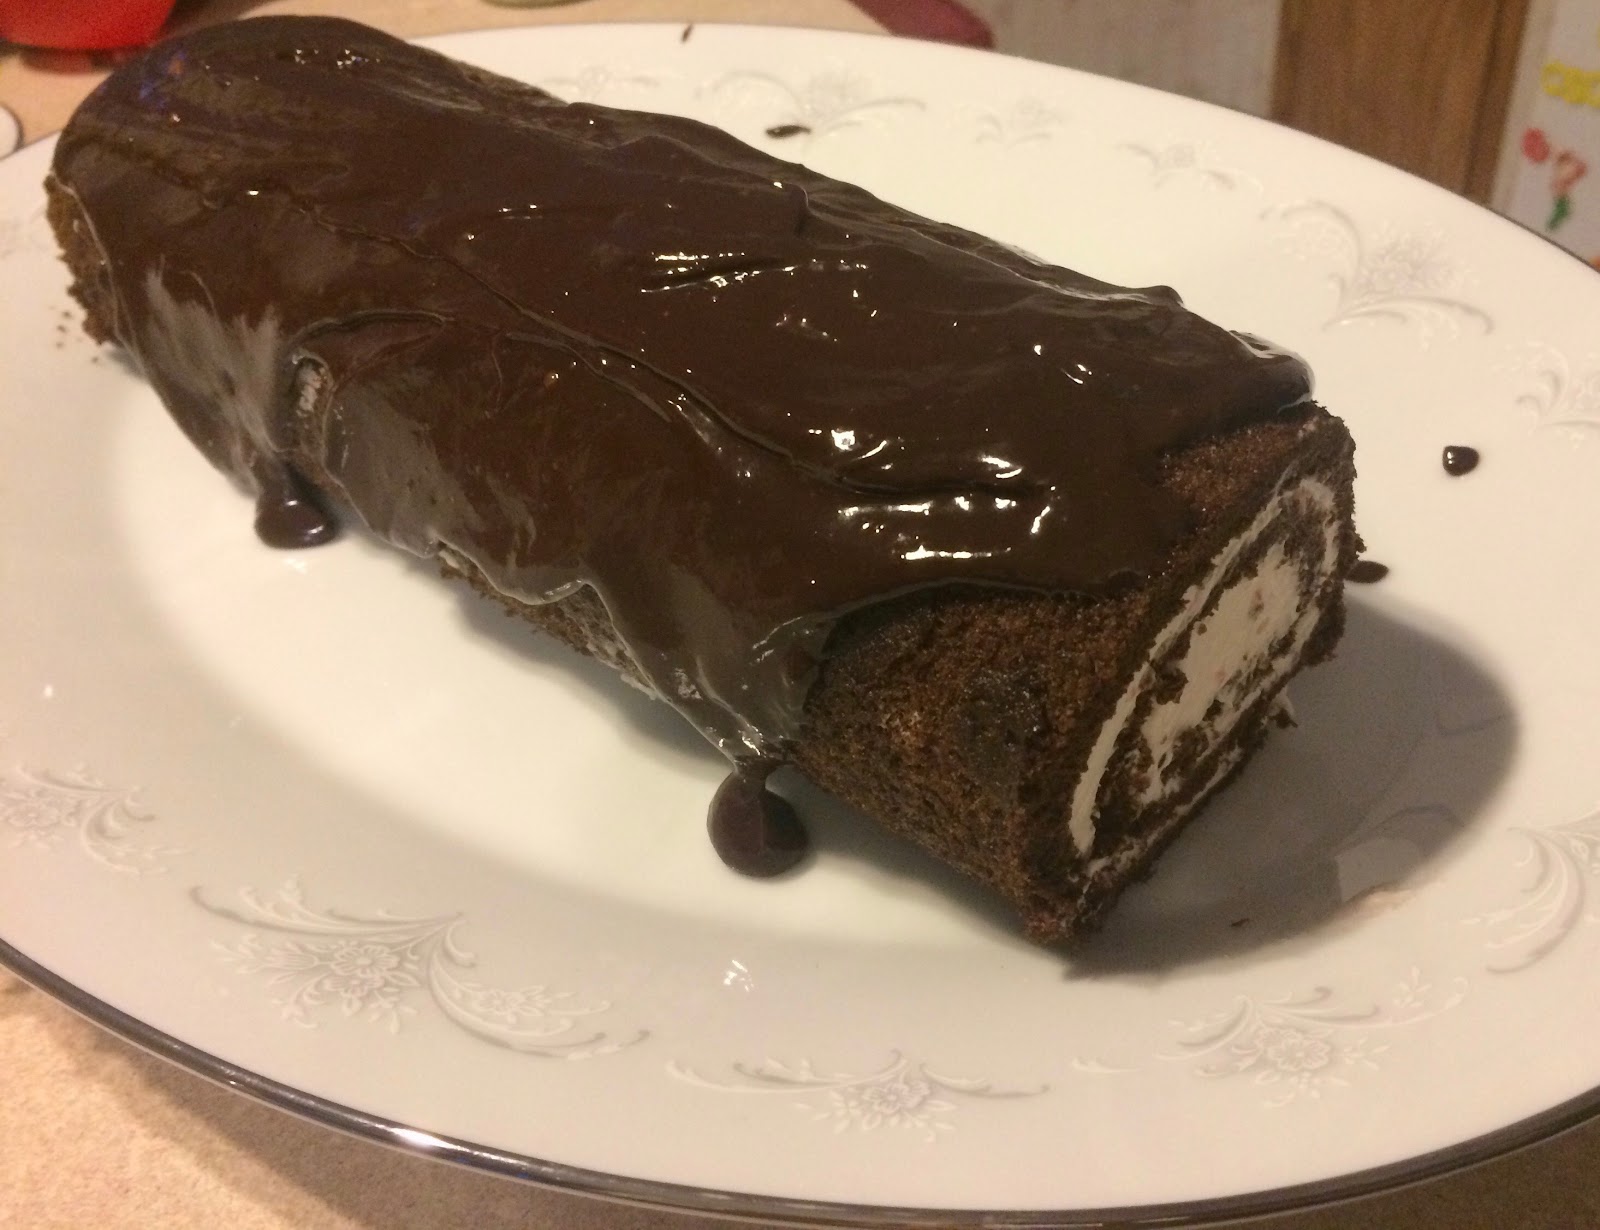
Let me preface this post by saying I'm not really a fancy kinda girl. (And now I have "Fancy" by Reba going in my head!) I'm a hillbilly, and quite happy about it. Once in a while though, I have the desire to try something that's fairly fancy. 

I've never made any "roll" before. No pumpkin roll, etc. However, I got silicon mats recently (some just before Christmas, and more for Christmas) and I thought that would make it easier, so.... I jumped out of my box. 

And whoa, was it worth it. This swiss cake roll is heavenly. You can use any freeze-dried berries or fruit, so you can change the flavor as desired. (I found strawberries at Aldi's, so that's what I went with.) Personally, I think that it could use more strawberry flavor, but that's a preference thing. 

I do think the use of silicon mats made this process much easier than without. If you don't have any, sub parchment paper in the pan and a clean towel for after the cake is done. 

Comments are loved! What's your favorite "fancy" dessert?

Printable Recipe
Strawberry Swiss Cake Roll


Ingredients
For the batter:
  • 4 eggs, separated
  • ½ cup + ⅓ cup sugar, divided
  • 1 teaspoon vanilla
  • ½ cup flour
  • ⅓ cup cocoa powder
  • ½ teaspoon baking powder
  • ¼ teaspoon baking soda
  • ⅛ teaspoon salt
  • ⅓ cup water
For the Filling:
  • ½ cup freeze dried strawberries, crushed finely
  • 8 ounces cream cheese, room temperature
  • ½ teaspoon vanilla
  • pinch of salt
  • 1 cup powdered sugar, divided
  • 1 cup heavy whipping cream
For the Ganache:
  • 3 ounces semi-sweet chocolate chips
  • 6 tablespoons heavy whipping cream
For the Topping, optional:
  • Redi-whip or cool whip
  • fresh strawberries, chopped

Directions
For the cake:
  1. Preheat oven to 350°. Line a 10”x15” jelly roll pan with a silicon baking mat and grease heavily.
  2. In a mixing bowl, beat egg whites until soft peaks form. Slowly add in ½ cup sugar and beat until stiff peaks. Beat for 3 minutes, then add remaining ⅓ cup sugar and vanilla. Beat for 2 more minutes.
  3. In a separate bowl, mix flour, cocoa powder, baking powder, baking soda, and salt together. Alternately add flour mix and the ⅓ cup water to a large bowl with the egg yolks. When thoroughly mixed, fold the batter into the egg whites a little at a time.
  4. Spread batter into the prepared pan and bake for 12-15 minutes until toothpick come back clean and cake springs back when lightly touched.
  5. Meanwhile, coat a silicone baking mat with powdered sugar.
  6. When the cake is done, immediately invert it onto the mat. Remove the first silicone mat, and then roll up the cake starting at the narrow end. Let it cool completely.
For the Filling:

  1. In a large mixing bowl using a whisk, beat heavy whipping cream and ¼ cup powdered sugar until stiff peaks form. Remove to a separate bowl.
  2. In a large mixing bowl, beat the cream cheese until smooth. Add in ¾ cup powdered sugar, strawberry powder, vanilla, and salt.
  3. Fold in whipped cream until combined.
  4. Carefully unroll the cake. Spread the filling evenly over the entire surface and then roll the cake back up.
  5. Place cake roll on a plate, cover with plastic wrap, and place in the fridge for at least 3 hours.
For the Ganache/Finishing:
  1. Heat the whipping cream in microwave for 45 seconds or until hot, then add the chocolate chips. Cover and let it sit for two minutes; stir until smooth. Let the ganache cool slightly before pouring and spreading over the cake.
  2. If desired, top with more redi-whip or cool whip and strawberries.
  3. Slice and serve. Store leftover cake in the fridge.

Yield/Time
12 servings
5 ½ hours (start to finish)
Nutrition Facts
324


Source (for original): Spend With Pennies

Wednesday, December 7, 2016

Gingerbread Cheesecake Dip

I've been doing a lot of gingerbread items this fall... It's not something I normally do, and I'm not always a big fan, but it's just SO Christmas! And, let's be honest-- I love baking for other people, and it makes other people happy for me to make gingerbread things!

I saw this, and thought it would be something easy and tasty. Not time consuming, so it wouldn't be too complicated to do in the morning. (Mornings have actually been easier for me lately... sometimes.) 

This dip is VERY gingerbread-y. If you aren't a fan of gingerbread, you probably won't like this--but, you should make it anyways. The gingerbread people in your life will love you for it!

Oh, and FYI- while some dips don't really need the time to 'set' in the fridge, this one does. I actually add more cool whip than the original recommends, because it seems too thin without it. (The taste is still very strong though, so don't worry about that!)

Printable Recipe
Gingerbread Cheesecake Dip

Ingredients

  • 8 ounces cream cheese, softened
  • ¼ cup brown sugar
  • ¼ cup powdered sugar
  • 3 tablespoons molasses
  • 1 teaspoon ground ginger
  • 1 teaspoon ground cinnamon
  • ¼ teaspoon nutmeg
  • 8 ounces Cool Whip
  • Graham crackers, animal crackers, etc. for serving
Directions

  1. In a large mixing bowl, beat the cream cheese until smooth, about 1 minute. Add the sugars and molasses; beat on medium speed until smooth and combined. Add the spices and mix until combined.
  2. Beat in the Cool Whip until combined.
  3. Transfer dip to a serving bowl and chill until ready to serve. Serve with graham crackers, animal crackers, etc. 
Yield/Time
Approx 4 cups (estimate)
15 minutes + cooling
Nutrition Facts *I calculate nutrition facts for reference only, this is not done scientifically
116/ ¼ cup (estimate)

Source (for original): Food, Folks & Fun

Monday, November 21, 2016

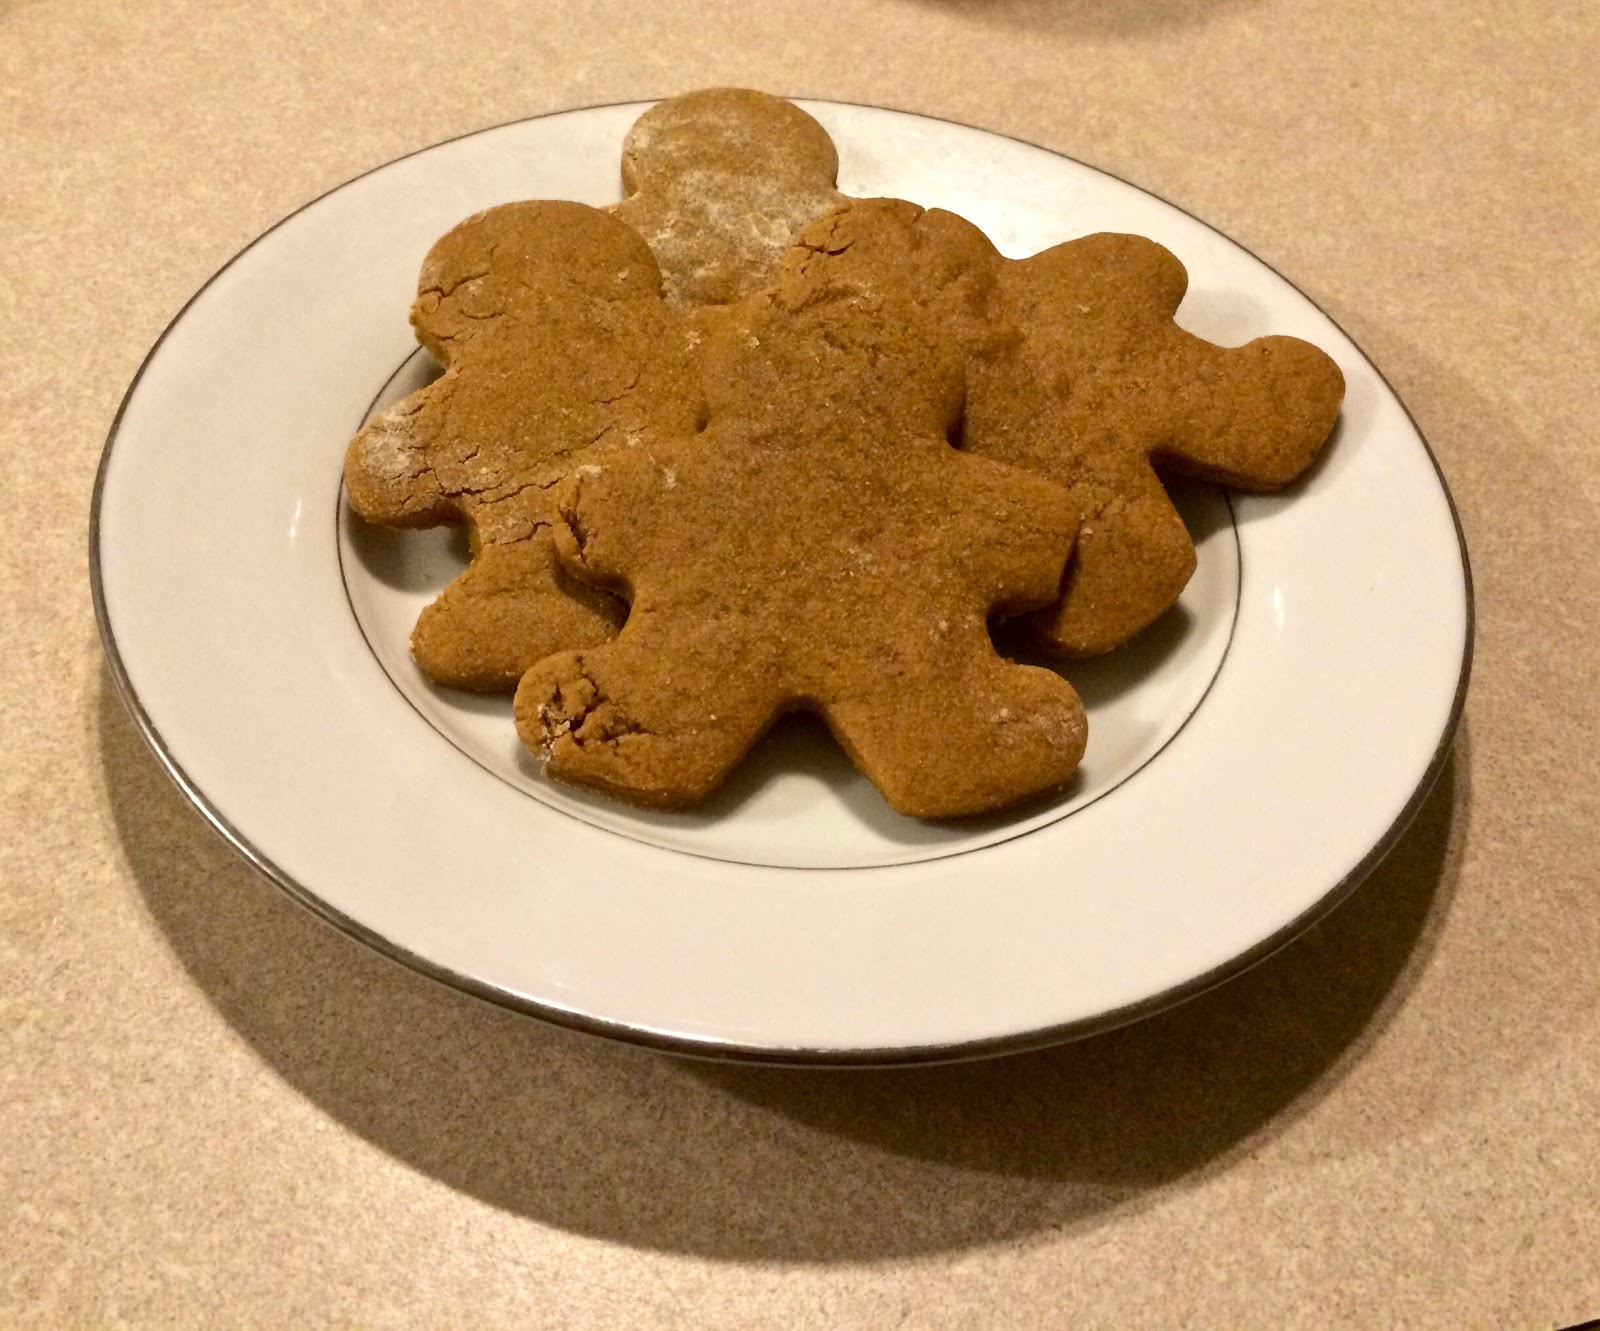
Gingerbread Cookies

I am, in general, not a fan of gingerbread cookies. I can have one or two, but they are not my thing. Nate is usually a fan though, and I like to try to do the "typical" seasonal things. I have a recipe that I've made before, but these are slightly different. Also, those are the ones I made for my mom to use on her advent calendar.... and there's something about the fact that they can last for years that throws me off. Time for a new, different recipe! :)

These, as advertised on the blog I got them from, don't spread. I like that about them. I was iffy to use butter, in my experience it tends to cause more issues than using Crisco, especially with spreading. (I know I've talked about my love for Crisco before.)  However, I am pretty fond of these. I think the lack of baking powder/baking soda helps, too. 


They are fairly crunchy, but soften a lot if you add frosting. Frosting is totally optional, though!

Remember, comments are loved! Tell me about your favorite gingerbread recipes & ideas!


Printable Recipe

Gingerbread Cookies

Ingredients
  • 6 tablespoons unsalted butter, room temperature
  • ¾ cup brown sugar
  • 1 large egg
  • ½ cup molasses
  • 2 teaspoon vanilla
  • 3 cups all-purpose flour
  • ½ teaspoon salt
  • 1 tablespoon ground ginger
  • 2 teaspoon ground cinnamon
  • ¼ teaspoon ground cloves

Directions
  1. Preheat the oven to 375°. Line a baking sheet with parchment paper. 
  2. In a large mixing bowl, cream the butter and sugar together. Do not overmix. Add the egg, and mix until incorporated.
  3. Add the molasses, and vanilla; mix just until incorporated.
  4. Whisk the flour, salt, and spices together in a separate bowl. Slowly mix in the flour mixture.
  5. Roll the dough out on a lightly floured surface, to ¼" thickness. Place on prepared baking sheet, and bake for 8-9 minutes.

Yield/Time
Approximately 27 cookies
45 minutes
Nutrition Facts
110

Source (for original): The Kitchen Paper


Cream Cheese Icing

Ingredients
  • 4 ounces cream cheese, softened
  • ¾ cup powdered sugar
  • 2-3 tablespoons milk

Directions
  1. In a large mixing bowl, mix together the cream cheese, powdered sugar, and milk to desired consistency. 
  2. Spread over cookies. 

Yield/Time
5 minutes
Nutrition Facts
20/cookie


Source (for original): Love Grows Wild

Wednesday, November 16, 2016

Cheesecake Crescent Bars

Most of my dessert recipes, my husband doesn't really care about. I bake desserts at least once or twice a week, so I guess he gets tired of them. (I don't understand that, but hey. I try not to judge.)

However, there are a few recipes in my book that he LOVES. Traditional cheesecake (no picture, so no blog post on that yet), Irresistible Peanut Butter Cookies, and this! Nate always approves when I make these! I would make them more often, but the main problem is that I don't keep crescents in the house unless I have a particular recipe I am going to use them for. I am not a big fan (of the crescents, not this! I love this!), so I don't buy them that often. I think I need to work on that... Nate puts up with all my crazy baking, I should try to make his favorites more often. ;)

On to the actual bars... these are perfect, cream cheese gooeyness right out of the oven, or perfect once they are cool & have been put in the fridge! I honestly don't have a favorite... I take them either way! Once they are cool they are slightly more irresistible, though... Warm and gooey it's easy to just eat a few. Cool.... not so easy. ;)

Remember, comments are loved! What's your favorite cream cheese style dessert?

Cheesecake Crescent Bars

Ingredients
  • 2 cans crescent rolls
  • 16 ounces cream cheese, softened
  • 1 cup sugar
  • 1 ½ teaspoon vanilla
  • ¼ cup butter, melted
  • ¼ cup cinnamon & sugar (approximate)

Directions
  1. Preheat oven to 350°. Lightly grease a 9”x13” baking dish.
  2. Unroll and spread one can of crescents on the bottom the prepared baking dish. In a medium bowl, combine cream cheese, sugar, and vanilla. Spread over crescents in baking dish. 
  3. Unroll and layer remaining crescents over cream cheese layer. Spread butter on top of crescents; sprinkle generously with cinnamon & sugar.
  4. Bake for 20-30 minutes or until browned & bubbly.

Yield/Time
Approximately 28 bars
30 minutes
Nutrition Facts
155/bar

Source (for original): my mom, I have no idea where she got this!

Wednesday, October 12, 2016

Nutella Pie

You guys know about my love for Nutella. My serious, unending love for Nutella. So, when I saw a recipe for no-bake Nutella pie as I was looking for things to make for family Christmas... I decided to just adapt my peanut butter pie recipe for Nutella!

I posted earlier in the week about the Peanut Butter Pie. This Nutella Pie is very similar--if you look, there are only very minor differences. I cut down on the milk--the consistency of Nutella is thinner than peanut butter, so that was a needed change. Even with that it's a bit thinner than I wanted, so beating it just a bit extra helps.

This is just as great as the peanut butter... but satisfies my Nutella cravings. ;)

Printable Recipe
Nutella Pie
Ingredients
  • 1 graham cracker pie crust
  • 8 ounces cream cheese (softened)
  • ¾ cup powdered sugar
  • 1 cup Nutella
  • 2 tablespoons milk
  • 8 ounces Cool Whip

Directions
  1. Beat together cream cheese, powdered sugar, Nutella, and milk. Beat together for a minute or two, until thickened. Fold in Cool Whip. 
  2. Spread into graham cracker crust. 
  3. Refrigerate for 2 hours or until firm. Refrigerate again after serving. 

Yield/Time
1 pie (12 small pieces or 8 regular)
Nutrition Facts *I calculate nutrition facts for reference only, this is not done scientifically
350 (12 pieces), 525 (8 pieces)

Source (for original): longtime friend