PinIt!

Showing posts with label Dessert. Show all posts

Monday, May 8, 2017

Funfetti Dip

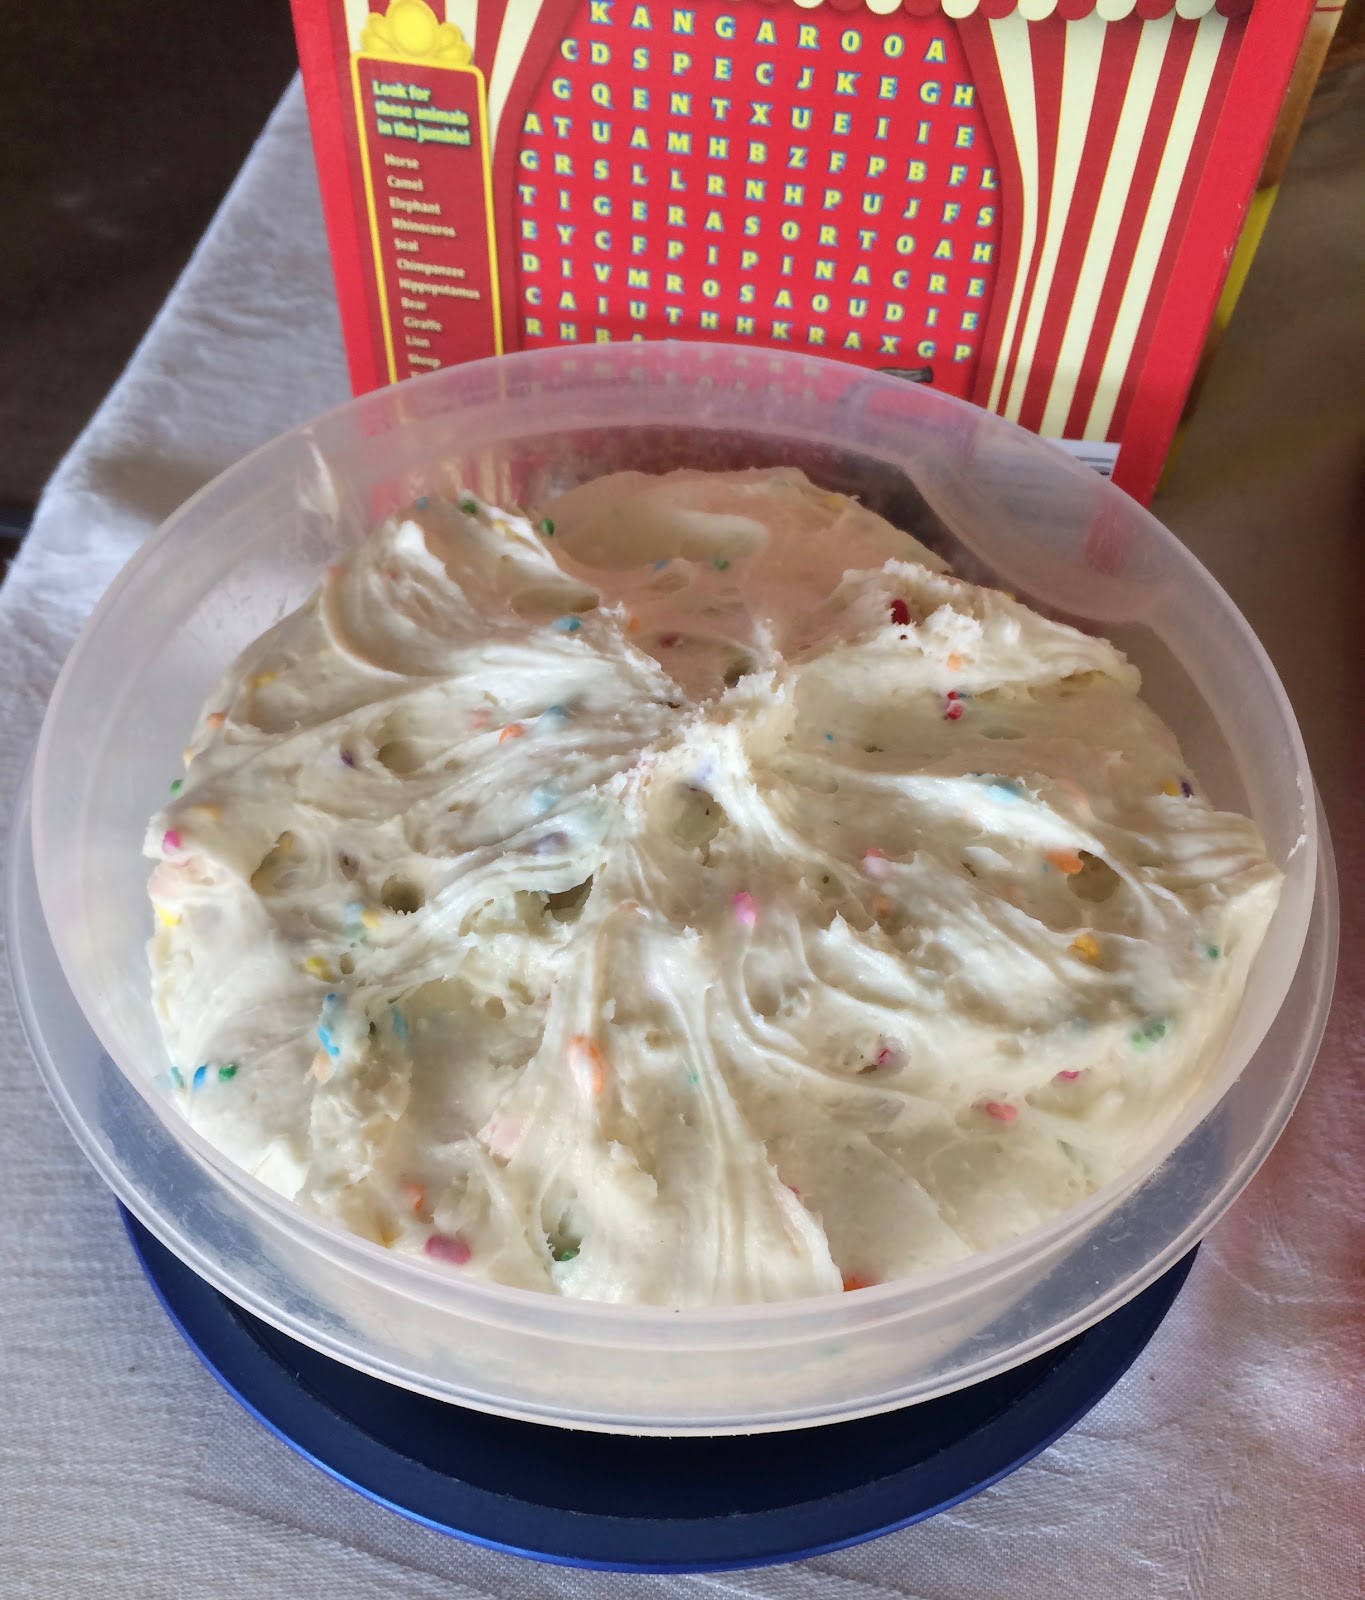
Do you remember the old Dunkaroo dips? They had little graham crackers, and vanilla frosting with sprinkles. I couldn't get my mom to buy them very often, but I loved those things. So, when I stumbled across something that claimed to taste like it... I jumped on that. 

I will say that this funfetti cake mix dip isn't QUITE how I remember the Dunkaroo dips tasting, but it's pretty close. Close as I'm going to get, at least.

Unless someone happens to be going to Canada and wants to bring me back some... because apparently those things are still available in Canada. It might be the pregnancy hormones talking, but I am seriously tempted to order some. (But, the least expensive is $8 for a 5 pack... I think I'll have to refrain. I don't think Nate would be understanding of that...)

Anyways, back to the dip: this stuff is GOOD. It does make a ton though, so unless you are feeding a crowd and can pawn the leftovers off on someone, I really recommend cutting the recipe in half.

Remember, comments are loved! What's your favorite childhood treat that you like to remake?

Printable Recipe
Funfetti Dip

Ingredients
  • 1 box Funfetti Cake Mix
  • 16 ounces cream cheese
  • 8 ounces cool whip
  • Extra sprinkles, if desired

Directions
  1. Mix all ingredients together. Add more cool whip until desired consistency is reached. 
  2. Add extra (seasonal) sprinkles, if desired.

Yield/Time
Approx 50 servings
5 minutes
Nutrition Facts
75/servings

Source (for original): Finding Our Way

Monday, May 1, 2017

Dirt Cake

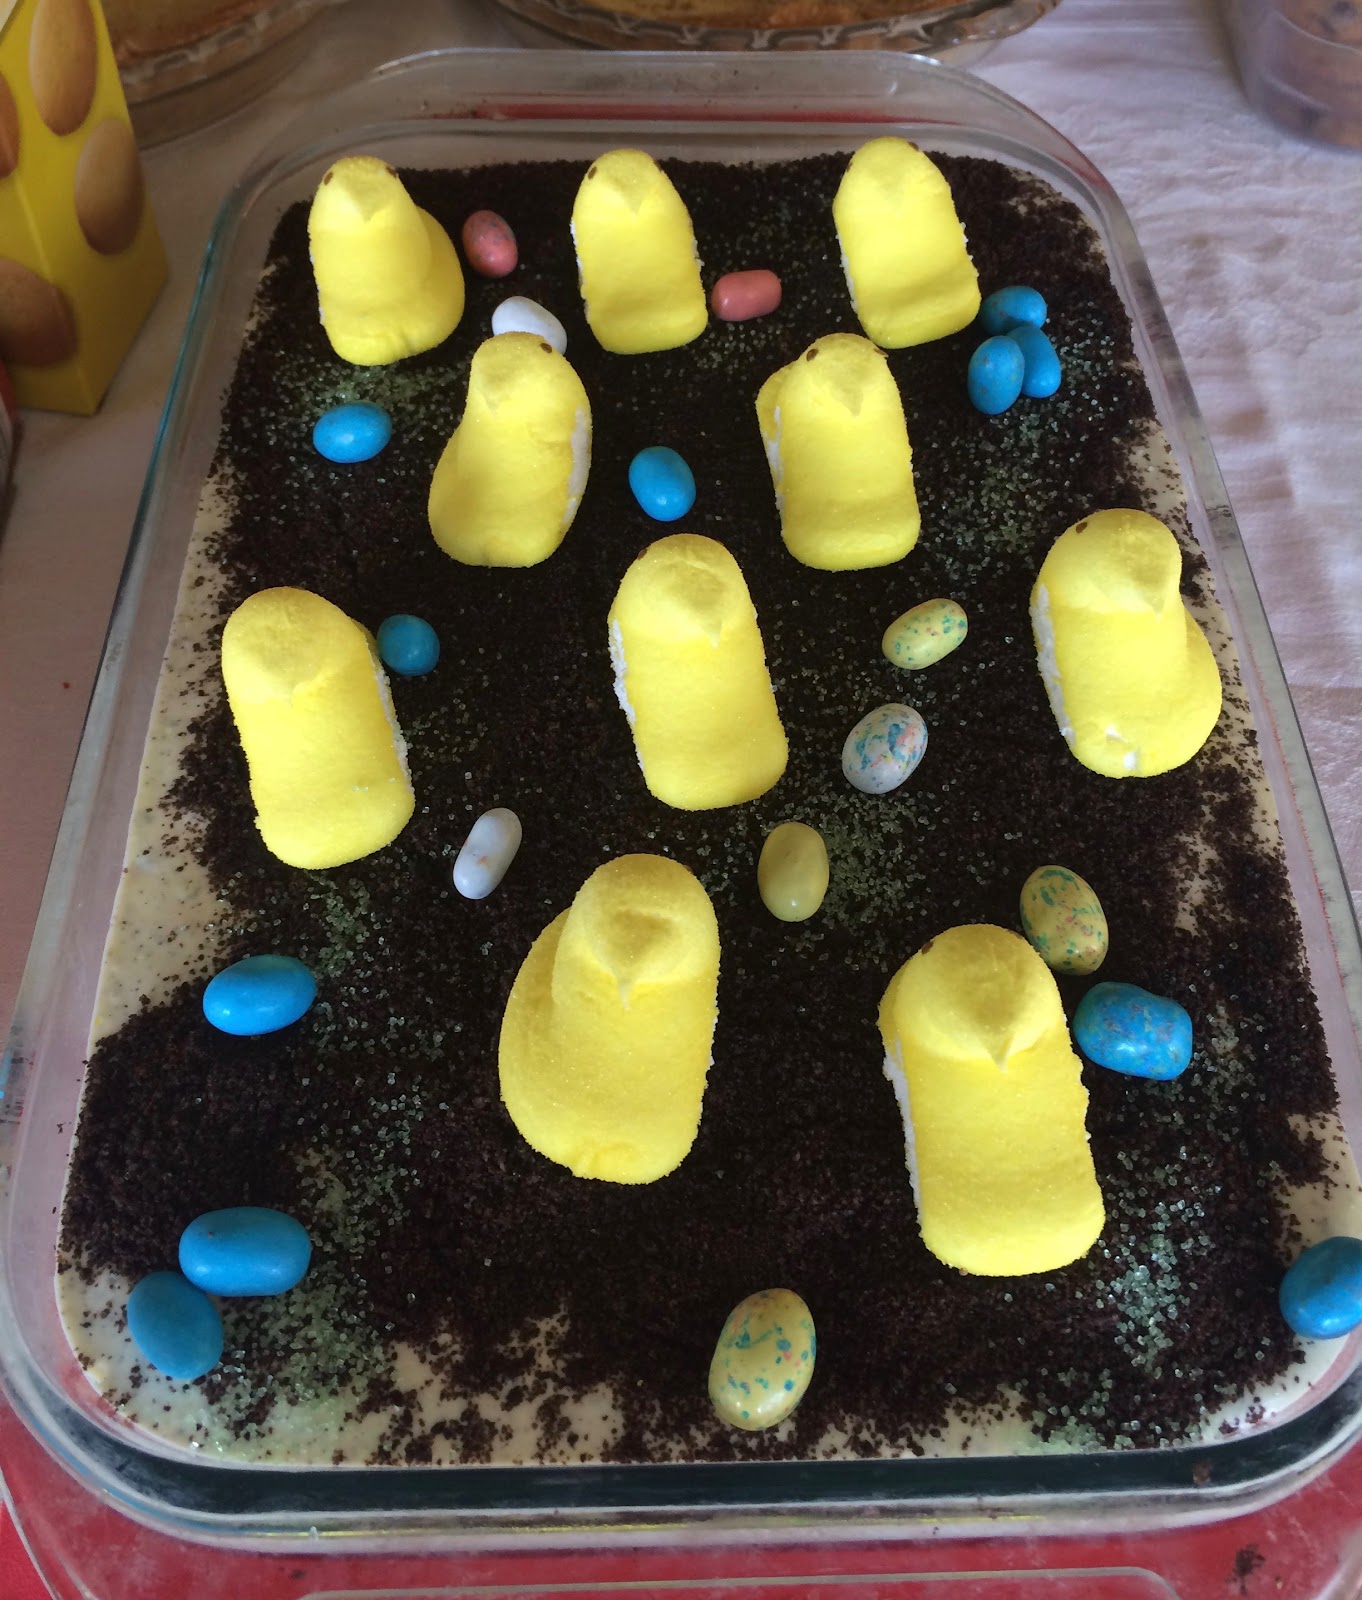
I've tried different type of dirt dessert recipes over the years, but I've never been fully satisfied with one I've found... til now.

This is perfect. I seriously wouldn't change anything about this recipe! (Well, except for the calorie content...) If you really wanted to cut down on the calories, you could try cutting out some of the Oreos, using light cream cheese, skim milk, etc. However... this is worth the calories. 

I made this for Easter with my extended family (thus the Peeps, eggs, and green sprinkles), but you really don't need to decorate it unless it's for a holiday. I'm considering making this again soon just for a random Wednesday or something. Or possibly just because baby says it sounds good. ;) 

Remember, comments are loved! Do you have a favorite dirt dessert recipe?

Printable Recipe

Dirt Cake

Ingredients
  • 1 & ⅓ package Oreos, separated
  • 8 ounces cream cheese, softened
  • ½ cup butter, softened
  • 1 cup powdered sugar
  • 16 ounces cool whip
  • 2 small boxes instant vanilla pudding
  • 3 cups milk
  • 1 teaspoon vanilla
  • Decorations (ex: including bunnies and edible grass for Easter)

Directions
  1. Finely crush 1 package Oreos, place ⅔ in the bottom of a 9” x 13” pan. Set aside.
  2. Separately, crush ⅓ package Oreos into small chunks and set aside.
  3. Mix cream cheese and butter until smooth. Mix in powdered sugar, and fold in whipped topping and small chunks of Oreos. Set aside.
  4. In a separate bowl mix pudding, milk and vanilla. Fold this mixture in with the cream cheese mixture.
  5. Pour over crumb mixture in pan, then sprinkle with the reserve finely crushed Oreos. Let set for a few hours and keep refrigerated until ready to serve.

Yield/Time
16 servings
20 minutes + cooling time
Nutrition Facts
431/serving

Source (for original): Lil Luna

Monday, April 17, 2017

Nutella Bundt Cake

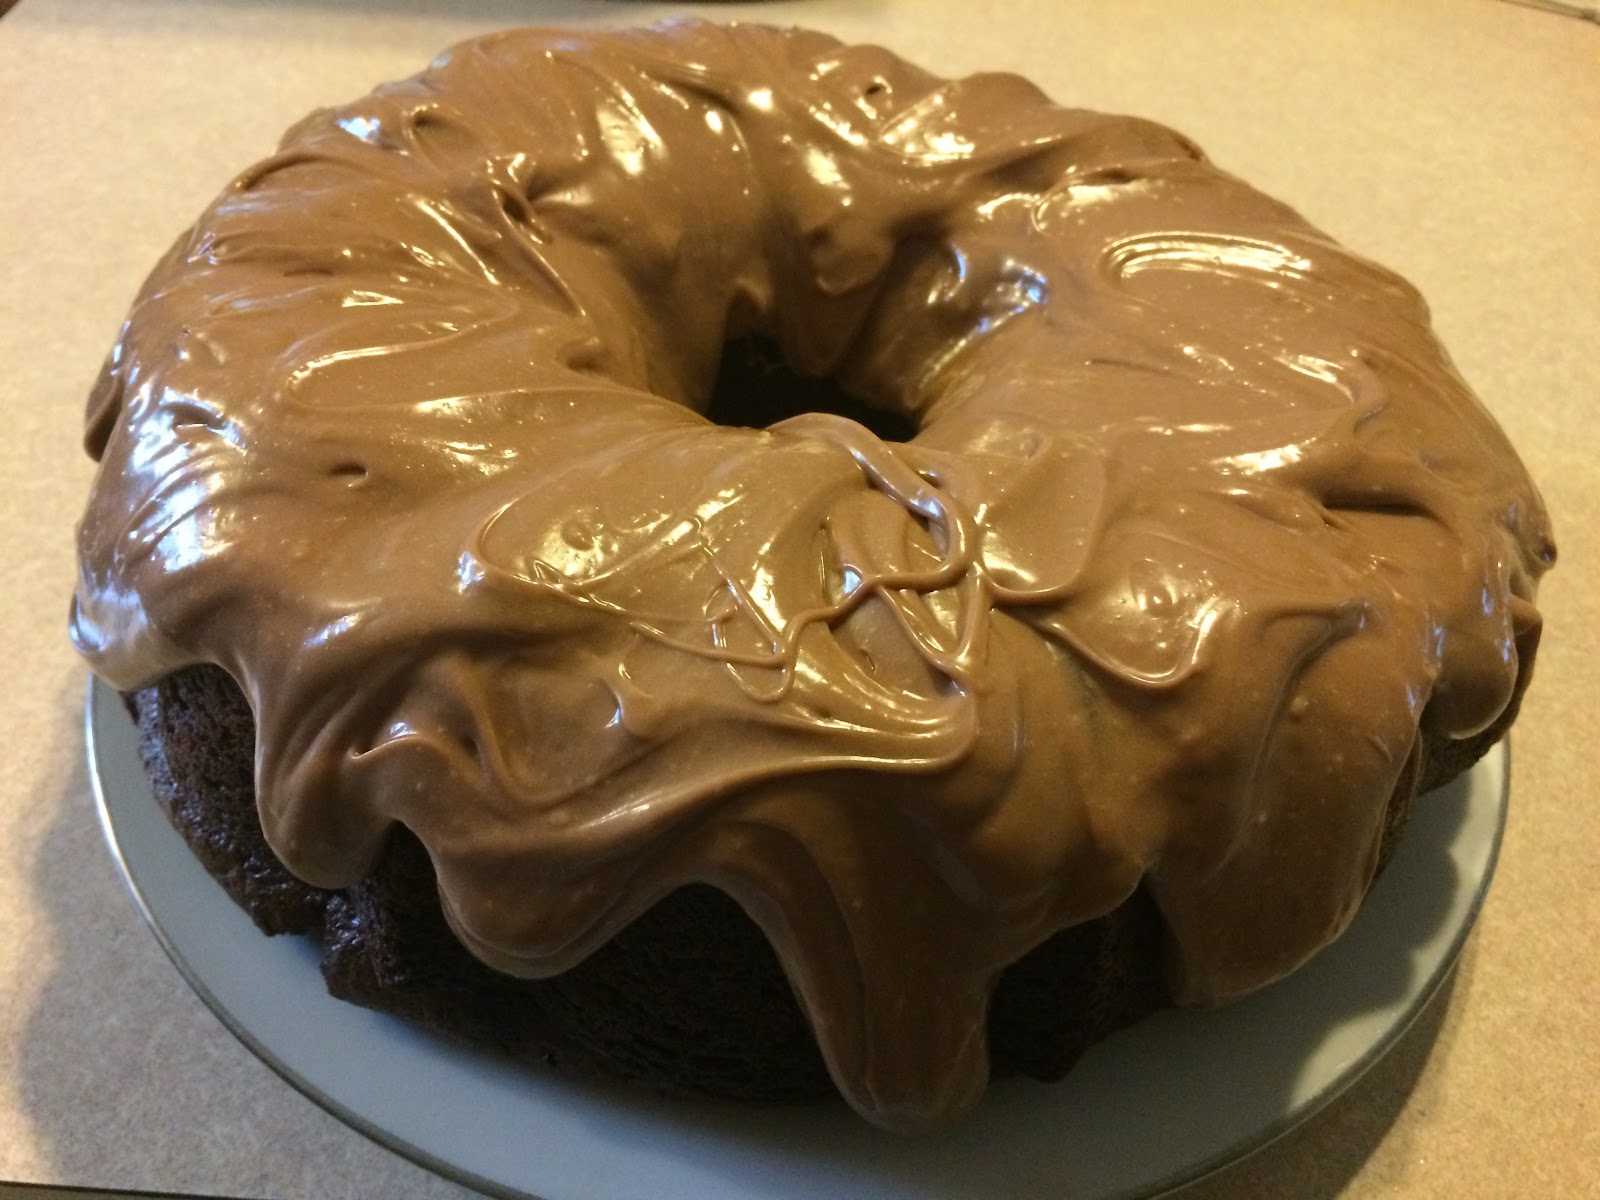
You all should know of my love for Nutella; I've spoken about it a lot. It might even be considered an addiction, at times. I have no regrets, though. (Ok, well, this is pregnant me talking, not trying-to-lose-the-baby-weight me.) I even got my grandma going on it, although I still think that's her own fault. (Really! We went down to Florida to visit them, and she bought TWO jars for the week we were there. Her reasoning is that they were buy one get one free. So, this pregnant lady ate a lot of Nutella that week, and of course Grandma had some too!) 

I've made this Nutella Bundt Cake a couple times, and it is always a HUGE HIT. Even before it gets into the oven, because I practically lick out the bowl for both the cake and the frosting. ;) It's very rich, but not so rich you can't eat a really big piece. Or two.  OK, maybe I'm the only one who could eat two, but baby LOVES Nutella. It makes her happy.

Anyways, back to the cake... this was my contribution to Easter dinner yesterday, and the reason Mama always lets me make desserts for everything. It was, of course, a huge hit. I recommend making it for any and all upcoming occasions, because everyone loves it. And that's without even getting into JUST how easy this is. You literally just mix all the cake ingredients together for a few minutes, then pour into a well-greased bundt pan and bake it. The frosting is just as easy-- mix the 3 frosting ingredients together for a few minutes, then spread over the cake. Delicious, easy, and a crowd pleaser!

Remember, comments are loved! What's your favorite Nutella dessert?

Printable Recipe

Nutella Bundt Cake

Ingredients
Cake:
  • 1 box chocolate cake mix (Devils food)
  • 1 small box chocolate pudding mix (3.9 ounces)
  • ½ cup Sour Cream
  • ½ cup Nutella
  • ¾ cup Oil
  • ¾ cup Water
  • ½ cup Sugar
  • 4 Eggs
  • 1 teaspoon Vanilla

Frosting:
  • 8 ounces cream cheese, softened
  • 2 cups powdered sugar
  • ¼ cup Nutella
  • chopped hazelnuts for garnish, optional

Directions
  1. Preheat oven to 350°, heavily grease a large bundt pan.
  2. In a large bowl, mix all cake ingredients together for 3 minutes on high. Pour into pan.
  3. Bake for 45-50 minutes or until a toothpick comes out clean. Let sit in pan for 5 minutes, then invert onto a cooling rack.
  4. While cake is cooling make frosting: In a medium bowl combine cream cheese, powdered sugar, and Nutella; beat on high until creamy.
  5. Scoop frosting into a large ziplock bag and cut a hole in the corner of the bag, or use a piping bag with a large round tip. (Or, do what I do, and just spread it over til it looks kinda pretty.)
  6. When cake is completely cooled, pipe the frosting over the cake in a back and forth method. Sprinkle chopped hazelnuts over the top if desired.

Yield/Time
1 hour 15 minutes
Approximately 20 servings

Nutrition Facts
372

Note:
You can make double layer (for a VERY LARGE GROUP): make 2 cakes, then when both are cooled place one cake upside down on serving tray. Spread layer of frosting over the top, then place second cake on top. (Makes a sphere-like cake.) Drizzle frosting over top as directed.


Source (for original): Chef in Training

Monday, April 10, 2017

Easter Oreo Bark

Easter is coming up shockingly fast. The whole month of March, I kept telling myself I had lots of time for Easter goodies, none of that is til after our vacation anyways...

Well, we've been back for a week, and Easter is next week. Time to get on top of it! I'm still planning my contributions to Easter dinner with the family, but I wanted to get a few fun goodies for the kids going.

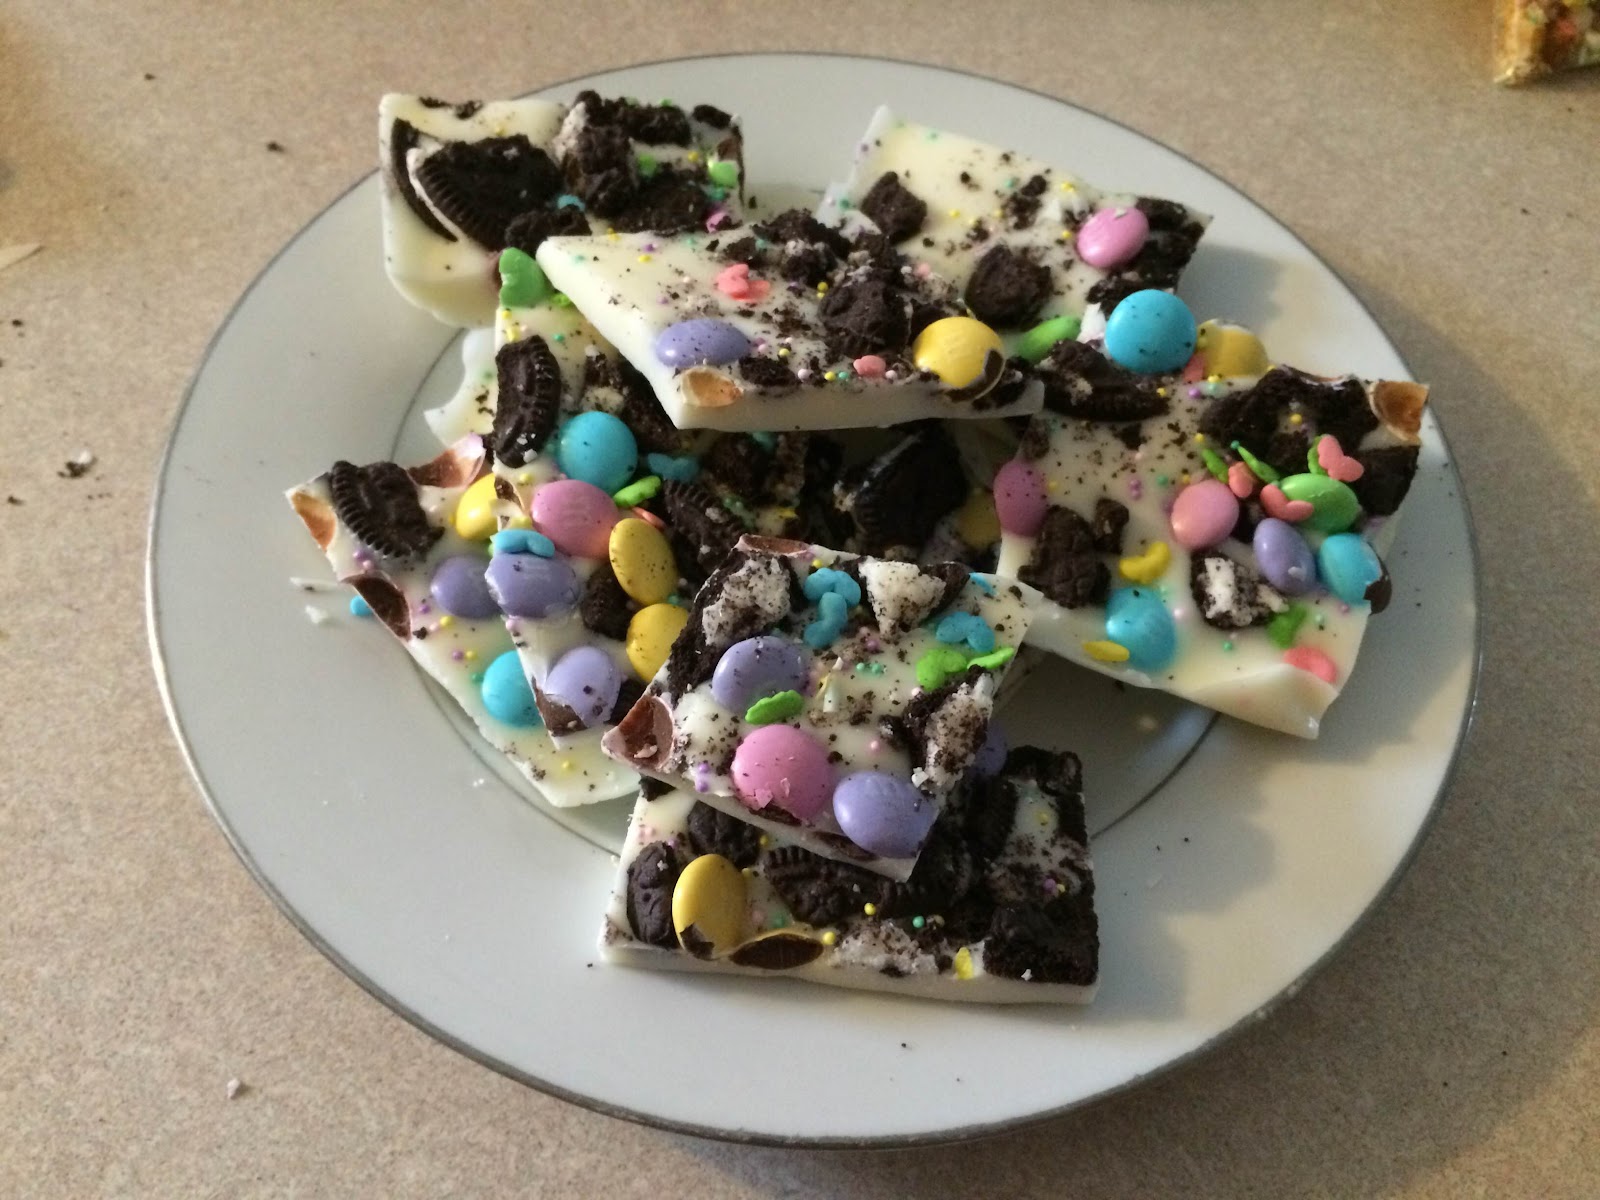
I have a couple things that are fun for the boys to make-- Easter Marshmallow Bark, and Easter Oreo Bark. (Similar... kinda.) I know my mom really enjoys things similar to the oreo bark, so I made that tonight as a thank you for some stuff she's done lately! I had two super cute helpers, too. They were both pretty excited, they love making things like this.

(This picture is actually from last year, when I didn't add peanuts.)

Oh, and FYI: All measurements are rough. I just add things until it looks like enough. ;) This is really something that you can just add whatever you have to, and it'll be yummy. I've done similar things subbing pretzels, Reese's Pieces... I can't even remember. Whatever I had handy!


Remember, comments are loved! (And show me that people are actually reading this.) What's your favorite Easter treat?

Printable Recipe
Easter Oreo Bark

Ingredients
  • 1 package vanilla candy coating
  • ¼ cup Easter/Spring M&Ms
  • 8 Oreos, crushed
  • Easter Sprinkles
  • ¼ cup peanuts (salted)

Directions
  1. Line a 13”x9” baking pan with aluminum foil. 
  2. Melt package of candy coating in double boiler, stirring frequently until all melted. Pour into prepared pan, spread thinly.
  3. Sprinkle on M&M’s, Oreos, sprinkles, and peanuts. Place in freezer for half hour. Break into pieces.

Yield/Time
30 pieces
1 hour
Nutrition Facts
107

Source (for original): Lil Luna

Monday, March 13, 2017

Reese's Pieces Chocolate Cookies

Originally posted 11/16/13, updated 3/13/17

I would say that it's fairly obvious that I love sweet things, whether you actually know me in person or even if you just read the title of my blog. I am a big fan of peanut butter/chocolate combos in particular. (Surprisingly, I don't like regular Reese's much. Not a fan of their peanut butter. Reese's Pieces, however, are an entirely different story.)

So when I saw a recipe for Reese's Pieces Double Chocolate Chunk Cookies on one of my favorite blogs, I had to try it! 

I made a few changes (as you can see by the title alone), but we love this recipe! You could easily sub different things for the peanut butter chips/Reese's Pieces.... but I am really not sure why you would want to. ;) I also had to play with the baking time/ingredients, as the cookies were great on day one but get hard & dry quickly. Once I made some changes, that solved the problem! (I don't know what they are like past day 3 now.... they never make it that long!)

One tip I would like to stress: Be careful not to overbake these! They will get harder faster if you do. Ovens vary, but I would check them at 10-11 minutes. Since I made the change to the ingredients, I would recommend trying for 11 1/2 - 12 minutes; but again, ovens vary. 

Enjoy!

These are my favorite cookies to bake--this is definitely my current go-to recipe!

Remember, comments are loved!

Printable Recipe

Reese’s Pieces Chocolate Cookies

Ingredients
  • ½ cup butter-flavored Crisco
  • ½ cup granulated sugar
  • ½ cup packed light brown sugar
  • 2 large eggs
  • ½ teaspoon pure vanilla extract
  • 1 ¼ cups all purpose Flour
  • ½ cup unsweetened cocoa powder
  • ½ teaspoon baking soda
  • 1 teaspoon cornstarch
  • ½ teaspoon salt
  • ½ cup peanut butter chips
  • ½ cup mini Reese’s Pieces *make sure you get Mini!!!*

Instructions
  1. Preheat oven to 350°.
  2. Place Crisco and sugars into a stand mixer, cream until well combined. Add eggs and vanilla, beating until well combined. 
  3. Slowly add flour, cocoa powder, salt, cornstarch & baking soda. Hand mix in peanut butter chips and Reese’s Pieces.
  4. Scoop dough (or form into balls) and place onto greased baking sheet. Bake for 11-13 minutes or until baked through. 
  5. Let cookies cool for 5-8 minutes before transferring to cooling rack. Serve and enjoy.

Yield/Time
2 dozen
Prep/total time: ½ hour

Nutrition Facts *I calculate nutrition facts for reference only, this is not done scientifically
146 calories each

Source (for original): Picky Palate

Monday, March 6, 2017

Double Chocolate Chip Cookies

So, first off, I have to apologize for the lack of posts lately... We found out we are having a girl (yay!), so I've been spending a lot of time in the evenings sorting boy clothes, getting it ready to sell, and then sorting the mountain of girl clothes I've bought. Between that, and being utterly exhausted... I haven't really been doing many new recipes. New ideas and taking photos requires energy that I just don't have! :) 

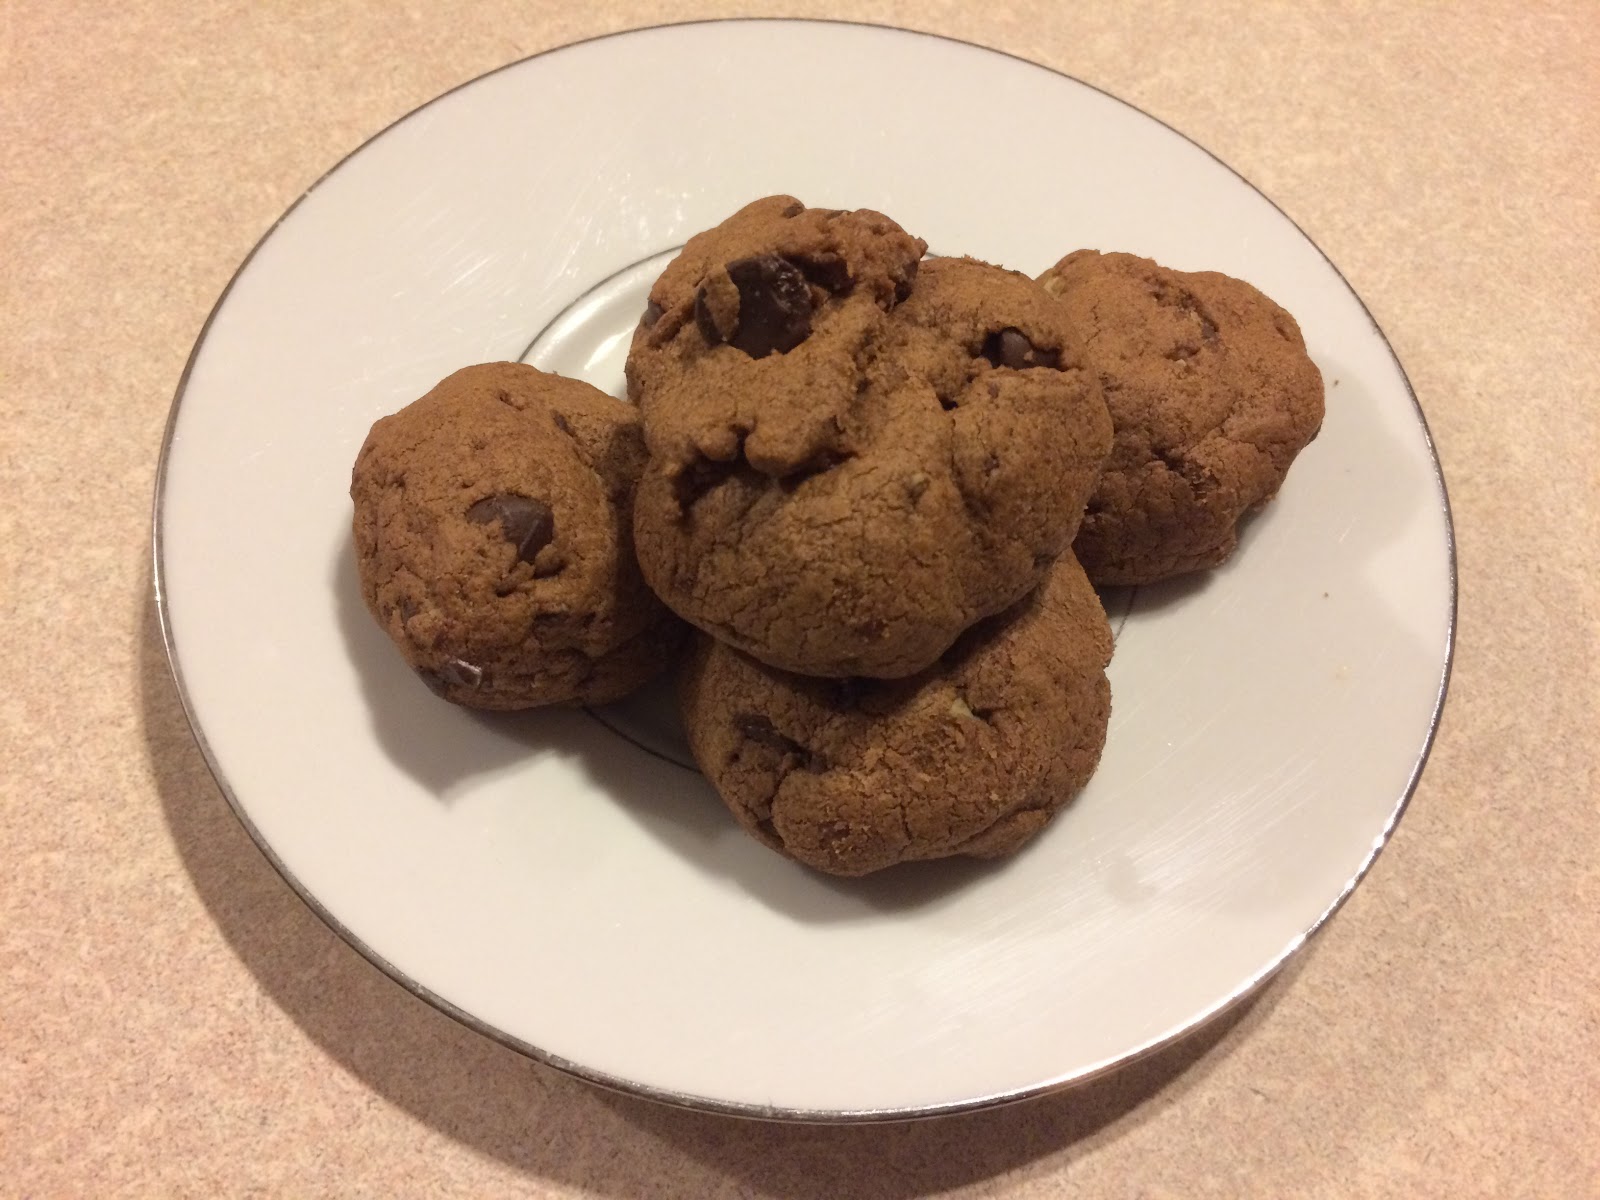
I did get some baking done this weekend, though...  I made this Sunday morning, before Nate & I had a fun date! Partly to 'pay' my mom for watching the boys... partly because I wanted chocolate. ;) 

I have a lot of variations on these cookies, and while these aren't always my go-to recipe, they are always a hit!

Remember, comments are loved! What's your favorite double-chocolate recipe?

Printable Recipe
Double Chocolate Chip Cookies

Ingredients
  • 1 cup cold, unsalted butter, cubed *note: these were made with Crisco, but I've made them both ways. While I am a Crisco girl generally... this time, I decided that they are better with butter.
  • 1 ¼ cups sugar
  • 2 large eggs
  • ½ cup cocoa powder
  • 2 ¼ cups all-purpose flour
  • ¼ teaspoon salt
  • 1 teaspoon baking powder
  • 1 teaspoon cornstarch
  • 2 ½ cups semi-sweet chocolate chips *This time, I only used 1 1/2 cups chocolate chips, the other half was Andes chips! They were great!

Directions
  1. Preheat the oven to 350°. Line baking sheets with parchment paper or silicone baking mats.  In the bowl of an electric mixer, combine the butter and sugar.  Beat together on medium-high speed until light and fluffy, 2-3 minutes.  Blend in the eggs one at a time, scraping down the bowl as needed.  Mix in the cocoa powder until well blended.
  2. Add the flour, salt, baking powder, and cornstarch to the bowl and mix on low speed just until incorporated.  Fold in the chocolate chips with a spatula. (The dough is very thick.)
  3. Roll into small balls, and place on baking sheets a few inches apart. Flatten slightly. 
  4. Bake 12-16 minutes.  Let cool on the baking sheets 5-10 minutes, then transfer to a wire rack to cool completely.

Yield/Time
3 ½ dozen cookies
1 hour
Nutrition Facts
153

Source (for original): Love from the Oven

Friday, February 3, 2017

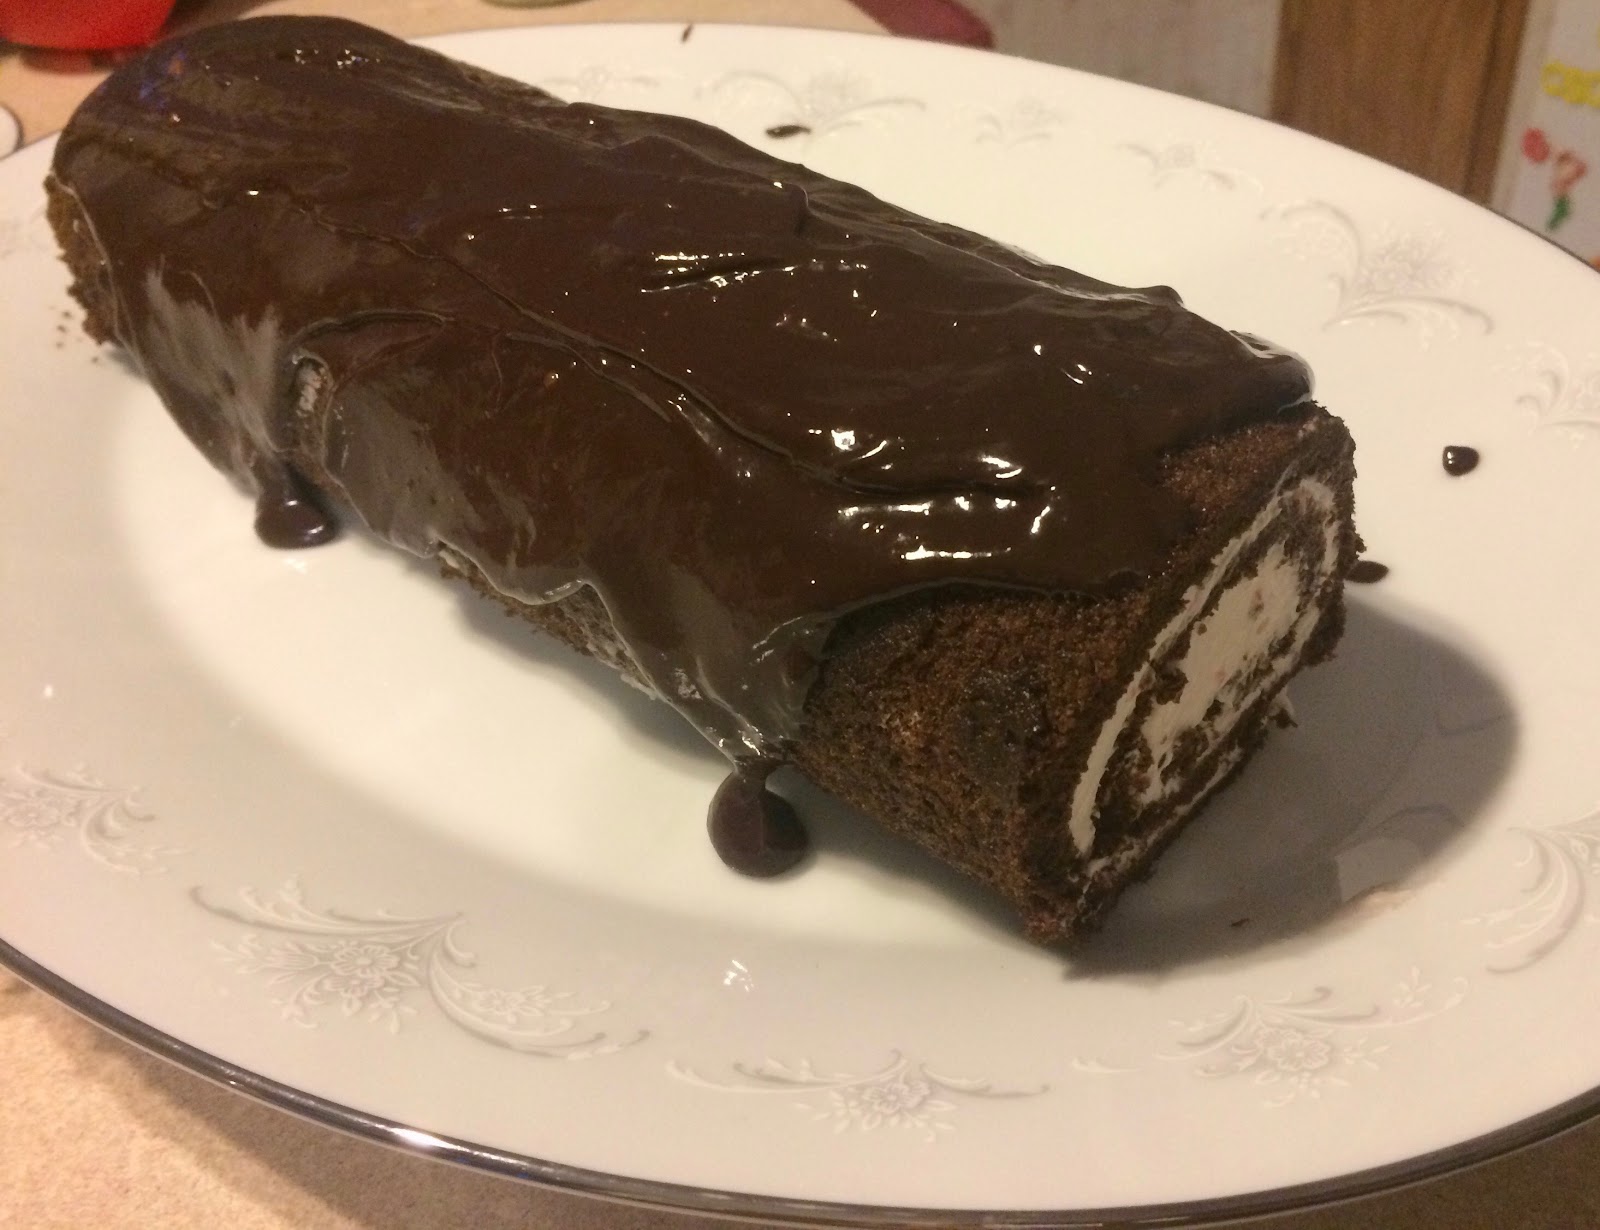
Strawberry Swiss Cake Roll

Let me preface this post by saying I'm not really a fancy kinda girl. (And now I have "Fancy" by Reba going in my head!) I'm a hillbilly, and quite happy about it. Once in a while though, I have the desire to try something that's fairly fancy. 

I've never made any "roll" before. No pumpkin roll, etc. However, I got silicon mats recently (some just before Christmas, and more for Christmas) and I thought that would make it easier, so.... I jumped out of my box. 

And whoa, was it worth it. This swiss cake roll is heavenly. You can use any freeze-dried berries or fruit, so you can change the flavor as desired. (I found strawberries at Aldi's, so that's what I went with.) Personally, I think that it could use more strawberry flavor, but that's a preference thing. 

I do think the use of silicon mats made this process much easier than without. If you don't have any, sub parchment paper in the pan and a clean towel for after the cake is done. 

Comments are loved! What's your favorite "fancy" dessert?

Printable Recipe
Strawberry Swiss Cake Roll


Ingredients
For the batter:
  • 4 eggs, separated
  • ½ cup + ⅓ cup sugar, divided
  • 1 teaspoon vanilla
  • ½ cup flour
  • ⅓ cup cocoa powder
  • ½ teaspoon baking powder
  • ¼ teaspoon baking soda
  • ⅛ teaspoon salt
  • ⅓ cup water
For the Filling:
  • ½ cup freeze dried strawberries, crushed finely
  • 8 ounces cream cheese, room temperature
  • ½ teaspoon vanilla
  • pinch of salt
  • 1 cup powdered sugar, divided
  • 1 cup heavy whipping cream
For the Ganache:
  • 3 ounces semi-sweet chocolate chips
  • 6 tablespoons heavy whipping cream
For the Topping, optional:
  • Redi-whip or cool whip
  • fresh strawberries, chopped

Directions
For the cake:
  1. Preheat oven to 350°. Line a 10”x15” jelly roll pan with a silicon baking mat and grease heavily.
  2. In a mixing bowl, beat egg whites until soft peaks form. Slowly add in ½ cup sugar and beat until stiff peaks. Beat for 3 minutes, then add remaining ⅓ cup sugar and vanilla. Beat for 2 more minutes.
  3. In a separate bowl, mix flour, cocoa powder, baking powder, baking soda, and salt together. Alternately add flour mix and the ⅓ cup water to a large bowl with the egg yolks. When thoroughly mixed, fold the batter into the egg whites a little at a time.
  4. Spread batter into the prepared pan and bake for 12-15 minutes until toothpick come back clean and cake springs back when lightly touched.
  5. Meanwhile, coat a silicone baking mat with powdered sugar.
  6. When the cake is done, immediately invert it onto the mat. Remove the first silicone mat, and then roll up the cake starting at the narrow end. Let it cool completely.
For the Filling:

  1. In a large mixing bowl using a whisk, beat heavy whipping cream and ¼ cup powdered sugar until stiff peaks form. Remove to a separate bowl.
  2. In a large mixing bowl, beat the cream cheese until smooth. Add in ¾ cup powdered sugar, strawberry powder, vanilla, and salt.
  3. Fold in whipped cream until combined.
  4. Carefully unroll the cake. Spread the filling evenly over the entire surface and then roll the cake back up.
  5. Place cake roll on a plate, cover with plastic wrap, and place in the fridge for at least 3 hours.
For the Ganache/Finishing:
  1. Heat the whipping cream in microwave for 45 seconds or until hot, then add the chocolate chips. Cover and let it sit for two minutes; stir until smooth. Let the ganache cool slightly before pouring and spreading over the cake.
  2. If desired, top with more redi-whip or cool whip and strawberries.
  3. Slice and serve. Store leftover cake in the fridge.

Yield/Time
12 servings
5 ½ hours (start to finish)
Nutrition Facts
324


Source (for original): Spend With Pennies

Monday, January 23, 2017

Nutella Ribbon Pie

There are some things I've made, that I have old pictures for, that I apparently did not post. Some are intentional-- waiting to make again for a better picture, etc. Some are not intentional-- like this Nutella Ribbon Pie! I definitely thought I had already posted it... oops. Apparently I've been holding out on you guys. ;)

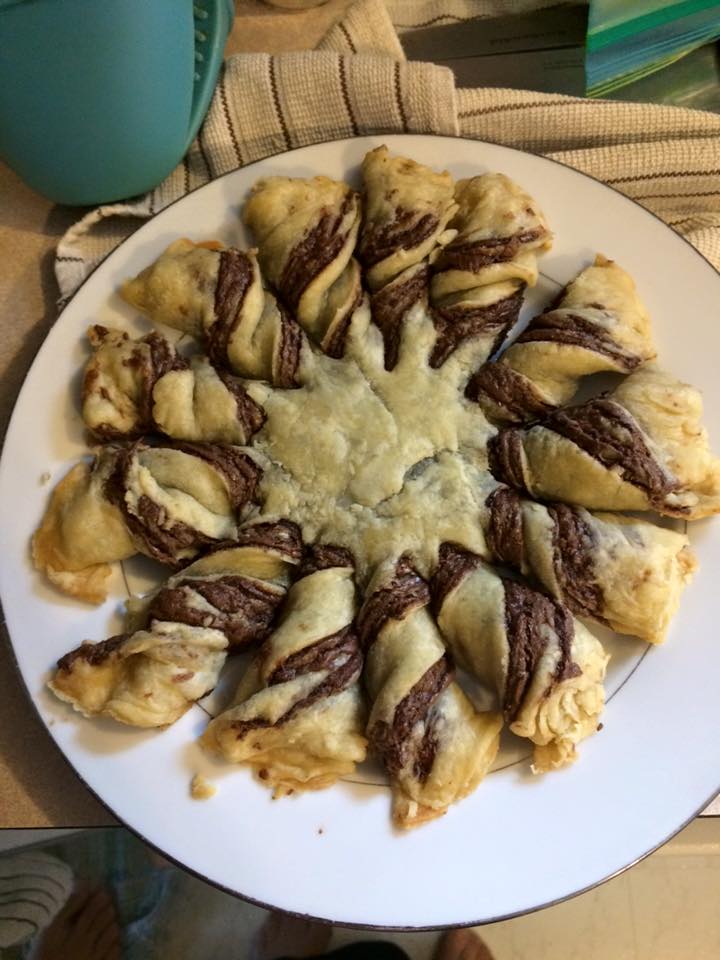
One of my friends showed me this recipe ages ago, but it was a video on facebook... in another language. So I had to come up with this on my own, based on the video! It's actually very easy, although it looks slightly complicated. Worth making!!

Essentially, this is thin layers of pie crust, layered with Nutella. Thin layers of flaky, delicious pie crust, smothered in Nutella. It's heaven.

I discovered that this wasn't on here the other day, when I made two--one for my family, one for me to take to work. (Just in case you were wondering just how awesome it is to work with me.) Of course I have to post it now! This is an old picture, however. I like to double it and make two, but I didn't have enough Nutella for that. (Scandalous, I know. Don't worry, I got more Nutella when I got groceries this weekend.) I knew I should take one to work in addition to the one for home, so I just made them both smaller. Thus, no picture.

This is something you definitely should make!

Remember, comments are loved! What's your favorite thing to do with Nutella?

Nutella Ribbon Pie


Ingredients

  • 1 ¼ Cups all-Purpose flour
  • ¼ Teaspoon Salt
  • ⅓ Cup shortening
  • 4-5 Tablespoons cold water
  • ¾ cup Nutella
Directions

  1. Preheat oven to 350°. Lightly grease a baking sheet, or line with parchment paper/silicon mat.
  2. In a medium bowl stir together flour and salt. Using a pastry blender, cut in shortening until pieces are pea size.
  3. Sprinkle 1 tablespoon of the water over part of the flour mixture, gently toss with a fork. Repeat moistening flour mixture, using 1 tablespoon of the water at a time, until all the flour mixture is moistened. Form pastry into 5 balls. 
  4. Warm Nutella slightly in microwave for 20-30 seconds. DO NOT overheat, just enough to make it more spreadable.
  5. On a lightly floured surface, slightly flatten one pastry. Roll pastry from center to edges into a very thin circle. Using a medium sized bowl, cut out an even circle. Transfer to cookie sheet, then spread with a very thin layer of Nutella. Repeat for 4 layers of Nutella; top with final layer of pastry.
  6. Set a small glass on top of center of pie, then cut ½” strips out from center, making a sun. (Approximately 12-15 strips.) Remove cup. Do not separate strips from center. Twist each strip twice, then press end back down slightly to hold. Bake for 15-20 minutes, then very carefully remove to plate. Enjoy!
Yield/Time
13 servings
45-50 minutes
Nutrition Facts *I calculate nutrition facts for reference only, this is not done scientifically
176

Source (for original): unknown