PinIt!

Showing posts with label brownies. Show all posts

Saturday, August 27, 2016

Brownie Batter Dip


I have a serious love for brownie batter, that no amount of salmonella warnings can deter. In the dorms in college, I made brownies at least every other week...then gave away most of the brownies. (To the point that the boyfriend of one of my friends just called me Brownie. I really don't think he knew my name.) I just wanted the batter!

I still have the tendency to eat more brownie batter than I should, but I found another source for my brownie batter--one that doesn't include the risk of salmonella. This dip is delicious, perfectly satisfies my craving for brownie batter, and is great to share! (In fact, this dip should be shared. It would be entirely too easy to eat the whole thing in one sitting. Plan on having friends over, or taking this to work or a party!)

This dip takes only minutes to prepare, and can be served immediately! Or, you can make it and store it in the fridge until the party--the texture is great even after being refrigerated for awhile!
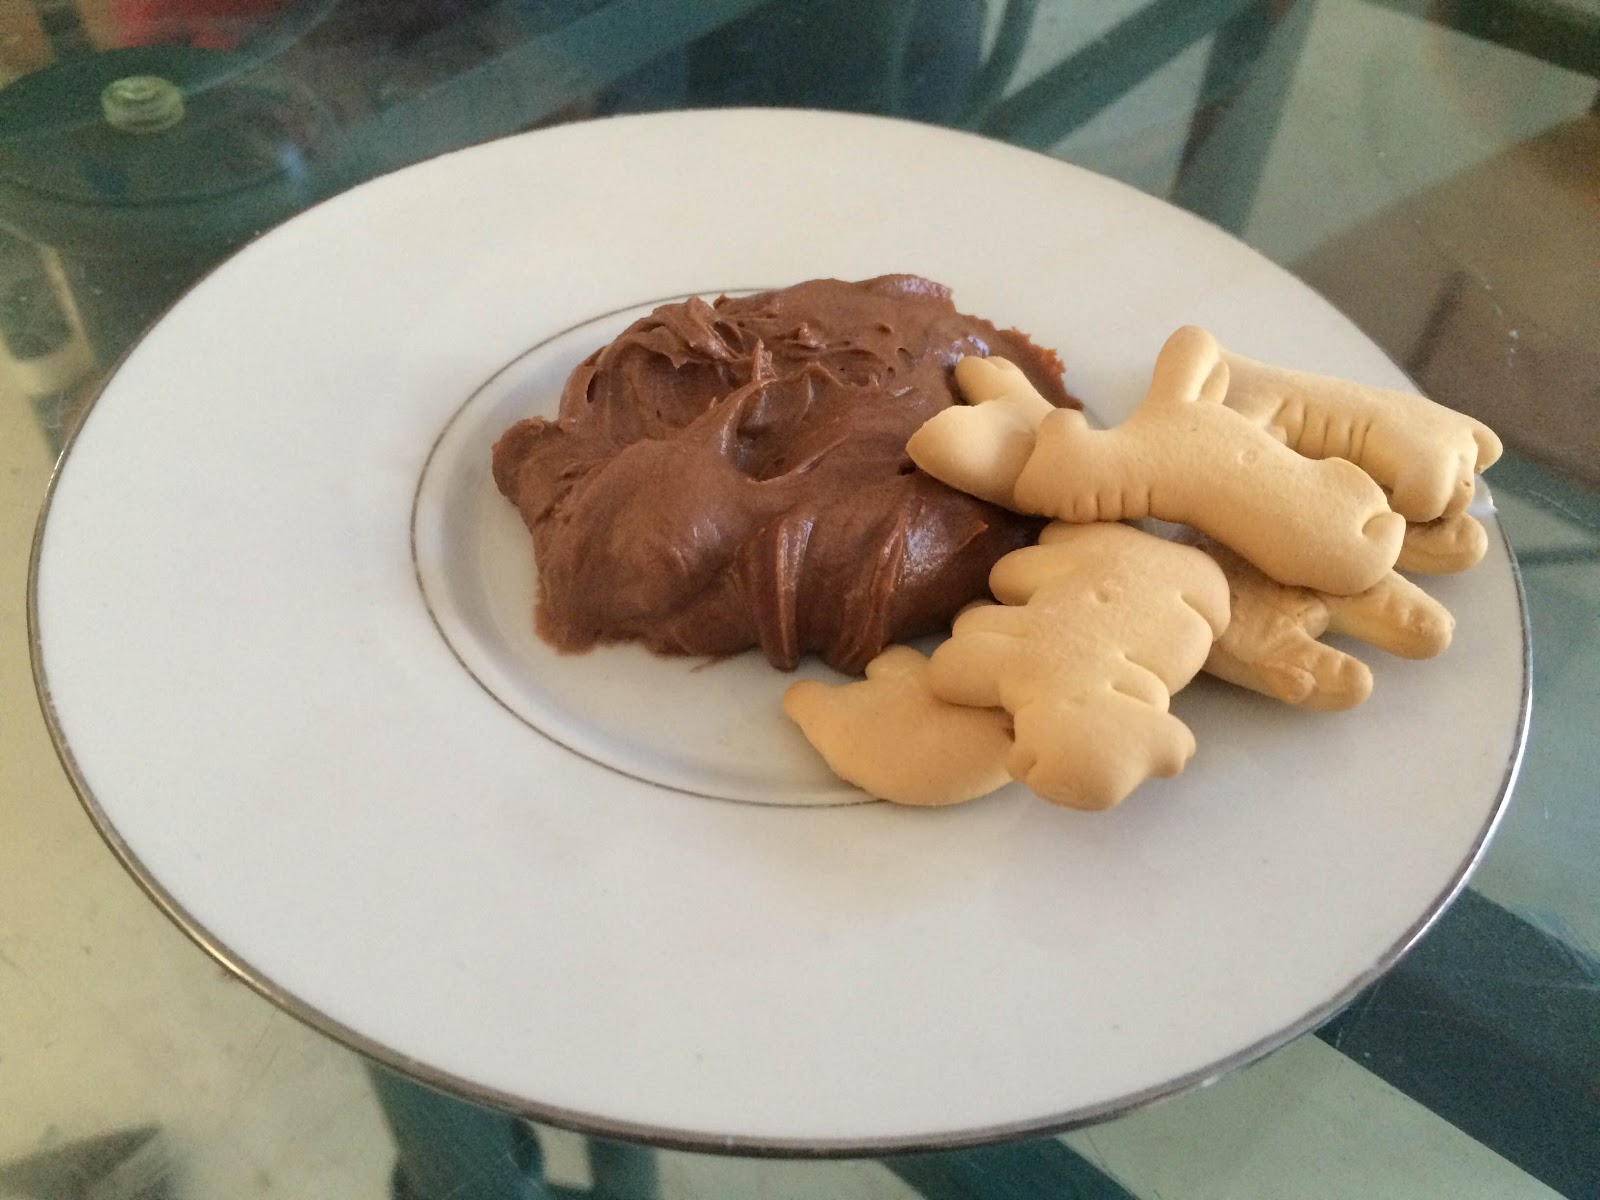
Brownie Batter Dip

Ingredients
  • 8 ounces cream cheese, softened to room temperature
  • 1/4 cup butter, softened to room temperature
  • 2 cups powdered sugar, plus more for a stiffer consistency, if needed
  • 5 tablespoons all-purpose flour
  • 5 tablespoons cocoa powder
  • 2 tablespoons brown sugar
  • 1 teaspoon vanilla
  • 2-4 tablespoons milk
  • Chocolate chips for garnish (optional)
  • Pretzels, strawberries, graham crackers, animal crackers, apples for dipping


Directions
  1. In a large mixing bowl, whip together the cream cheese and butter until light and fluffy, 1-2 minutes. Add 2 cups powdered sugar. Mix well.
  2. Add the flour, cocoa powder, brown sugar, vanilla and 2 tablespoons milk. Mix until fluffy and smooth.
  3. Add additional milk, if needed, until desired consistency is reached. (Should be easy to dip.) Garnish with chocolate chips, if desired.
Yield/Time
2 1/2 cups (20 servings of 2 tablespoons each)
10 minutes
Nutrition Facts
140/2 tablespoons *I calculate nutrition facts for reference only, this is not done scientifically

Source (for original): Mel’s Kitchen Cafe

Remember, comments are loved! What's your favorite dip recipe? 

Tuesday, August 16, 2016

Cheesecake Brownies

I was contemplating what dessert recipe to share next, when I realized that I have never shared my recipe for cheesecake brownies.

I'm sorry, guys. I didn't mean to hold out on you. Really. 

I originally got this recipe from my mother-in-law years ago, and I could not even begin to guess how many times I've made it since then. I've made it for a lot of gatherings with family and friends, birthdays at work, just because I wanted chocolate... It is always a hit, and I rarely take any leftovers home with me when I take it to a party. That's usually because someone else does. ;)

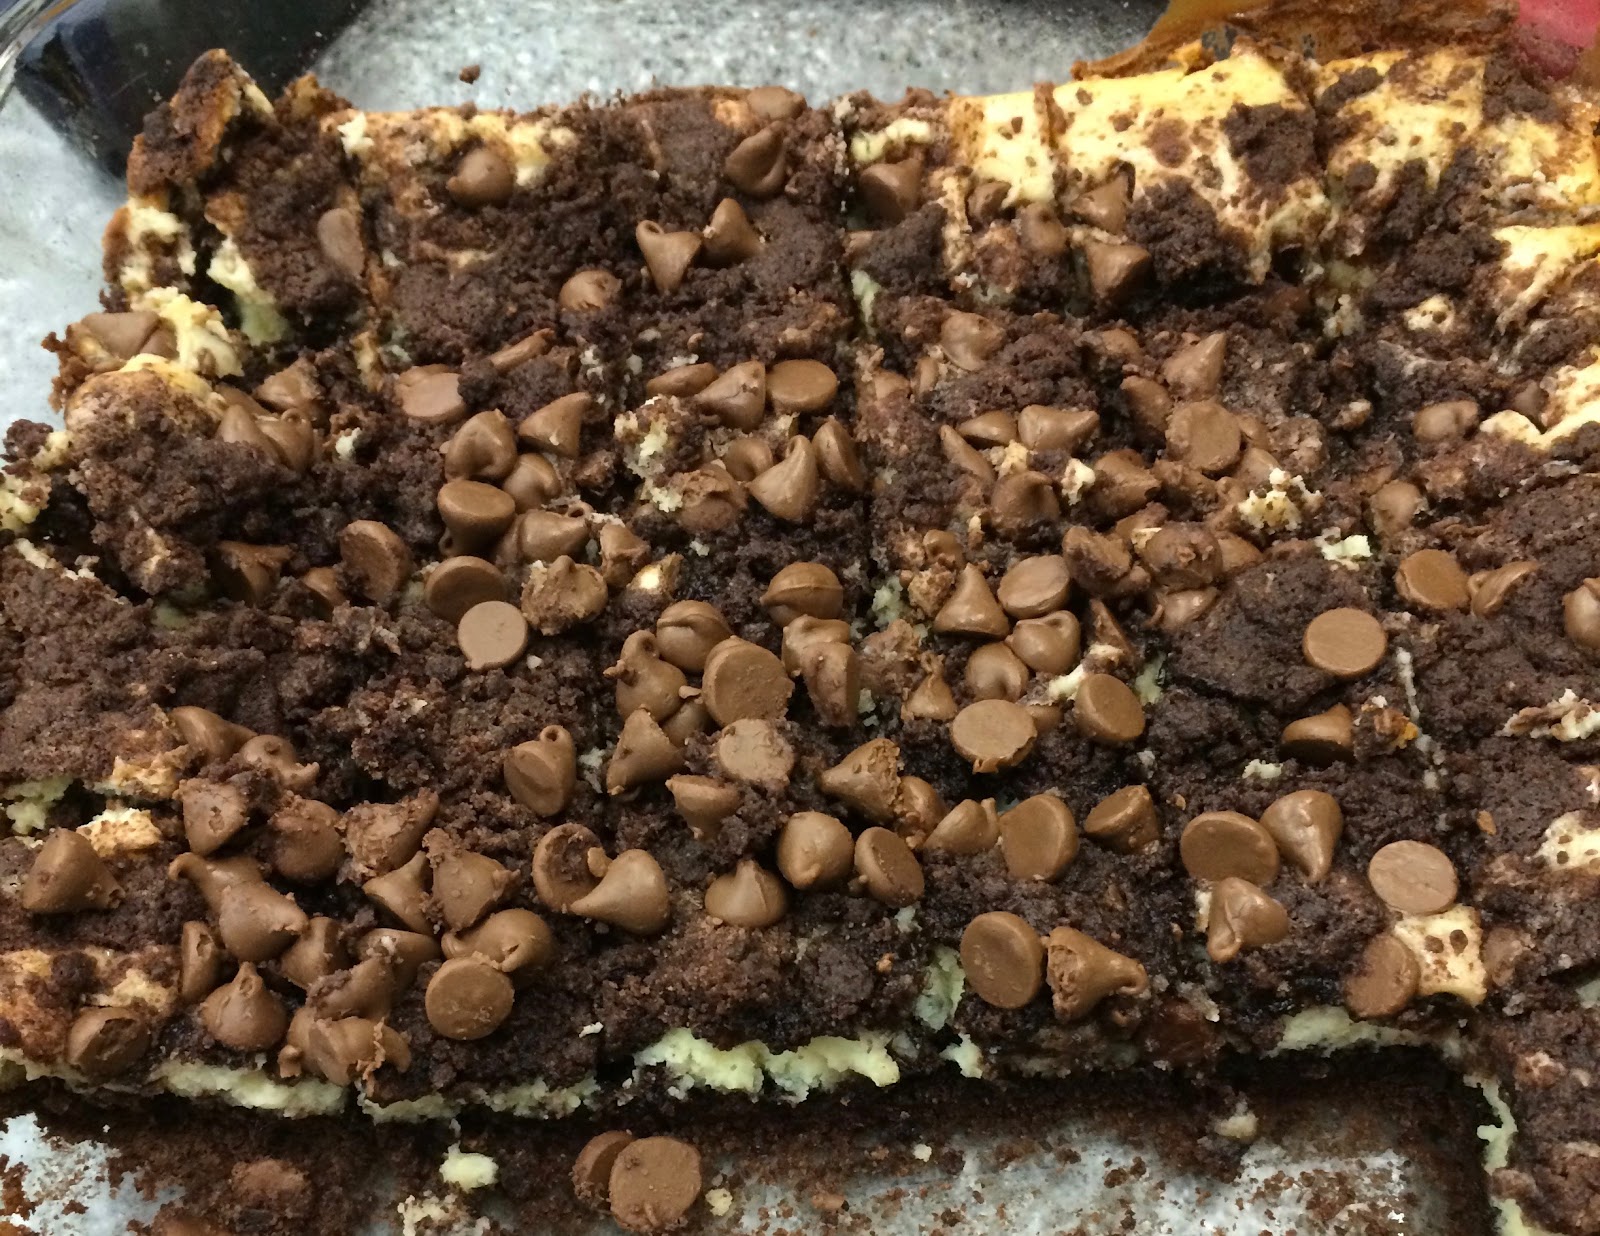
This is packed full of sweet, chocolatey, creamy, amazing-ness. And then covered in chocolate chips.

Need I say more?

Now, I think I'm going to go make some... then maybe update the picture. I can't ever remember to take a picture of this BEFORE it's cut. That may be because I cut it before it's even cool, but that's ok. You can too. I won't judge. 

Printable Recipe
Cheesecake Brownies


Ingredients
1 cake mix (Devil's food or dark, but I always use devils food.)
2 Eggs
1 stick Butter
8 ounces cream cheese, softened
1 teaspoon Vanilla
1 can sweetened condensed milk
1 cup milk chocolate chips (optional but who doesn't add chocolate chips when they can??)
*additional note on chocolate chips: I really don't know how many I add. This was the original... I just dump chocolate chips on. If it looks like you have enough, add more.
Directions

  1. Preheat oven to 350°. Grease a 9"x13" baking pan, set aside.
  2. Stir cake mix, 1 egg, and butter together until crumbly. Save one cup, place rest in bottom of prepared pan.
  3. Mix together cream cheese, 1 egg, vanilla, and milk until creamy. Pour on top of brownie mix. Crumble cup of saved brownie mix on top. Add chocolate chips, if desired.
  4. Bake for 30 minutes, or until cream cheese sets and edges golden.


Yield/Time
24-32 pieces, depending on how many you are serving and desired size.
Prep Time: 15 Cook Time: 30
Nutrition Facts
Calories: 188/32 pieces, 240/24 pieces. *I calculate nutrition facts for my use only, this is not done scientifically


Source (for original): Sue Lee (my lovely mother-in-law)
Remember, comments are loved! What's your favorite brownie recipe?

Wednesday, August 10, 2016

Brownie Dessert Pizza

The 4th of July is, truthfully, one of my favorite Holidays. Easter & Christmas being my absolute favorites (Jesus!), but 4th of July is next. For us, it doesn't have the craziness of the big holidays, but it's still so much fun. So much small town fun! My hometown might be tiny, but we put on a great 4th of July. Best fireworks in the area, followed by a nearly hour long parade the next morning. Then, my family has a picnic at Mama's house. I always have to bring something fun, and I wouldn't be me if I didn't make something sweet. Two years ago it was this Chocolate Chip Cookie Dip, last year it was cookies, this year I decided to do something patriotic!

I love Pinterest for things like this. A quick search and tons of ideas with great pictures instantly comes up! Only problem is that there is WAY too much to choose from. I finally settled on Brownie Dessert Pizza, as you can never go wrong with brownies! We had some strawberries from a local farm, too, which was another deciding factor. Fresh & local is best!

One of the great things about this is you have to feel a little good eating it. Sure, there is a ton of sugar, but there is a lot of fresh fruit, so that makes it good for you, right? ;)

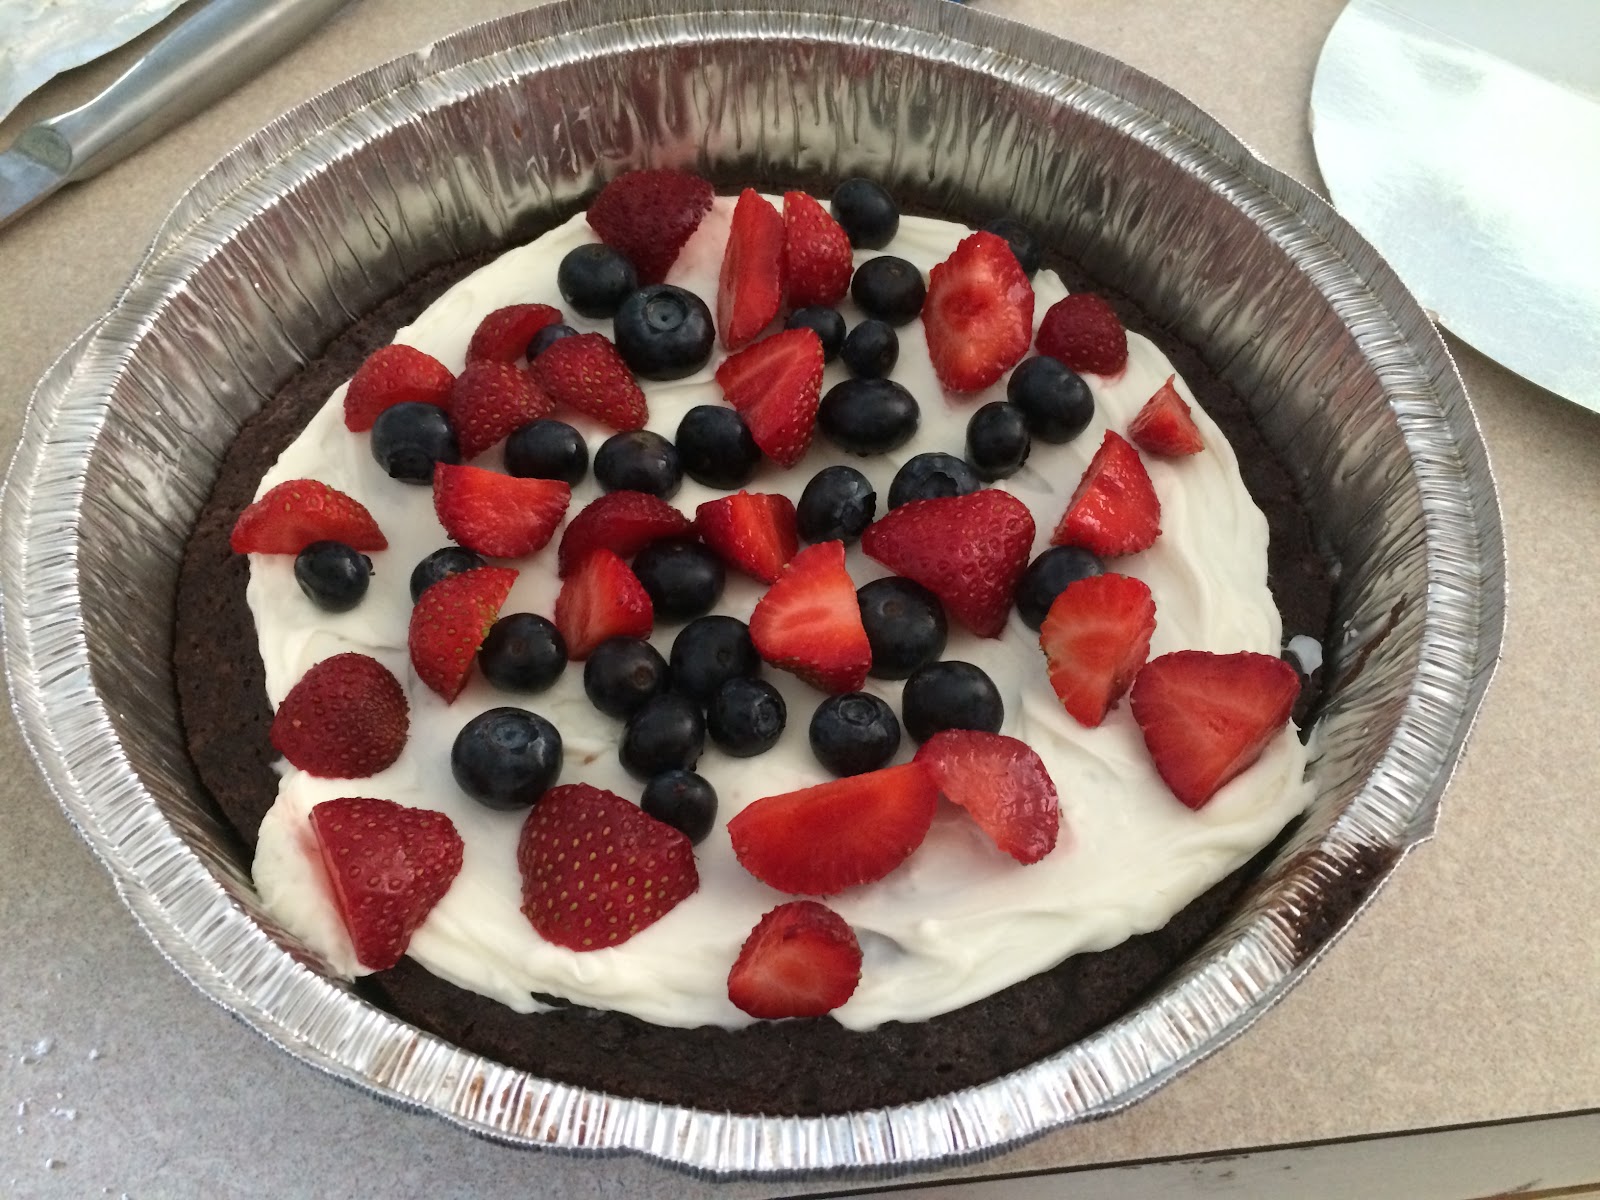
I opted to use strawberries and blueberries on my pizza, and skipped using anything white. Bananas or apples would be great if you wanted them (depending on desired texture), but I didn't want to risk getting to the parties and having the bananas be browned.

We were invited to a cookout at a friend's house that weekend too, and this was great for both events! I made two small pans, instead of one big one, and took one pan to each. Only problem is that one of these, if you do two pans, is awfully small. People get cranky when they can't go back for seconds! ;)

Brownie Dessert Pizza


Ingredients
1 boxed brownies mix
2 eggs
1/4 cup water
1/2 cup oil
8 ounces cream cheese, softened
1/2 cup powdered sugar
2 bananas, optional
lemon juice, optional
1 1/2 cups diced strawberries
1/2 cup blueberries
8 ounces Cool Whip, optional


Directions
Preheat the oven to 350°. Grease a 12" round rimmed pizza pan with nonstick spray; set aside. (Alternately, may use two small round cake pans.)

In a medium mixing bowl, combine the brownie mix, eggs, water and oil. Stir until just combined. Pour into the greased pan and spread evenly with a spatula. Bake for about 18-25 minutes (depending on size of pans), or until a toothpick inserted in the center comes out clean. Remove the brownie pan from the oven and allow to completely cool.
In a medium bowl, cream together the cream cheese and powdered sugar until smooth. Spread evenly over the top of the cooled brownie. If desired, slice the bananas and sprinkle with lemon juice. Place the banana slices evenly over the top of the cream cheese layer. Sprinkle with strawberries and blueberries.

Slice into wedges and serve immediately with a dollop of Cool Whip, if desired.

Yield/Time
12 servings
30 minutes + cooling
Nutrition Facts
342 (12 servings), 257 (16 servings) *I calculate nutrition facts for my use only, this is not done scientifically


Source (for original): Seeded at the Table


Remember, comments are love! What is your favorite thing to take to a gathering?

Thursday, January 23, 2014

Twix Caramel Brownies: Why My Coworkers Love Me!

I like to joke that the only reason my coworkers like me is because I make good food to bring in & share with them. They say it's not true, but I think they are actually nicer to me when I do bring in food... they certainly tell me they love me more often. ;)

This recipe is something that's been on my mind since shortly after I made Butterfinger Brownies. I wanted to make them as soon as I found the recipe, but wound up waiting til after Christmas. (We had wayyyyy too many goodies in the house during Christmas, especially considering I wasn't eating many sweets.) This is something that's great for me to take into work & share with my Mama & little brother, for a couple reasons. 1) they all love things like this & 2) Nate is not a huge fan of things like this, so I get some & the rest doesn't go to waste!

These were a huge hit. I left 4 in a dish at home, and took the rest to work. There were only about 6 left when I got out of work, to take to Mama's. They are very rich, but not as strong cocoa flavor as a lot of other brownies. (Which is my biggest complaint about homemade brownies.) The caramel topping really adds to the brownie, too.

I didn't make many changes--some small changes in the actual process, but those don't affect the  brownies. I don't measure the caramel, I just drizzled it on til it looked right, and I think I used a little more Twix than the original.

If you are looking for something sweet, try these! Let me know what you think!

Remember, comments are love!


Sorry for the bad picture. :(

Twix Caramel Brownies


Ingredients
  • 1 cup butter/margarine, melted
  • 2 cups granulated sugar
  • 2 teaspoons vanilla extract
  • 4 large eggs
  • 3/4 cup cocoa
  • 1 cup all-purpose flour
  • 1/2 teaspoon baking powder
  • 1/4 teaspoon salt
  • 4 Twix candy bars, chopped (Do not chop too finely, or it won't be noticable! I left mine in 1/4-1/2" chunks)
  • Caramel ice cream topping (I used the Smucker's Sundae Syrup; easy to drizzle!)


Directions
  1. Heat oven to 350°. Grease a 9”x13” pan with cooking spray. Set aside.
  2. In large mixing bowl, combine butter, sugar and vanilla extract. Add eggs, one at a time, beating well after each addition. Add cocoa; stir until well blended.
  3. In a separate bowl, combine flour, baking powder and salt; slowly add to mixer. Stir in Twix candy bar chunks by hand. Pour batter into prepared pan.
  4. Drizzle caramel evenly over the brownies. Using a toothpick, swirl caramel into brownies. 
  5. Bake for 35-50 minutes or until a toothpick inserted in the middle comes out clean. Cool brownies completely in pan on a wire rack. Once cool, cut into squares and serve.
Yield/Time
24 brownies
Prep Time: 10 minutes Cook Time: 35-50 minutes

Source (for original): Two Peas & Their Pod (Really, you should check out this blog. I have found quite a few amazing recipes from here!)

Tuesday, October 22, 2013

Peanut Butter Butterfinger Brownies: Rich amazing-ness.

Whether you know me in person, or just read the title of this blog, you know I have a sweet tooth. If you know me in person, you may chuckle at that and say it's an understatement. That's OK. I have completely accepted my love of all things sweet, and I embrace it. I haven't accepted what it does to my waistline, but we're working on that. ;)

Now, taking that into consideration, let me tell you about these lovely, amazing, Peanut Butter Butterfinger Brownies: even I can't have a whole one.  To give the brownies (and myself) some credit, it may be more because of the richness of the brownies, but wow. I had half a brownie for breakfast (and that's our little secret, btw), and not only have I met my caloric needs for the day, but I can't even have the other half yet. It's that rich.

On the plus side, that makes it easier to share them. Which is good, because if I don't take them to work today my coworkers might get really cranky with me. I kinda promised that they would get some brownies today.

Onto the actual recipe and comments: The original recipe called for a 8x11 pan. I don't have an 8x11 pan. I have 8x8's, and 9x13's. I was afraid to put it in an 8x8, because these brownies are meant to be thick already; that might be too much. I was also afraid of putting it in a 9x13, again because these brownies are meant to be thick but that might make it too thin. So, I opted to increase the recipe a bit and put it in a 9x13. 

All in all, I like the brownies! (Nate & Gabriel approved too.) We'll see what my coworkers say today!

As someone who likes sweet but not anything that's too rich, I would say these have a bit too much cocoa. Aside from that, and making a smaller batch, I think we would make these again! They are very rich, and very fudgey. The chocolate chips and hints of butterfinger are wonderful surprises, and the peanut butter just tops it off nicely. (Literally.)


Peanut Butter Butterfinger Brownies

Ingredients
  • ¾ cup unsalted butter, partially melted
  • 3 tablespoons vegetable oil
  • 2 ¼ cups sugar
  • 3 eggs
  • 1 ½ teaspoons vanilla
  • ¾ cup all purpose Flour
  • 1 ½ cups unsweetened cocoa powder
  • ½ teaspoon salt
  • 1 ½ teaspoons baking powder
  • 1 ½ cups chocolate chips
  • 8 Butterfinger Candy Bars, crushed (leave some small chunks)
  • ½ cup melted peanut butter (I used more, but it made it harder to tell if the brownies were done or not)

Directions
  1. Preheat oven to 325°. Spray a 9”x13” baking pan with cooking spray.
  2. Cream together butter, oil, and sugar. Add in eggs and vanilla; stir until combined. 
  3. In a separate bowl, mix together flour, cocoa powder, salt, and baking powder; slowly add to creamed mixture until combined. Slowly add in chocolate chips and crushed Butterfinger with a spoon. Will be very thick!
  4. Transfer batter to prepared baking dish, spreading evenly. Drizzle melted peanut butter over batter and take knife to swirl peanut butter throughout. 
  5. Bake for 50-60 minutes, or until baked through. Remove and let cool completely.
Yield/Time
35 brownies
1 ½ hours

Source (for original): Picky Palate


Remember, comments are love!