However, around the first of the year, I made a goal: No more wasted yeast! I would use my jars of yeast within the recommended 3 months. So far, I have been doing pretty good! That means, of course, I have been making a LOT of bread. (Which keeps my husband happy!) I've been trying quite a few new bread recipes, and making many loaves of my favorite breads. With my Kitchen Aid and the dough attachment, I haven't even been shy about making breads requiring kneading! (I hate kneading. 10 minutes working out all my anger on the dough? Nope, bored after 5.)
That being said, I was intrigued when I stumbled across Artisan Bread in 5 Minutes a Day, specifically their basic loaf. Really? Yummy bread that created 4 loaves, I can make it over the course of 2 weeks (which means it's usually gone in one week, but whatever), and it doesn't require kneading? Yeah, I had to try that.
And boy, was Nate happy when I did!
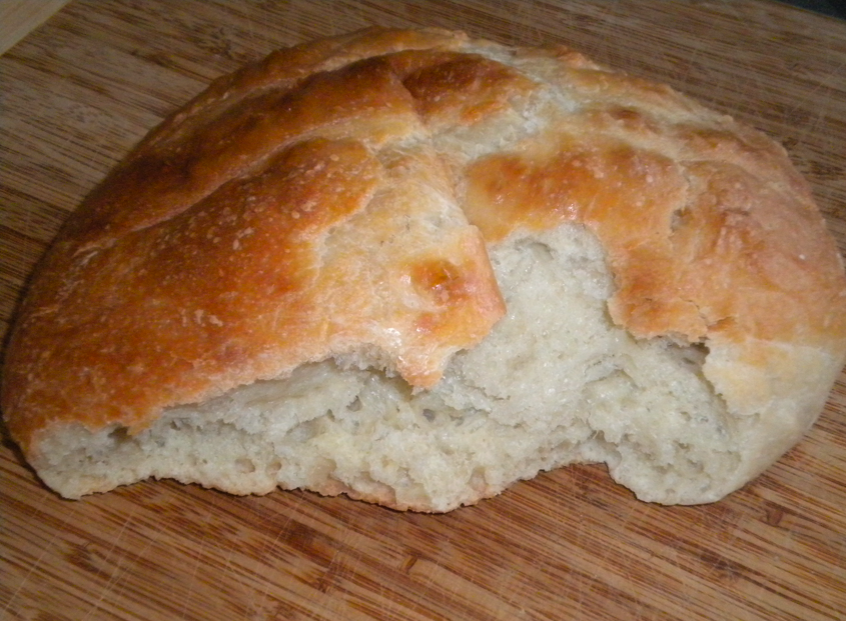
No-Knead Artisan Bread
Ingredients
- 3 to 3 ½ cups lukewarm water
- 1 tablespoon granulated yeast
- 1 tablespoons Salt
- 6 ½ cups all-purpose flour
Directions
- Pour 3 cups water into a large bowl with lid; add yeast and salt. Add in flour; stir until incorporated into the dough. Dough will be very wet; if it appears dry add up to ½ cup water.
- Place the lid lightly onto the container-do not close completely! Allow the dough to sit at room temperature for about 2 hours to rise.
- After 2 hour rise, dough can be used right away but is best to use refrigerated. May be kept for up to 2 weeks in the fridge.
- When ready to use the dough, dust hands with flour. Pull out a one-pound piece of dough and form into a ball. Let dough rest for 40-90 minutes.
- Preheat the oven to 450° with a cast iron pan (or baking stone) on the center rack, with a metal pan on the bottom.
- Cut ¼” slices into the loaf. Place loaf on parchment paper, then slide onto cast iron pan. Add hot water to the metal pan. Bake the bread for 20 minutes, then remove the parchment paper. Bake for another 10-15 minutes or until deep brown color.
- Place loaf on cooling rack; do not cut until it reaches room temp.
Yield/Time
4 loaves
5 ½ hours
Source:
Now, the recipe above is obtained from the source listed, HOWEVER: I re-typed this to put in my recipe book, which means I made it easy for ME to follow, with my own comments and preferences. I would definitely recommend checking out the original site; they have some great tips. I don't include all the tips in my recipes because they either 1) are not something I care about (amount of salt, for example) or 2) are common sense to me (using an oven thermometer).
(And, shockingly, I just had to type this to put in my recipe book. I know that I just made that book, but I couldn't believe that I hadn't put this in. Oops!)
One difference between my format/recipe and theirs that is worth pointing out: amount of water. I almost always use slightly more water than the recipe calls for, thus the 3 1/2 cups vs 3. My guess would be because I measure my flour vs weigh it, which is less exact; but really I can't say for sure.
This recipe does make 4 loaves, but the longer it sits in the fridge the more sourdough taste it has. (I've made a couple loaves right at the end of the 2 weeks, and it definitely tastes more like sourdough than the first loaves.)
Also, this bread does NOT last long uneaten--and I mean that in 2 ways! One, if it's sitting on the counter, it will very likely be eaten right away. Two, if for some reason it doesn't, it gets stale FAST. Fair warning.
This is also bread that can -hypothetically- be made in the crock pot. However, when I tried, it did NOT work. My guess, judging from others' comments, is that my crock pot doesn't get hot enough. That's not a surprise, since I have a not-so-great crock pot, but I was still disappointed. If you have a nice crock pot, you should definitely give it a try! (Basically, put the prepped loaf in the crock pot on high for one hour, then broil for 5 minutes.)
Happy baking! Leave a comment letting me know if you try this!
No comments:
Post a Comment